¶ About
Many ETL actions require Azure / Microsoft 365 / Dynamics credentials. This page explains, for each parameter, where it comes from and how to obtain it in Azure (Microsoft Entra ID + Azure Portal).
Use this page as the single reference and link it from every Azure/M365-related action documentation.
¶ Before you start
- You need access to:
- Azure Portal (for Storage accounts, containers, access keys, SAS)
- Microsoft Entra admin center / App registrations (for Client ID, Tenant ID, Client Secret)
- Never paste real secrets in documentation screenshots (mask values).
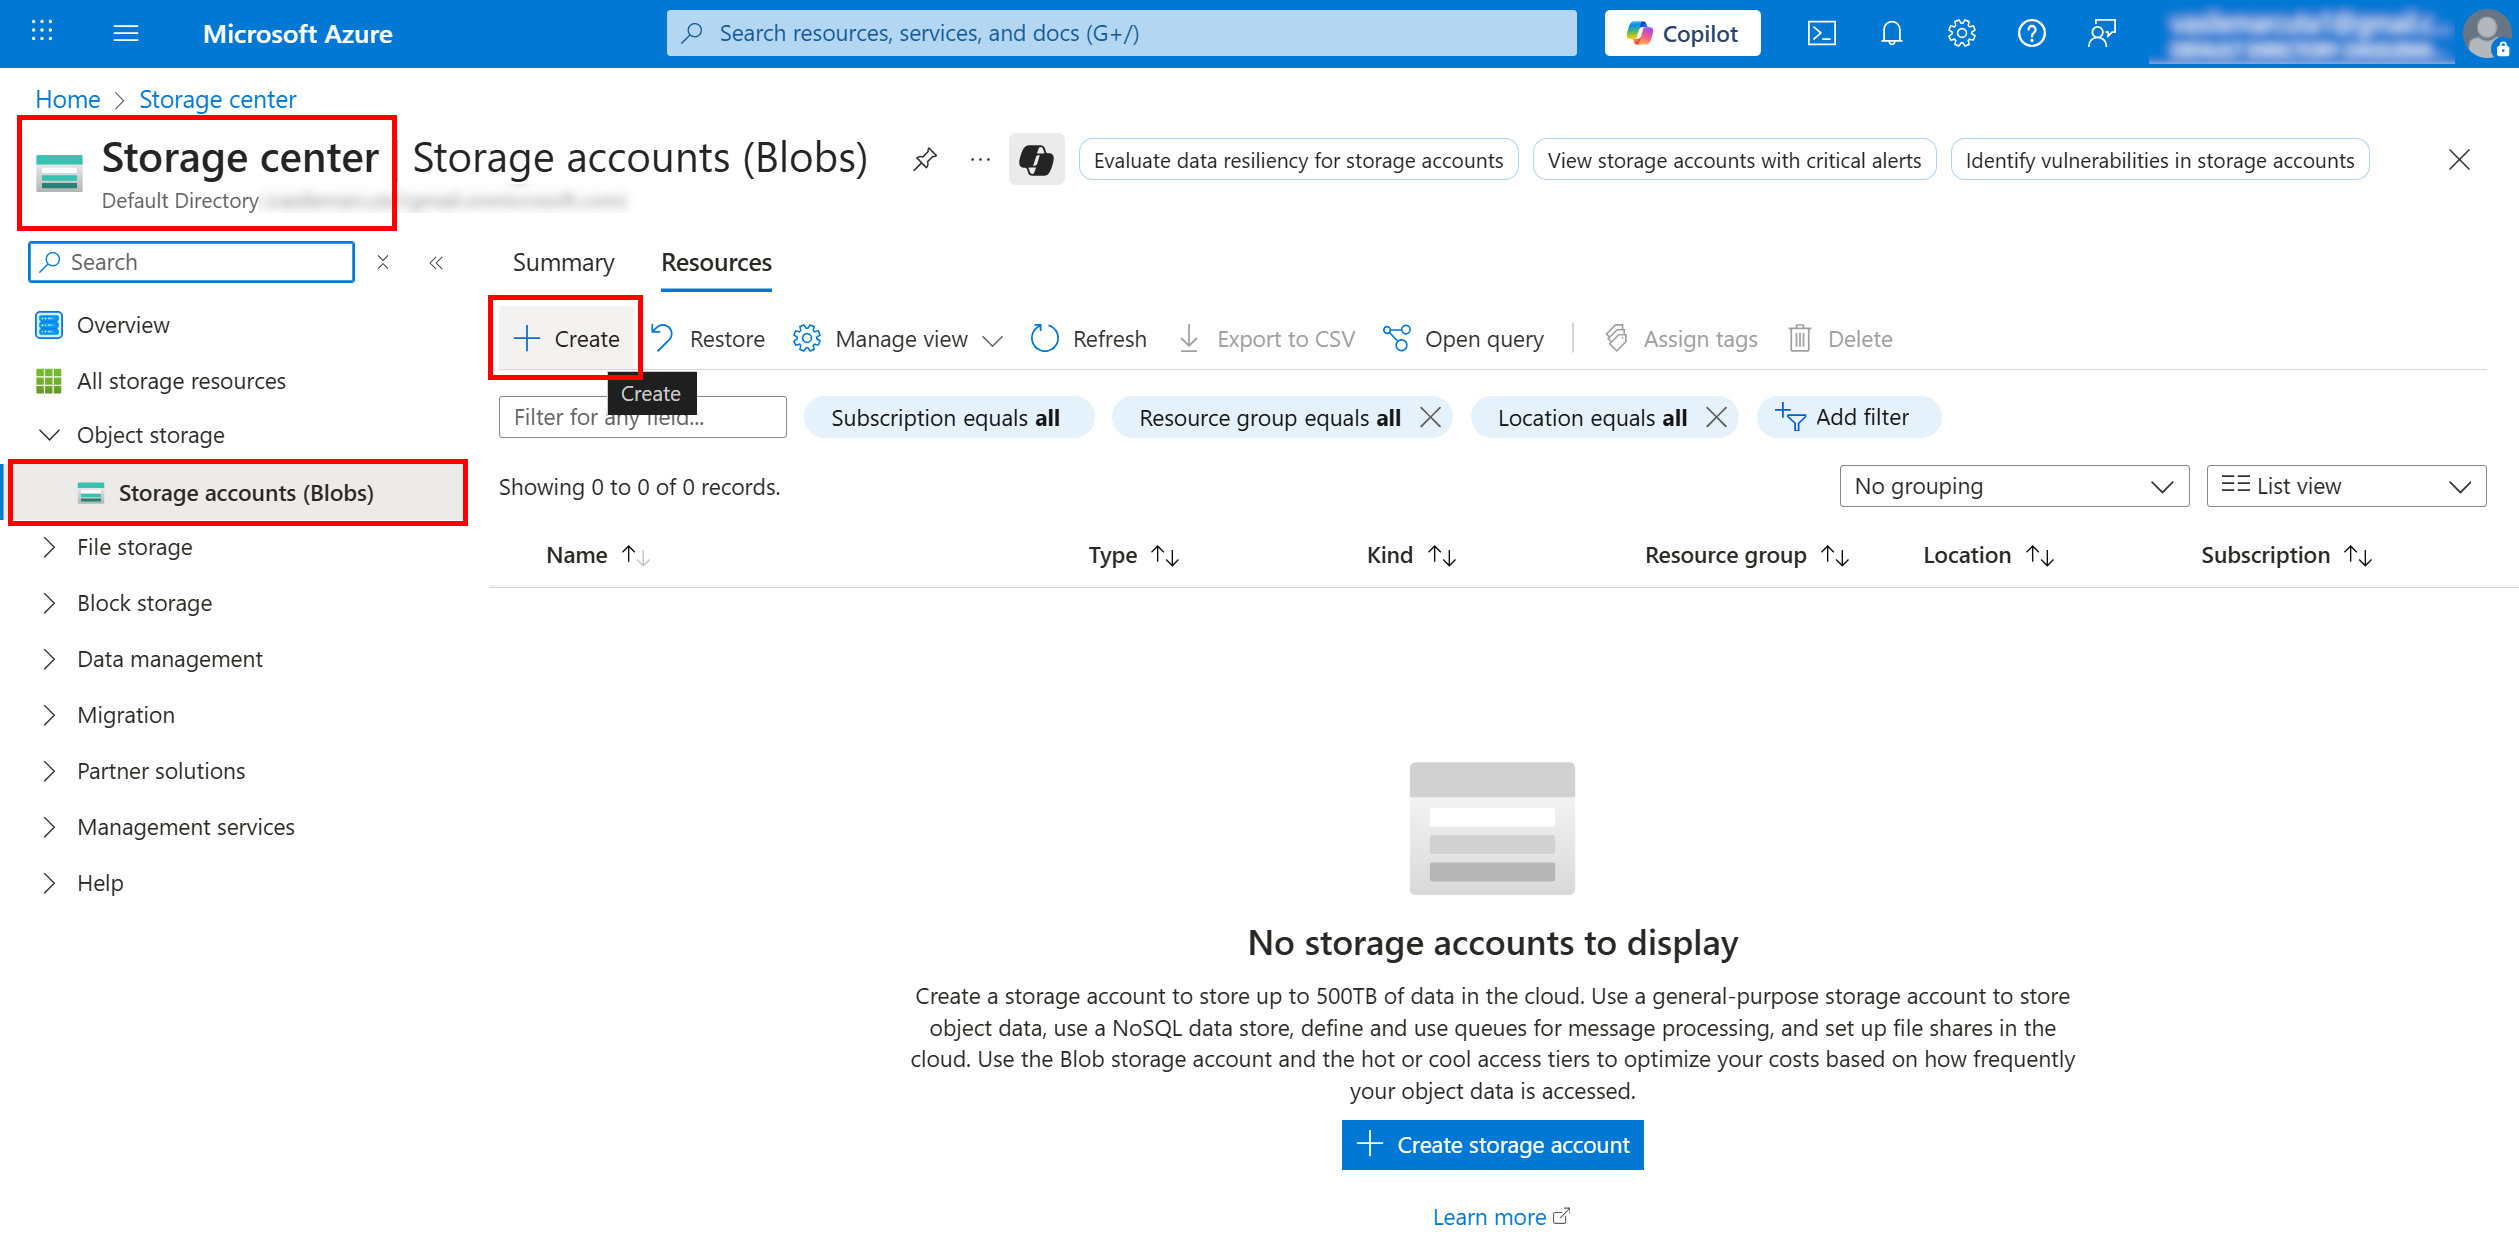
¶ 1) Create (or pick) a Storage account
-
Sign in to the Azure Portal:
https://portal.azure.com -
Search for Storage accounts → Create.
-
Basics
- Subscription / Resource group: choose your target scope.
- Storage account name: must be lowercase, 3–24 chars (e.g.
myazstorage123). - Region: close to your ETL runtime for best latency.
- Performance: Standard is fine for listing/downloading; Premium is optional.
- Redundancy: choose per your resilience needs (e.g. LRS).
-
Advanced
- If you need “real” folders and big-data semantics, enable Hierarchical namespace (ADLS Gen2).
- Otherwise keep defaults; “folders” can still be represented as prefixes.
-
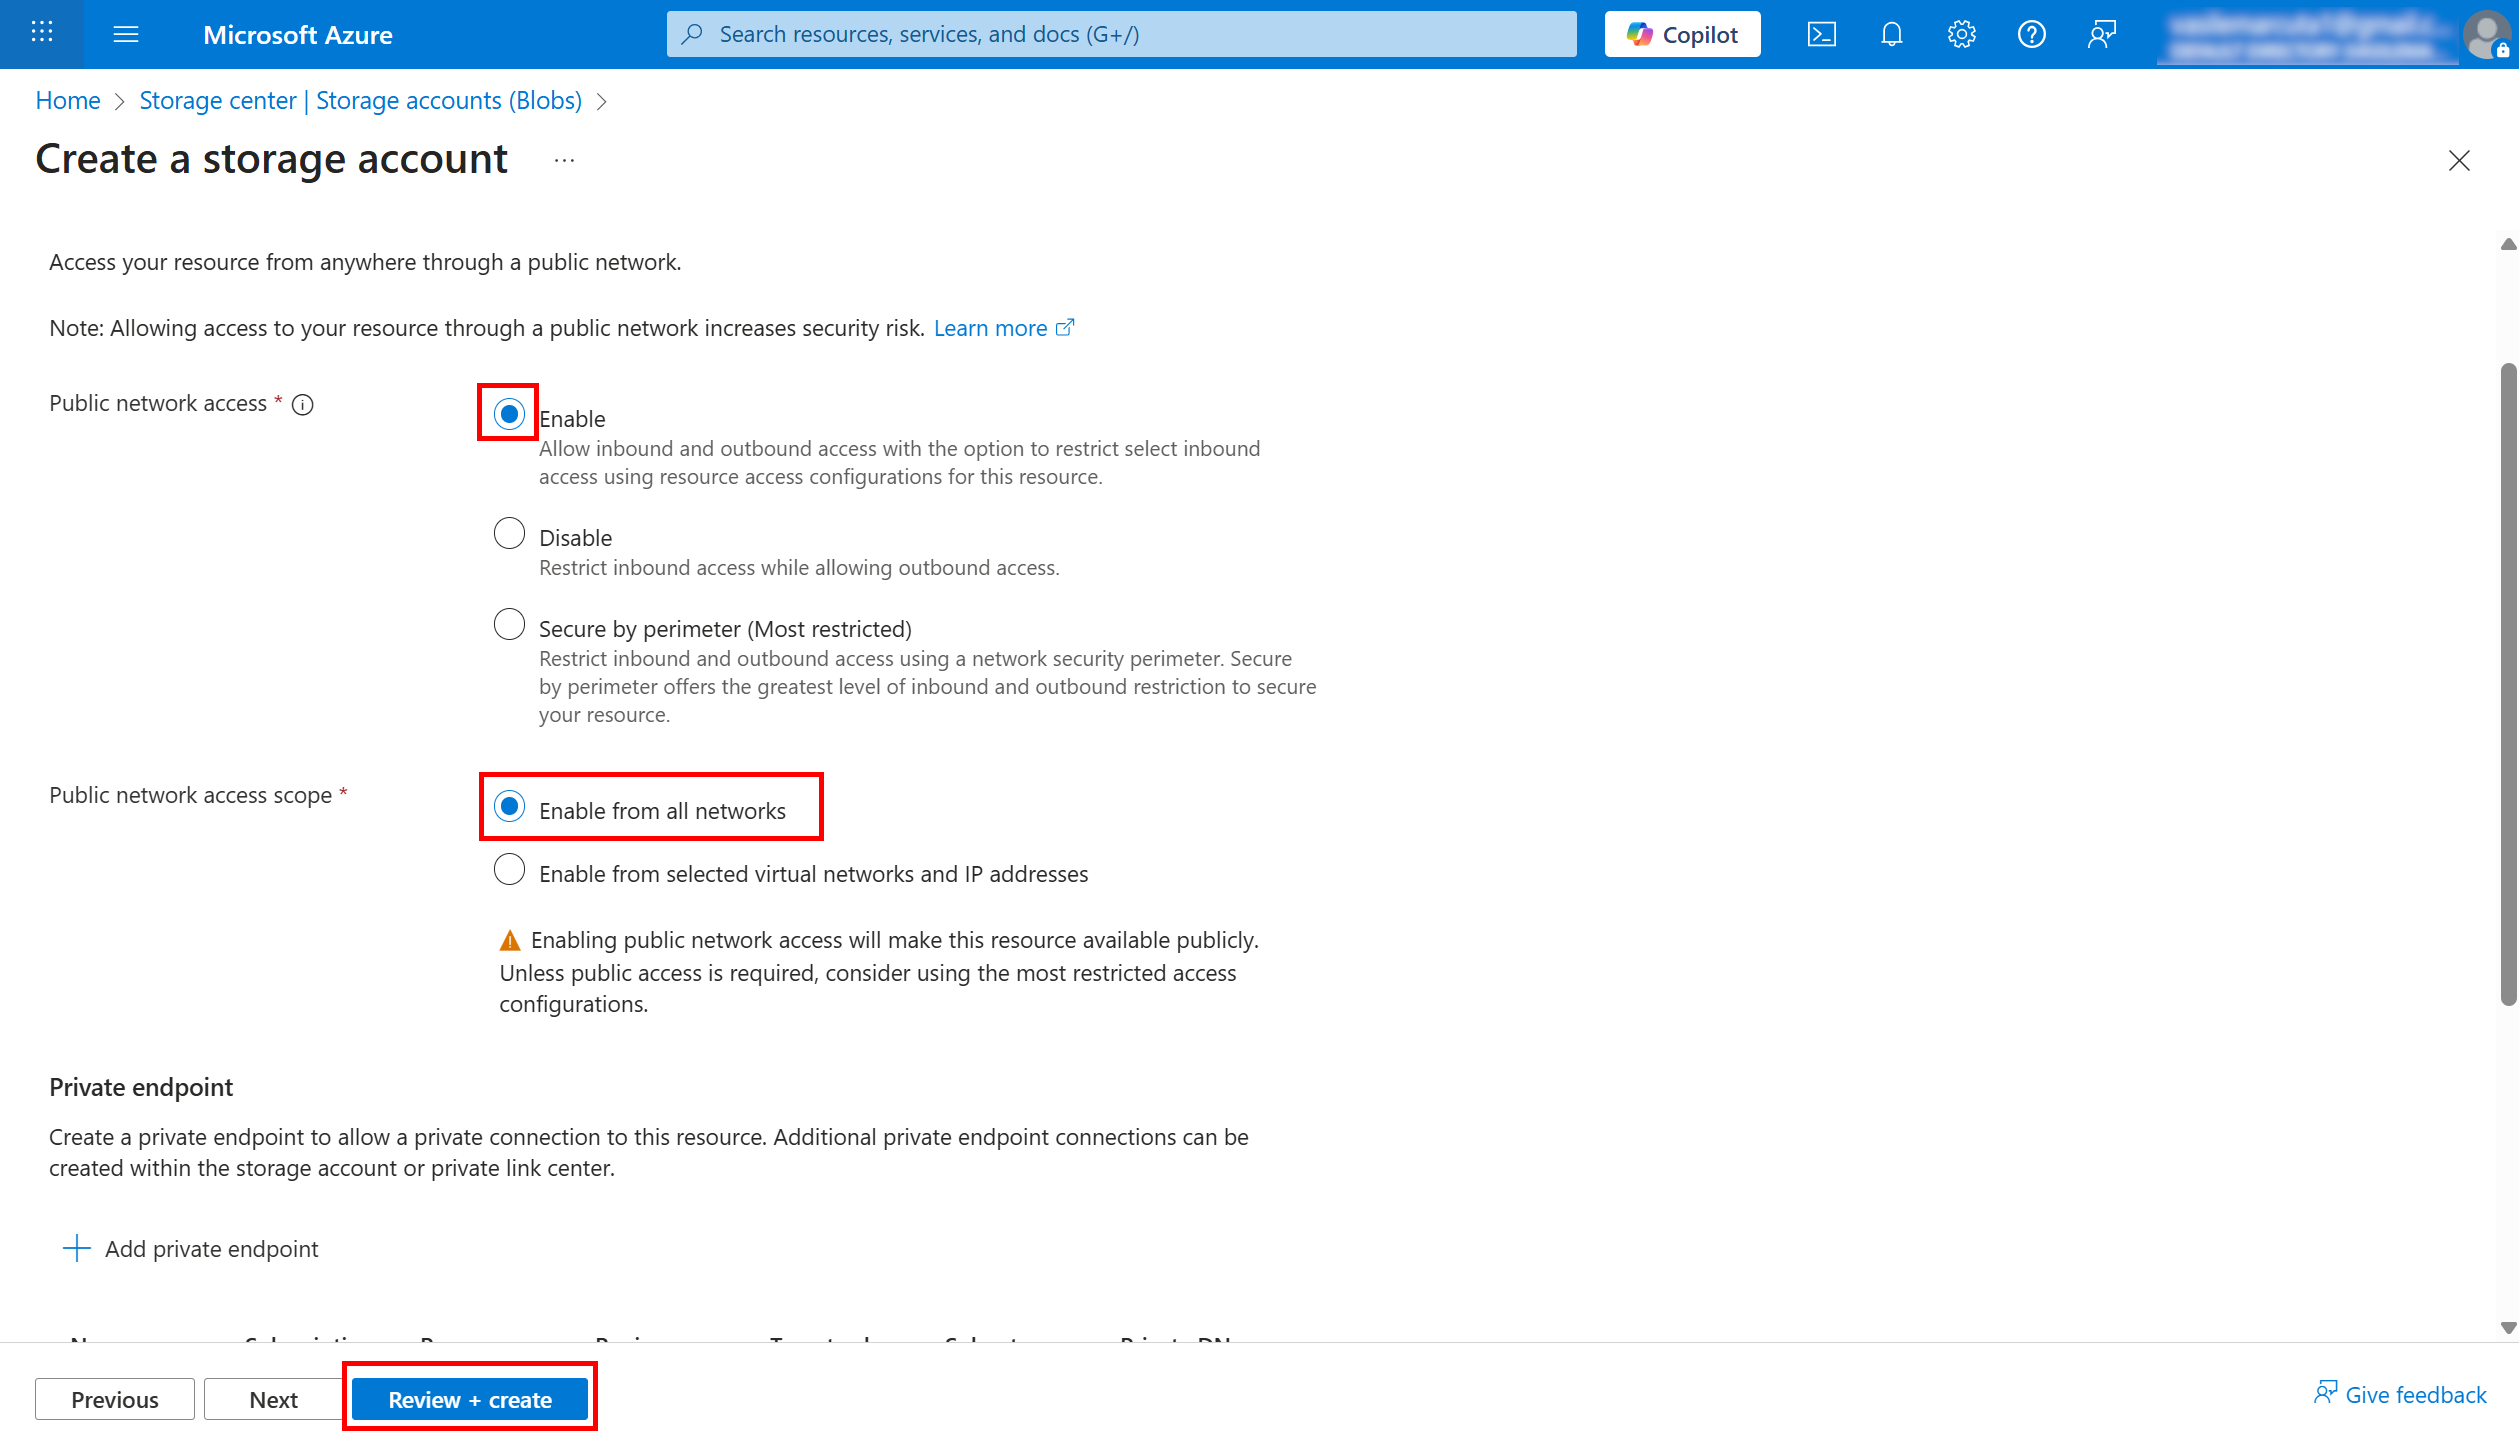
Networking
- Leave Public network access: Enabled from all networks while testing.
- If you must restrict networks, allow the egress IP your ETL uses.
- Data protection: optional; keep defaults unless you need soft delete/retention.
- Review + create → Create.
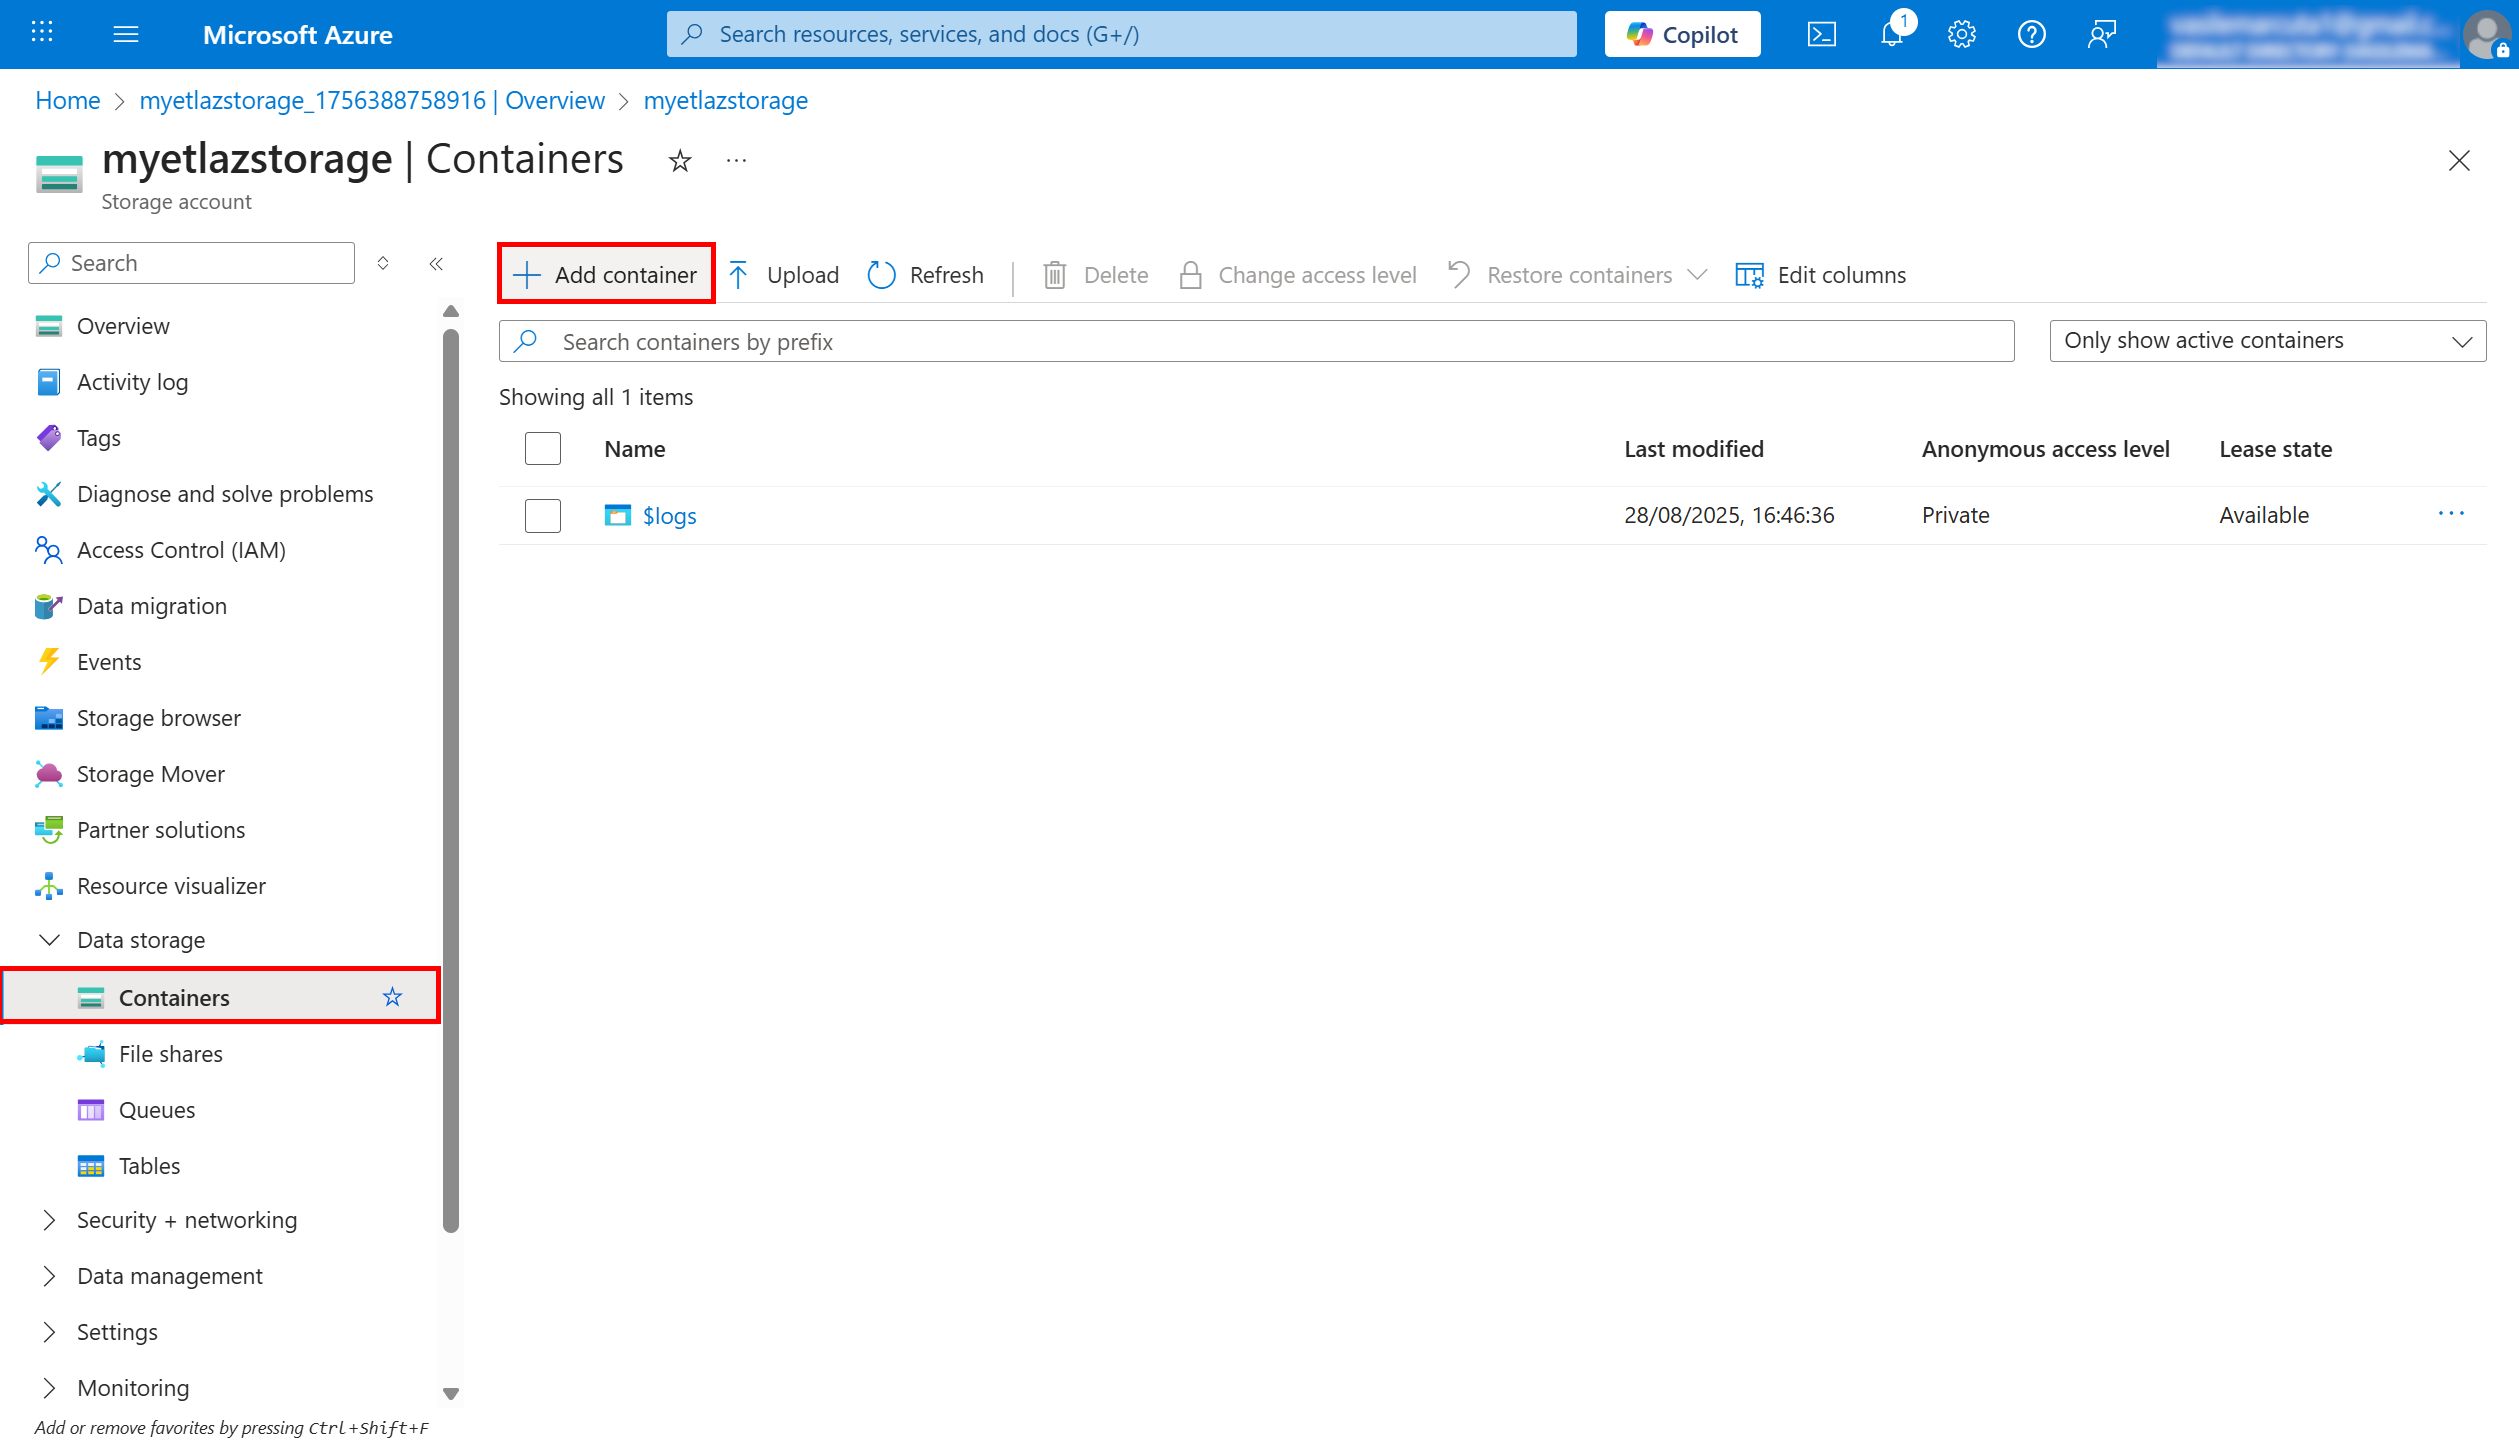
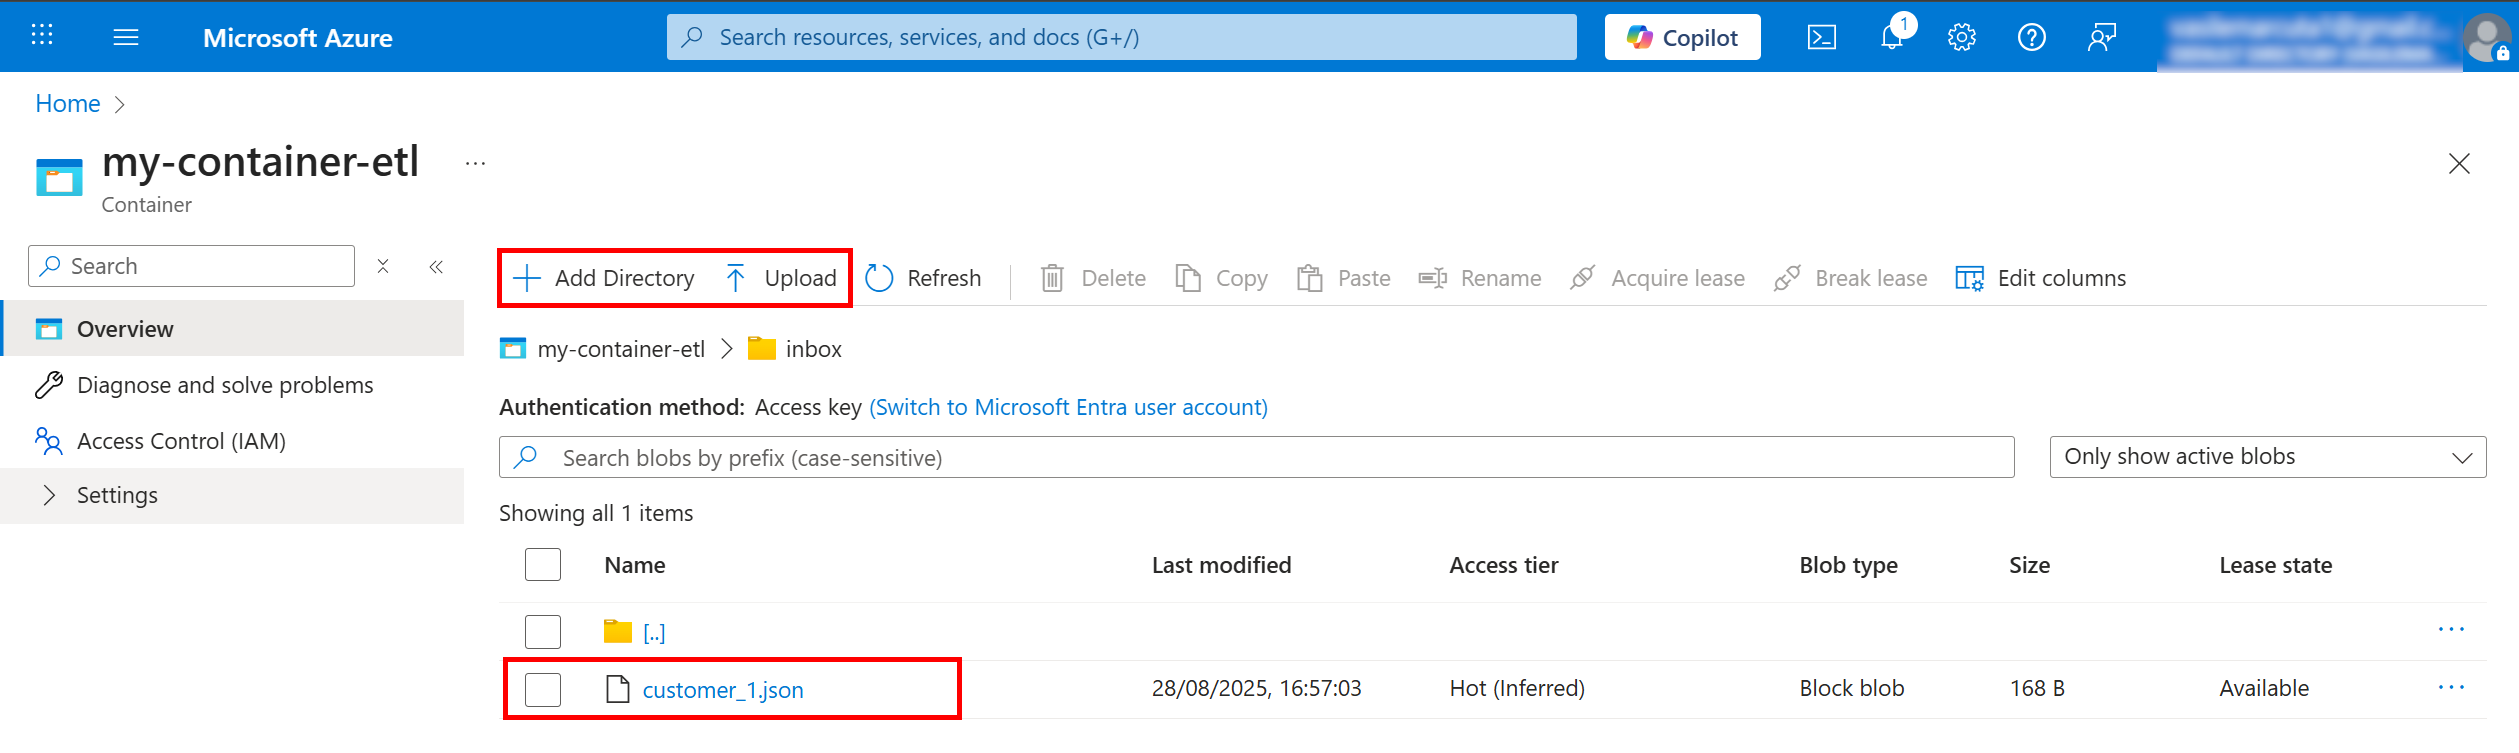
¶ 2) Create the Blob container
-
Open your Storage account → left menu Data storage → Containers.
-
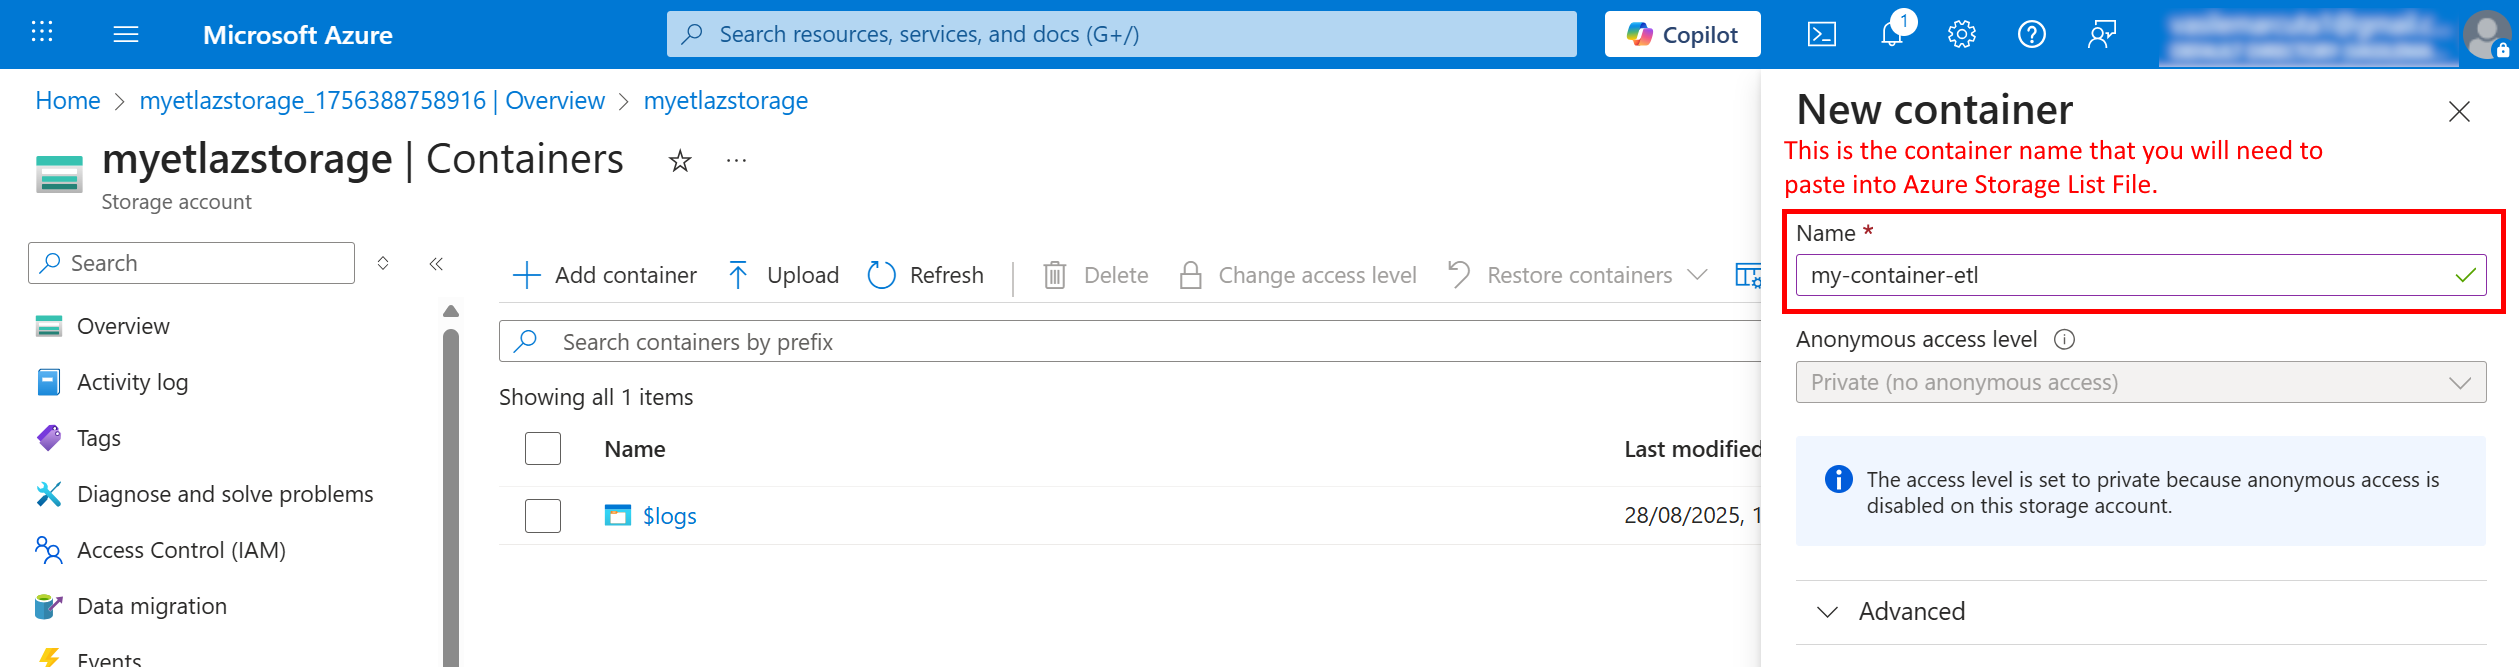
+ Container
- Name: e.g.
my-container-name(lowercase). - Public access level: Private (no anonymous access) (recommended).
- Create.
- Name: e.g.
Maps to ETL:
containerName = my-container-name
¶ 3) (Optional) Create a folder/prefix structure
The action can filter by a prefix (like a directory). You can prepare it in either way:
-
If Hierarchical namespace = Off (classic Blob):
Upload blobs whose names contain slashes, e.g.inbox/2025/report.json. The prefix is the part before the file name (inbox/2025/). -
If Hierarchical namespace = On (ADLS Gen2):
You can explicitly Add directory (UI provides a button) and upload files inside it.
¶ 4) Get the credentials (Shared Key)
-
In the storage account, open Security + networking → Access keys.
-
Click Show to reveal keys.
-
Copy:
- Storage account name (displayed at the top of the blade)
- Key1 (or Key2) value
Treat keys like passwords. Prefer Key1 for apps and keep Key2 for rotation.
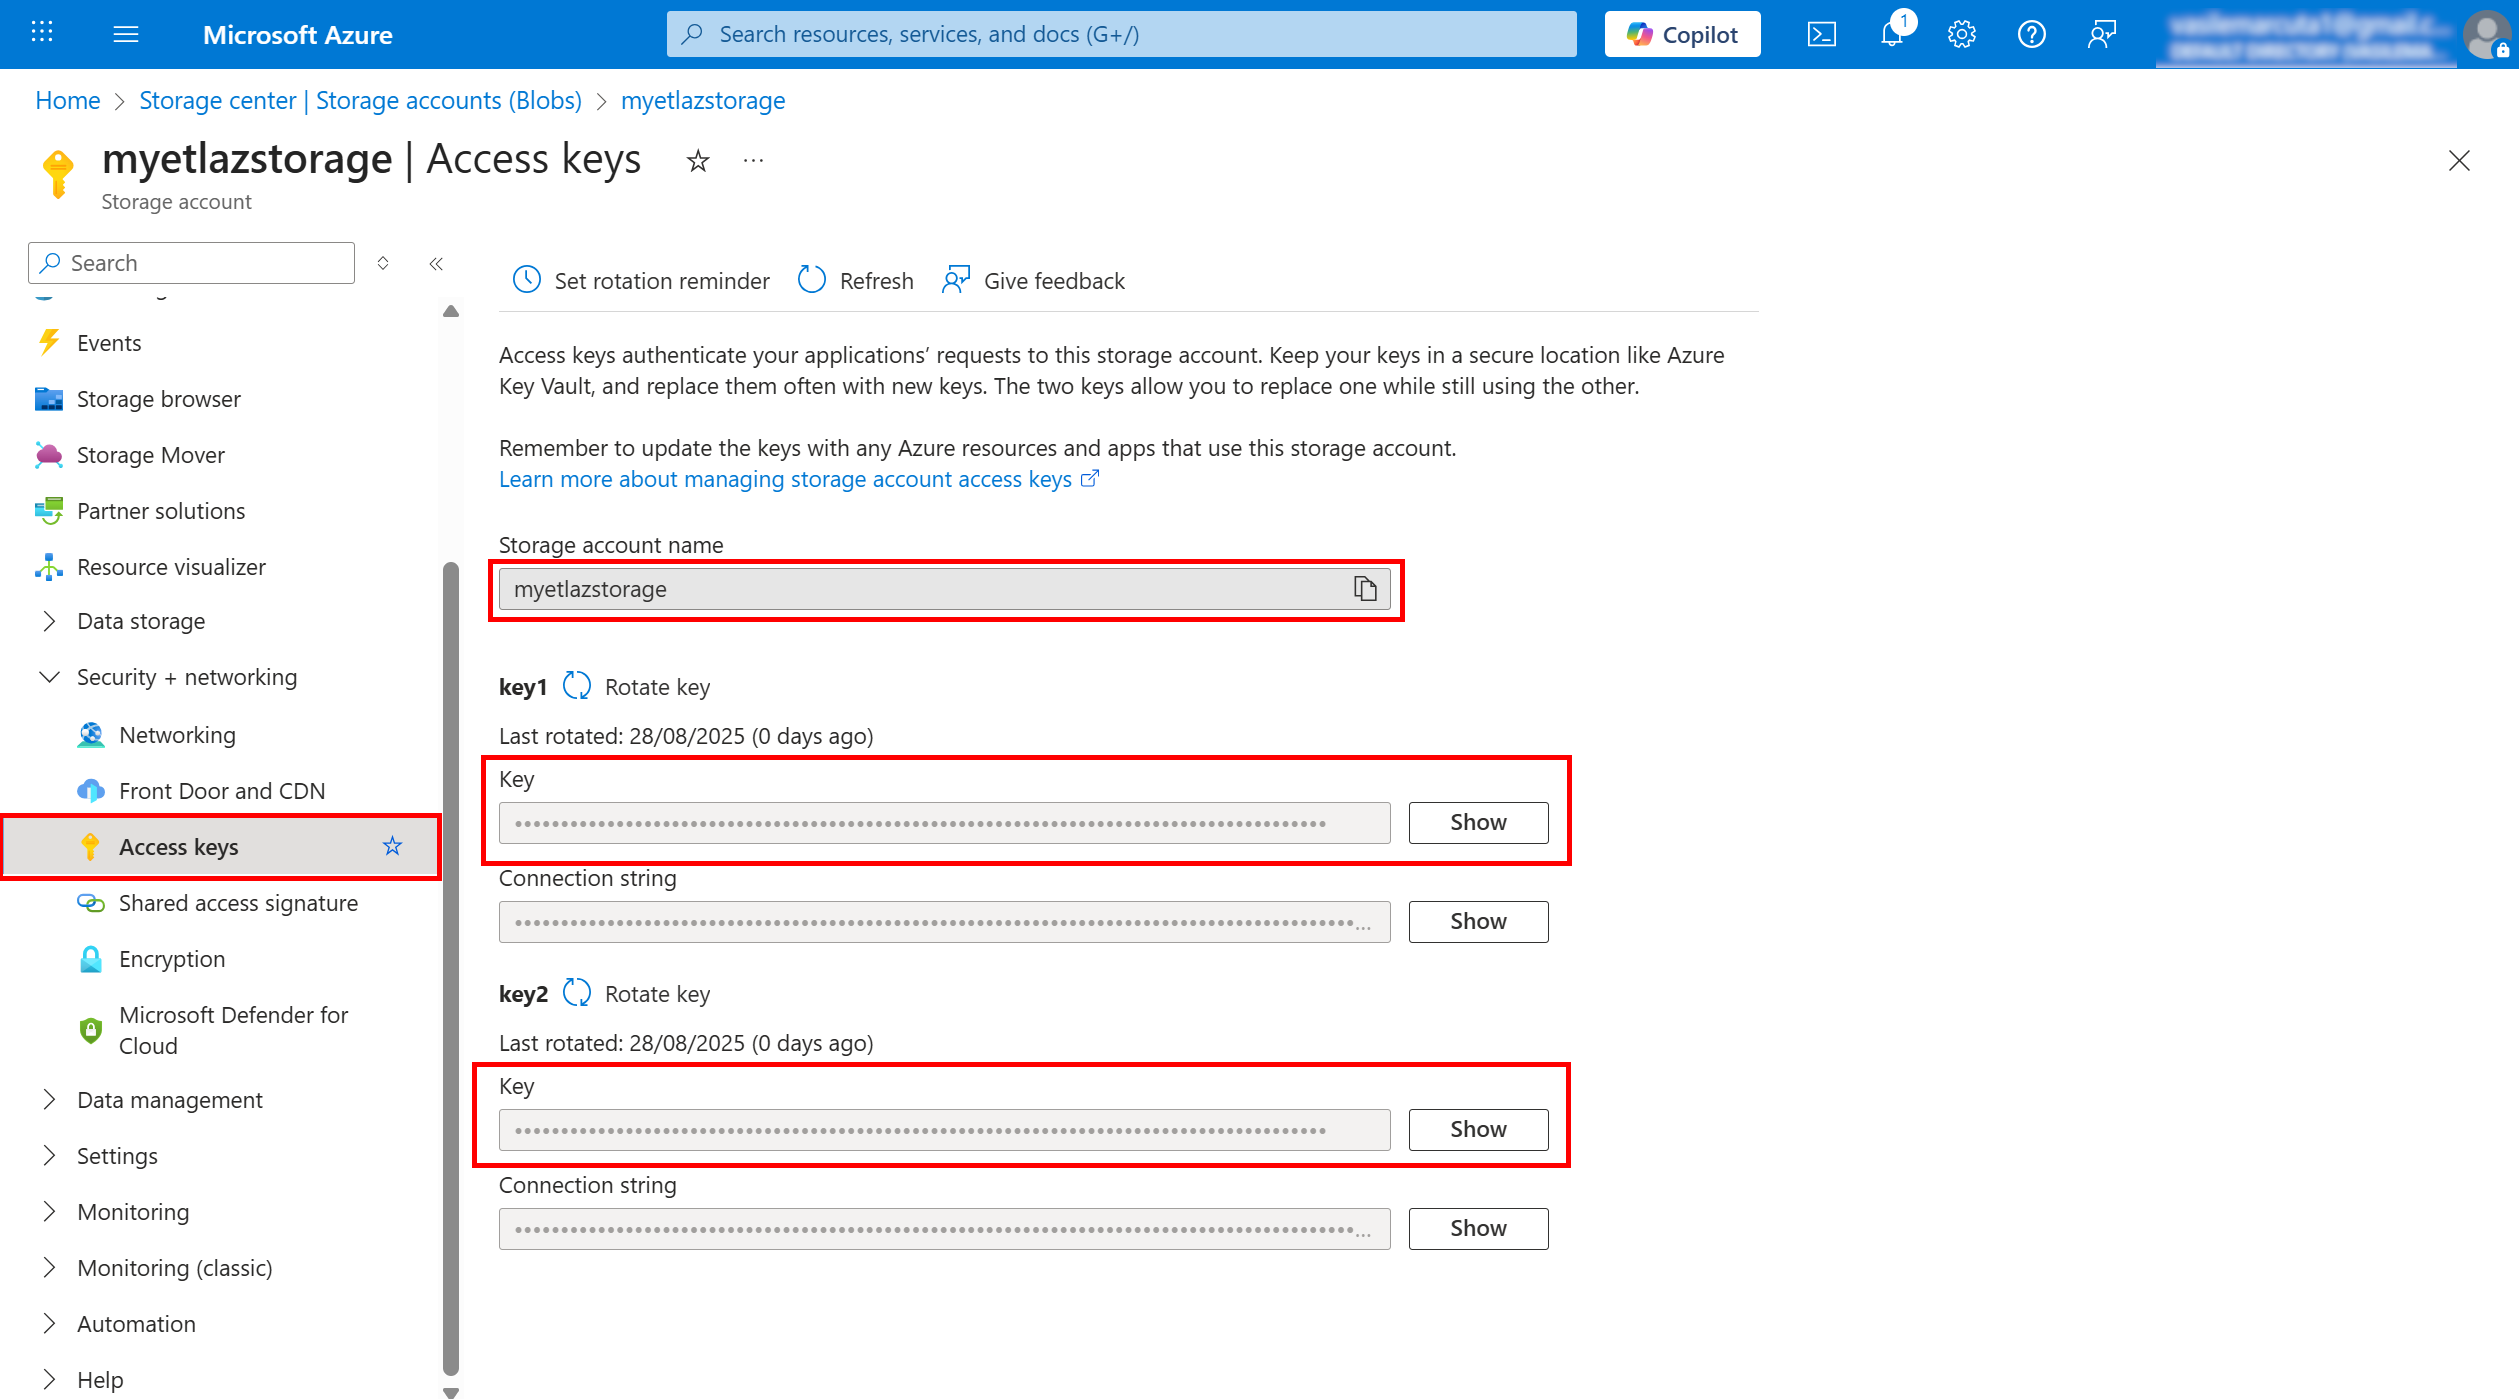
Maps to ETL:
storageName =the storage account Namekey =the Key1 (or Key2) string
¶ 5) Summary → What you’ll paste into the ETL action
- storageName:
myazstorage123 - containerName:
my-container-name - key:
<the long base64-ish key value from Access keys> - prefixFolder (optional):
inbox/orinbox/2025/
With this Azure prep done, you’re ready to configure the Azure action box in ETL (Parameters → paste the values above).
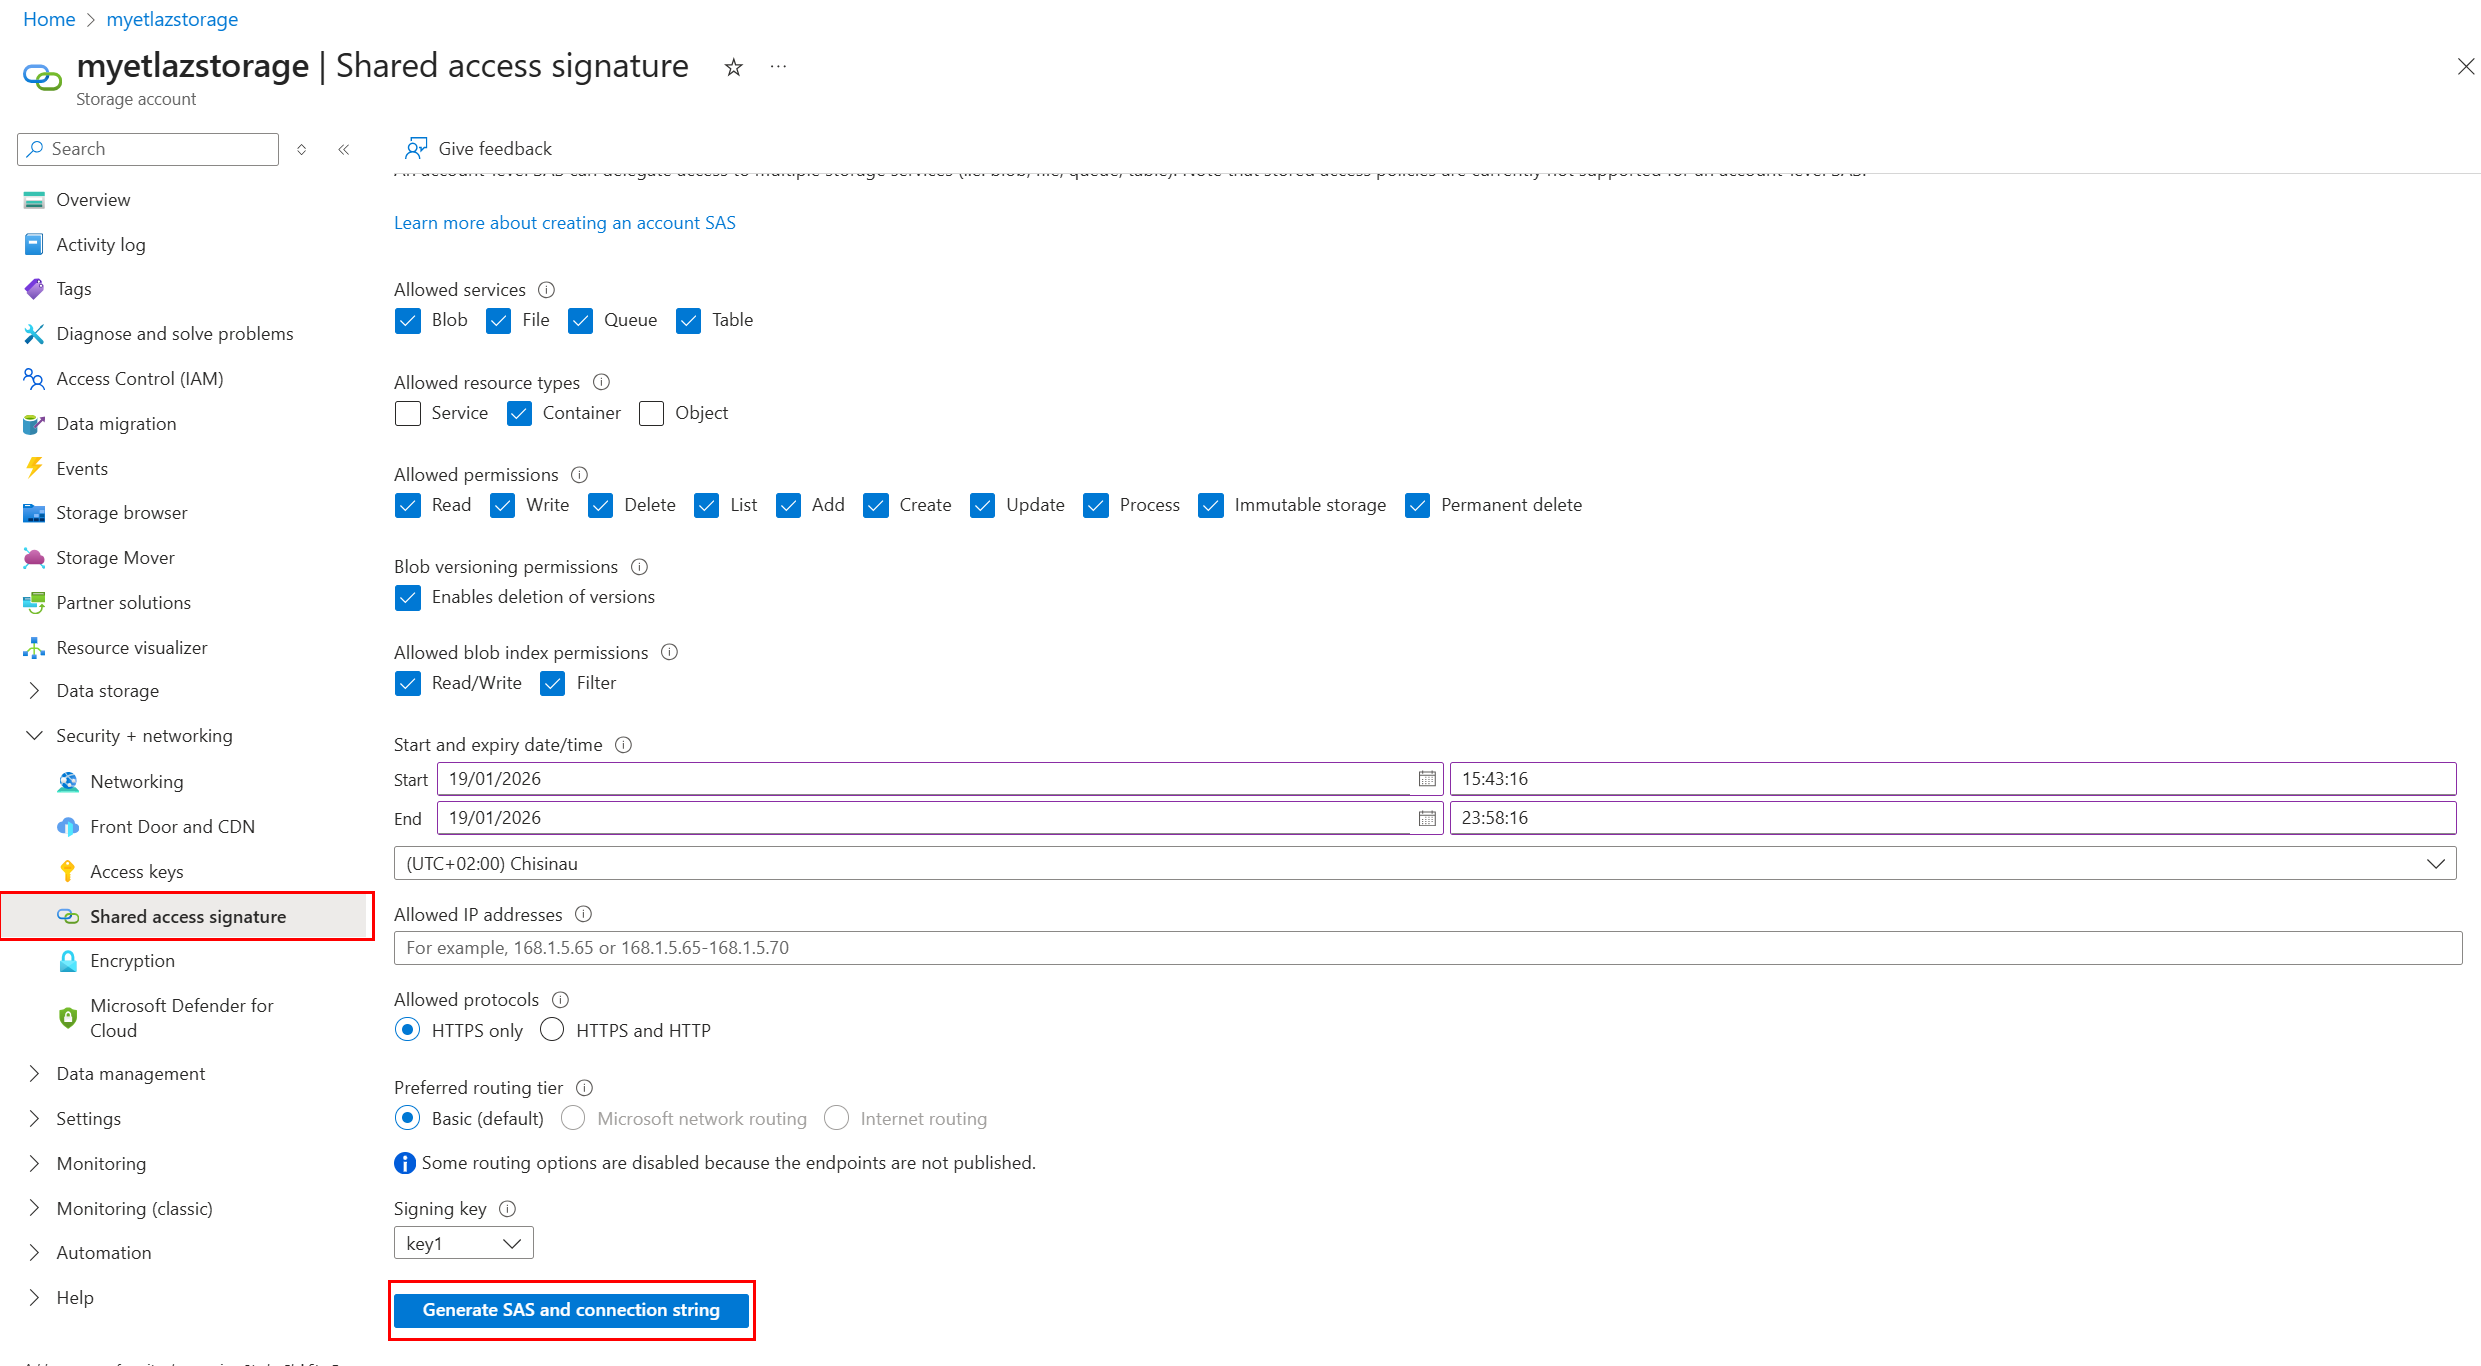
¶ 6) Azure SAS Token
What it is
A time-limited token that grants scoped permissions (recommended over shared key when possible).
How to obtain (typical portal method)
-
Open Azure Portal
-
Go to Storage accounts →
-
Open Security + networking → Shared access signature
-
Configure:
- Allowed services (Blob)
- Allowed resource types (Service/Container/Object)
- Permissions (Read/List/Write/Delete as needed)
- Start/Expiry time
-
Click Generate SAS and connection string
-
Copy the SAS token (or full URL if your action expects it)
Common mistakes
- Token expired
- Missing “List” permission (causes listing actions to return empty results)
¶ 7) Microsoft Entra ID (Tenant ID + Client ID)
These parameters are used by Microsoft 365 / Graph / SharePoint / OneDrive / Mail / PowerBI / Dynamics actions.
¶ Azure application (client) ID / Client ID
What it is
The unique identifier of your Entra ID App Registration.
(“Azure application (client) ID” and “Client ID” are the same thing.)
How to obtain
- Open Microsoft Entra admin center (or Azure Portal → Entra ID)
- Go to App registrations
- Open your app
- Copy Application (client) ID
- After registration opens, stay on Overview.
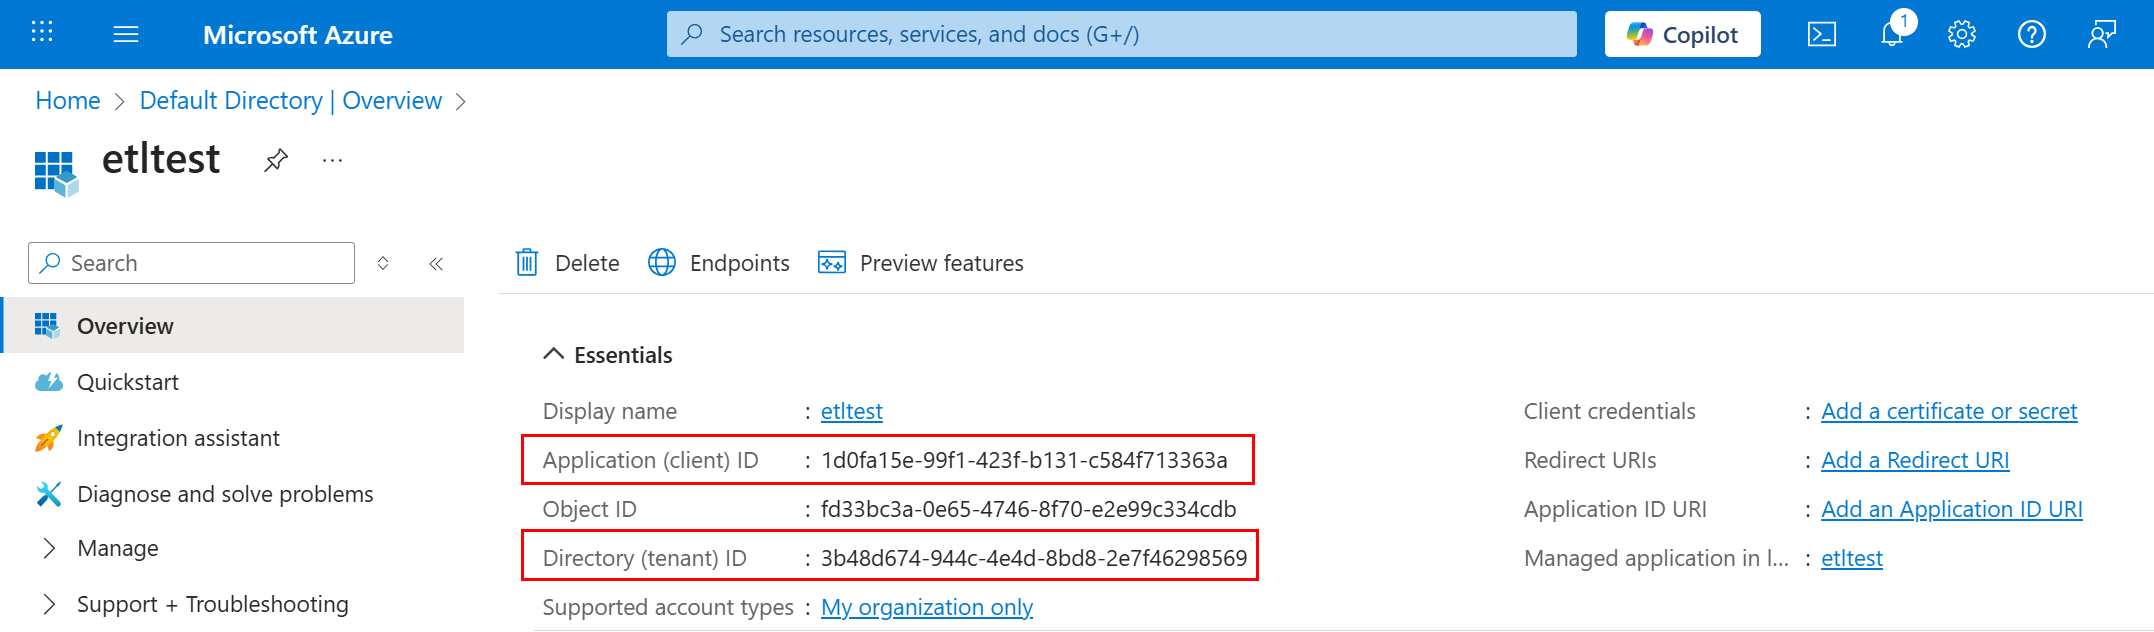
¶ Azure tenant ID
What it is
The identifier of your organization’s Entra ID tenant.
How to obtain (Option A — from App Registration)
- Open your App registration
- Copy Directory (tenant) ID
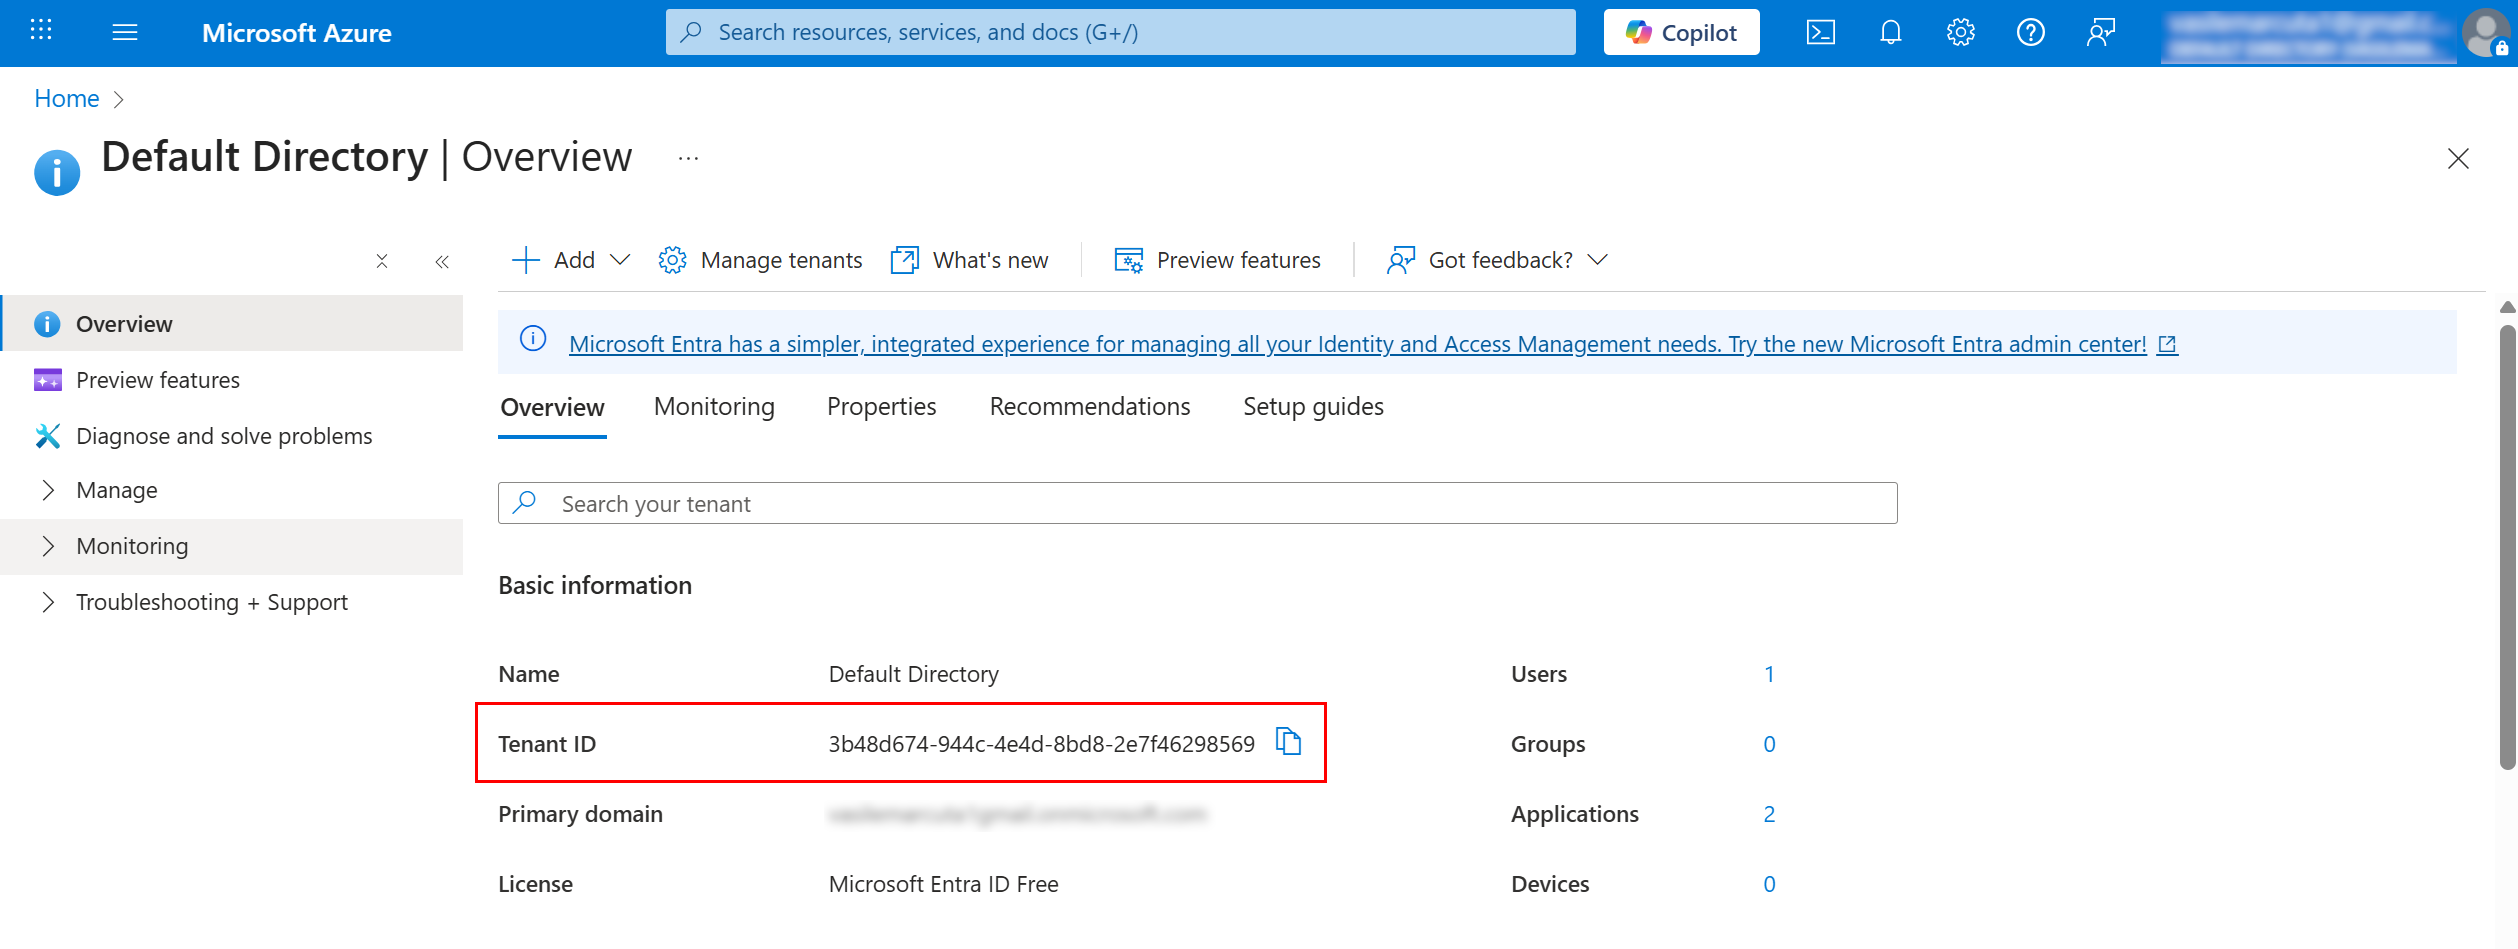
How to obtain (Option B — from Tenant overview)
- Go to Microsoft Entra ID
- Open Overview
- Copy Tenant ID
¶ Azure client secret
What it is
A secret string used by the app to authenticate (like a password).
It is shown only once at creation time.
How to create & obtain
- Open App registrations →
- Open Certificates & secrets
- Click New client secret
- Choose an expiration period
- Create it and immediately copy the Value (not the Secret ID)
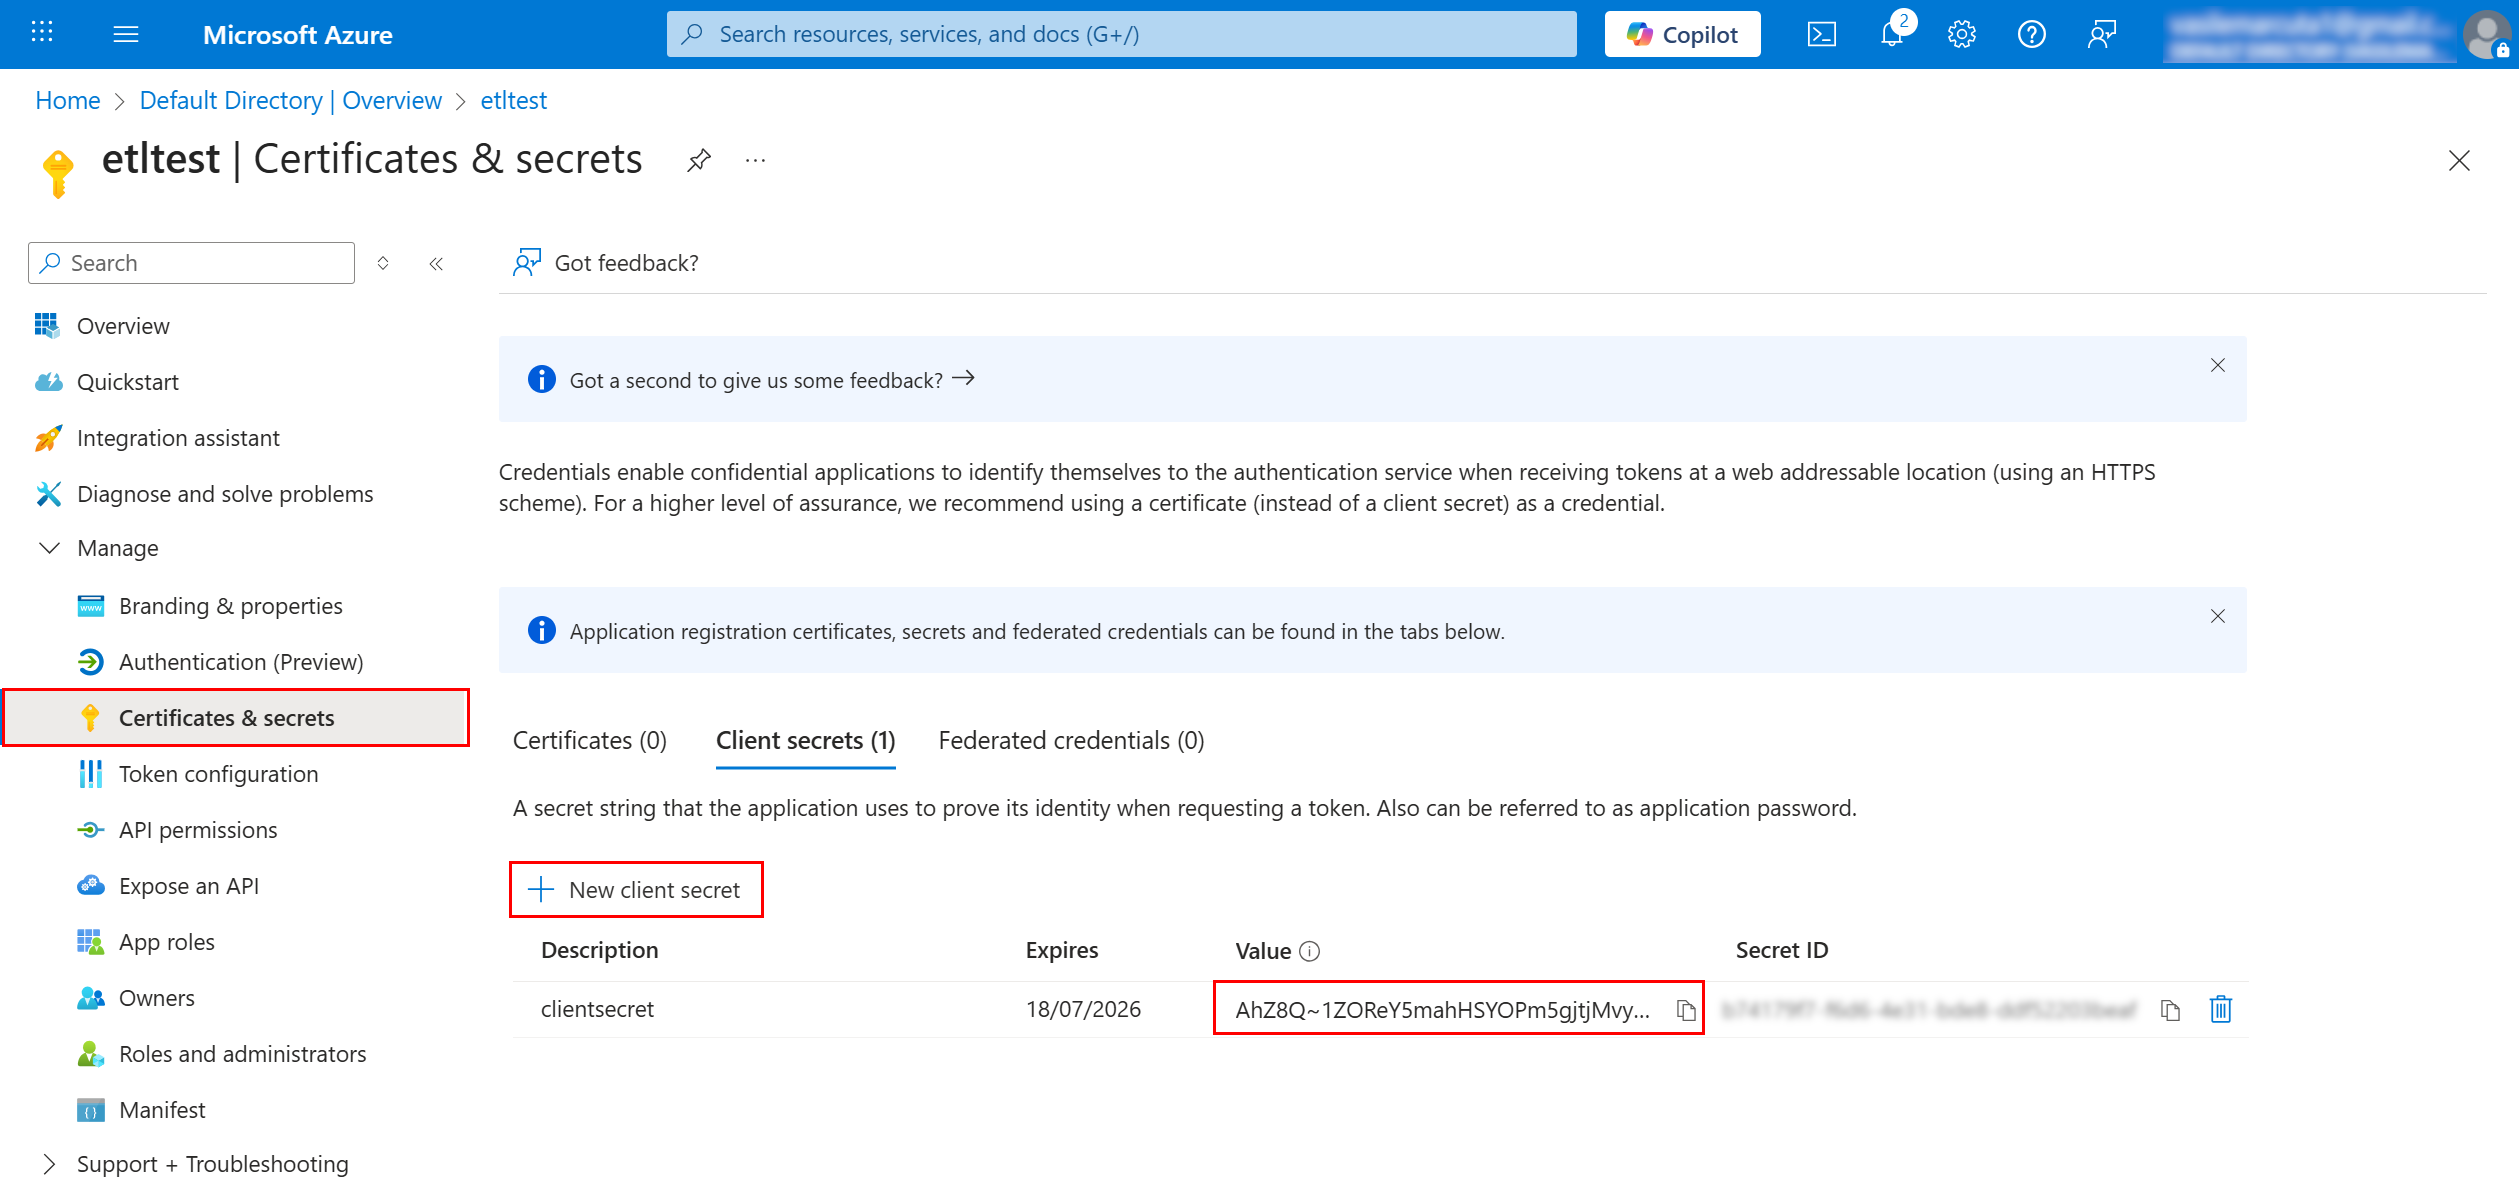
Common mistakes
- Copying the Secret ID instead of the Value
- Secret expired
¶ 8) Get the Organization URI for Dynamics 365 / Dataverse
¶ Organization URI
What it is
The base URL of your Dynamics 365 / Dataverse environment.
How to obtain (most common)
- Open Dynamics 365 in browser
- Copy the environment base URL, for example:
https://<org>.crm.dynamics.com/
- Paste it into the ETL parameter Organization URI
- For ETL Organization URI, you usually must use the base environment URL, i.e. remove /api/data/v9.2
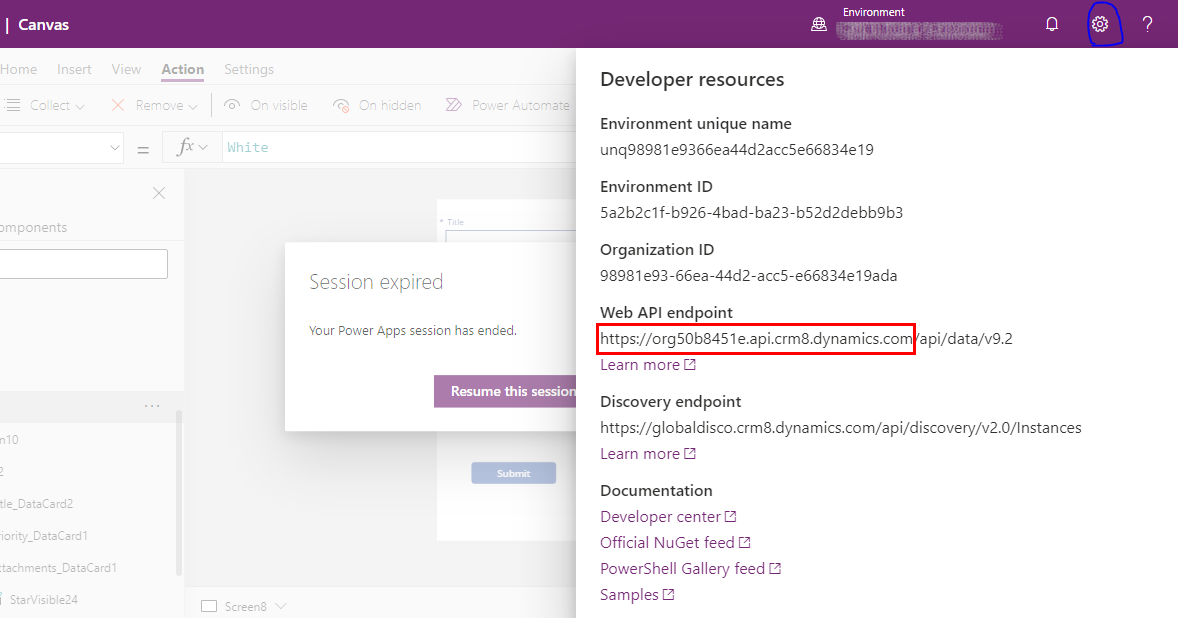
Tip
- Use the root URL only (avoid copying a long URL with extra paths and query parameters).
¶ 9) Azure Unlock Key (ETL internal reusable authorization)
¶ Azure Unlock Key
What it is
A key generated by the ETL platform (via AzureUnlock action).
It represents a validated authorization and is reused by other actions (SharePoint, OneDrive, Mail, PowerBI, etc.).
¶ How to generate it (AzureUnlock action)
- Add AzureUnlock into a pipeline
- In Parameters, choose/enable access you want:
- SharePoint lists access level
- PowerBI
- OneDrive
- Send & receive e-mails
- Contact’s address book
- User’s directory (only if needed)
- Fill:
- Azure application (client) ID
- Azure tenant ID
- Azure client secret
- Run the pipeline
- Copy the produced Azure Unlock Key from results/logs/output (depending on your platform UI)
- Store it as a global parameter and reuse in all other boxes
¶ How to reuse it in other actions
Most actions will require:
- Application ID (same client ID as above)
- Azure Unlock Key (generated by AzureUnlock)
¶ Troubleshooting (quick)
¶ 401 Unauthorized / invalid_client
- Wrong tenant ID / client ID / client secret
- Secret expired
¶ 403 Forbidden
- Missing permissions or admin consent required
¶ Storage listing returns empty
- Wrong container name
- SAS missing List permission
- SAS expired
¶ Security recommendations
- Store secrets and unlock keys as restricted global parameters
- Use least privilege (enable only required accesses)
- Rotate client secrets regularly