¶ Description
Send messages to a broker.
¶ Parameters
¶ Parameters tab
Parameters:
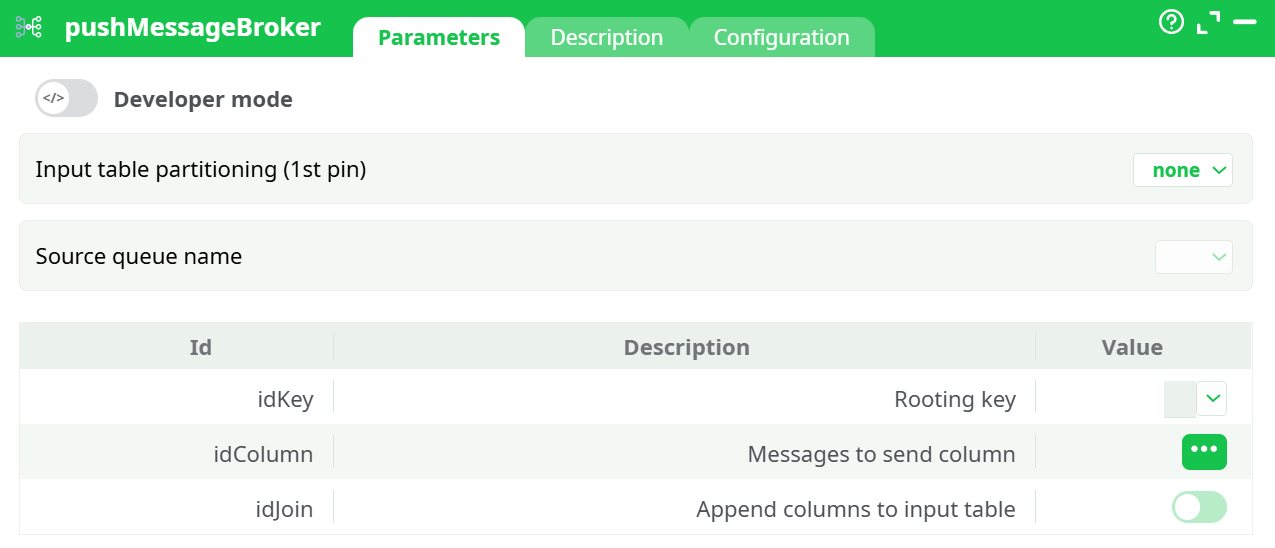
- Developer mode: activate/deactivate code tab.
- Input table partitioning (1st pin)
- Source queue name
- Rooting key
- Messages to send column
- Append columns to input table
¶ Description tab
See dedicated page for more information.
¶ Code tab
pushMessageBroker is a scripted action. Embedded code is accessible and customizable through this tab.
¶ Configuration tab
See dedicated page for more information.
¶ About
The pushMessageBroker action publishes messages from your pipeline into a RabbitMQ-compatible message broker (AMQP).
Each row of your input table is transformed into a message that can be sent either directly to a queue or to an exchange with a specific routing key.
The node can also optionally append message delivery metadata (such as message ID, broker response, and status) back to the table for traceability and auditing.
This action is typically used for:
- Streaming real-time events or notifications between systems
- Distributing work items to asynchronous consumers
- Sending job triggers or updates from ETL pipelines to other services
- Integrating data pipelines with external message-based architectures
¶ How It Works
At runtime, pushMessageBroker connects to a RabbitMQ service defined in your pipeline parameters.
Each incoming row is turned into a message — the payload is taken from a selected column, and the routing key determines where the message is delivered.
If the Append columns to input table option is enabled, the output table will include extra metadata columns that record whether each message was successfully published and, if available, the broker’s message identifier or error details.
It’s important to note that this box does not create queues or exchanges itself.
All target queues, exchanges, and bindings must already exist on the broker.
The action only publishes to them, based on your configuration.
¶ Input and Output
The component accepts a single input table.
Each row of the input is sent as a separate message.
The output depends on your configuration:
-
By default, the output table is identical to the input (pass-through).
-
When Append columns to input table is activated, new columns appear with message delivery results, such as:
- Delivery status
- Message ID (if returned by the broker)
- Error message or broker response text
This allows you to keep an audit trail and reprocess failed messages if necessary.
¶ Configuring the Connection (via Pipeline Parameters)
To send messages, pushMessageBroker needs connection details for your message broker (RabbitMQ or compatible AMQP server).
These credentials are not entered directly in the box, but are defined in the pipeline parameters under the Services section.
To configure:
-
Open Pipeline parameters from the top toolbar.
-
Go to the Services tab.
-
Scroll to the section Queues of message brokers.
-
Click + Add to create a new broker definition.
-
Fill the following fields:
- Name – The internal name used to reference this broker connection (e.g.
myBrokerorrabbit_production). - Server – The hostname or IP address of the broker.
- Port – Typically
5672for AMQP or5671for TLS-secured connections. - Exchange – The exchange name (leave blank if you publish directly to a queue).
- Queue – The target queue name (if you use the default exchange).
- VHost – The virtual host on the RabbitMQ instance (default is
/). - Login/user – The username used to authenticate.
- Password – The password or secret token (you can store this as a Secret in the Definitions tab).
- Comment – Optional note or environment hint (e.g. “staging cluster”).
- Name – The internal name used to reference this broker connection (e.g.
-
Save the parameters.
-
Back in the
pushMessageBrokeraction, use the Source queue name dropdown to select the name you just defined.
This will automatically bind the box to the corresponding broker credentials and connection details.
Tip:
You can define multiple brokers (for example, one for development and one for production) and simply switch between them by changing the selected Source queue name in the box parameters.
¶ Parameters
¶ Input table partitioning (1st pin)
Defines how the input data is processed:
- none: All rows are processed in a single batch.
- partitioned: Data is divided into partitions and processed sequentially. This option is useful when sending a very large number of messages, as it controls memory usage and improves stability.
¶ Source queue name
Selects the broker configuration defined in the Pipeline parameters → Services tab.
This dropdown lists all available broker definitions created in your pipeline.
It tells the component which RabbitMQ server, port, queue/exchange, and credentials to use.
¶ Rooting key (idKey)
Specifies the routing key used when publishing to an exchange.
The routing key determines where your message is delivered:
- For direct publishing to a queue, it can match the queue name.
- For exchanges (e.g.,
topicordirecttypes), it defines the routing pattern, such asorder.createdoruser.signup.v1.
If left empty, the message will be routed using the broker’s default behavior.
¶ Messages to send column (idColumn)
This parameter tells the component which column contains the message content.
Each value in that column is sent as a separate AMQP message.
The message content is typically JSON text, but any string or serialized payload is valid.
If your data contains binary content, you should encode it as Base64 before sending.
You can select the column interactively via the Column selector, or manually enter its name.
If the input pin is not yet connected, you can still type the column name manually.
¶ Append columns to input table (idJoin)
When this switch is enabled, the output table will include metadata columns with information about message delivery.
This is useful during testing or for systems that require confirmation and logging of each sent message.
It helps you identify which messages were successfully published and which failed.
¶ Execution Flow
When the box runs:
-
It retrieves broker connection details from the Services section using the chosen queue name.
-
It establishes an AMQP connection and authenticates with the broker.
-
For each row in the input table:
- The payload from idColumn is used as the message body.
- The routing key from idKey determines the destination route.
- The message is published to the queue or exchange defined in the selected broker configuration.
-
If Append columns to input table is on, delivery results are added to the output.
¶ Example Use Case
Imagine you have an input table with a JSON column named payload_json, containing messages like:
{"event":"order.created","order_id":4587}
{"event":"order.shipped","order_id":4591}
You want each row to be sent as a message to your RabbitMQ broker.
Steps:
-
In Pipeline parameters → Services, define a broker:
- Name:
ordersBroker - Server:
rabbitmq.internal - Port:
5672 - Queue:
orders.queue - VHost:
/ - Login/user:
etl_writer - Password: (use secret reference)
- Name:
-
In pushMessageBroker parameters:
- Input table partitioning: none
- Source queue name: ordersBroker
- Rooting key: leave empty or use a column (e.g.,
event) - Messages to send column:
payload_json - Append columns to input table: ON
-
Run the pipeline.
Each row will be sent as a JSON message to theorders.queue, and the resulting output table will include delivery statuses.
¶ Best Practices
- Use secrets for credentials: Store passwords securely in the Definitions → Secrets tab and reference them in your broker configuration.
- Keep payloads small: For best performance, send compact messages (a few kilobytes). For large payloads, store data elsewhere (e.g., object storage) and send only references.
- Pre-create queues and exchanges: This action only publishes; it does not create broker entities. Ensure the topology exists.
- Enable auditing during testing: Turn on Append columns when validating connectivity, then disable it for high-throughput production runs.
- Design routing keys carefully: Use clear, consistent patterns like
domain.entity.event.v1to simplify downstream filtering.
¶ Troubleshooting
- Connection failed: Check broker name, server, and port in Services. Ensure the RabbitMQ server is reachable.
- Authentication errors: Verify username/password or secret references.
- Message not delivered: Ensure the queue or exchange exists and the routing key matches an existing binding.
- Slow performance: Try enabling input partitioning or reducing message size.
- Empty dropdowns in column selectors: Make sure the input pin is connected before selecting columns.
¶ Summary
The pushMessageBroker box is your publishing bridge between ETL tables and a RabbitMQ-compatible message broker.
It converts each row into a discrete AMQP message and sends it to your defined destination.
By combining broker configuration through pipeline parameters, column-based payload selection, and optional audit feedback, it provides a reliable and flexible way to stream data or trigger asynchronous events directly from your pipelines.