¶ Description
Process a MS-Word template or a MS-PowerPoint template to create a serie of personalized documents.
¶ Parameters
¶ Standard Tab
Parameters:
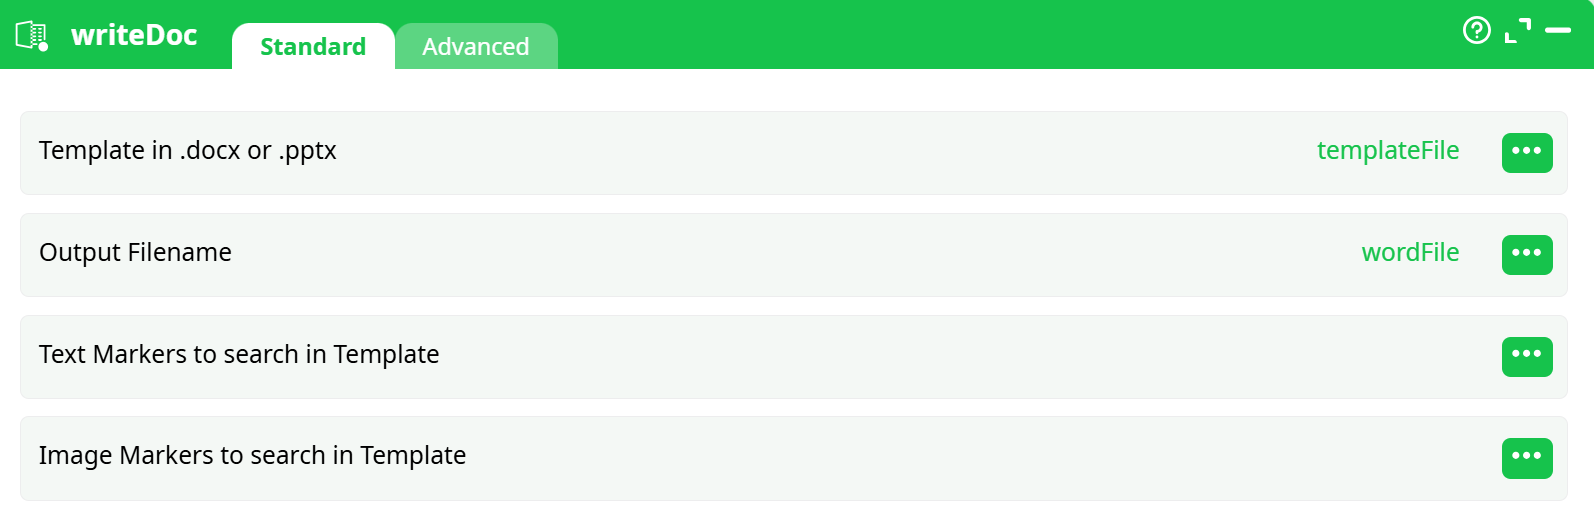
- Template in .docx or .pptx
- Output Filename
- Text Markers to search in Template
- Image Markers to search in Template
¶ Advanced Tab
Parameters:
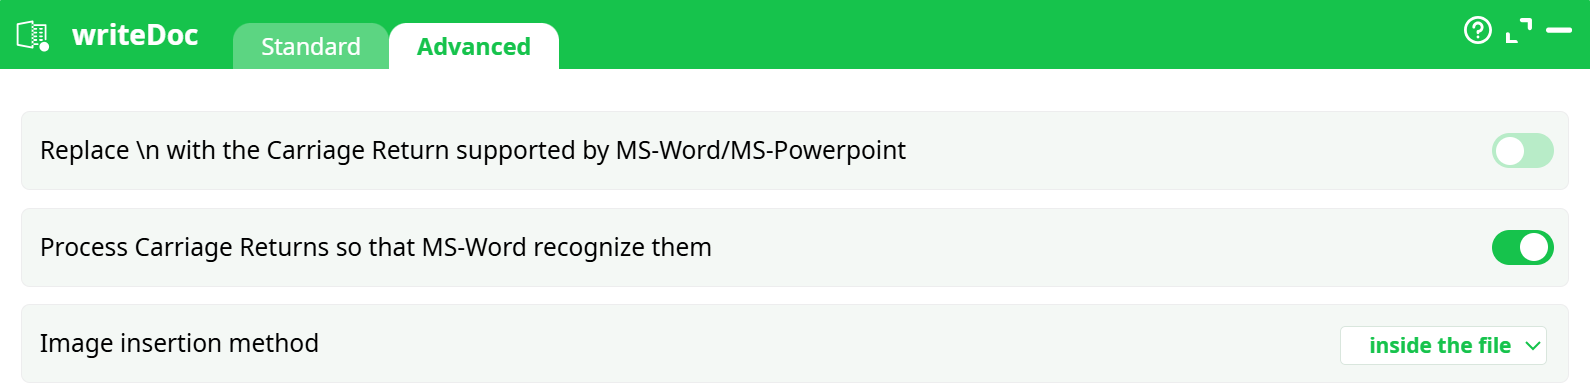
- Replace \n with the Carriage Return supported by MS-Word/MS-Powerpoint
- Process Carriage Returns so that MS-Word recognize them
- Image insertion method
¶ About
For each input row, this action will create a new .docx or .pptx document. This new document is a copy of the “template” document where:
- …all the “Text Markers” have been replaced by the values found on the current row. Inside the MS-Word template or MS-Powerpoint documents, the markers are the strings starting and ending with the “%” characters. The marker’s names must match the column’s names given in the parameter P3.
- …all the “Image Markers” have been replaced by other images. Only the .png, .jpg or .jpeg image-file-formats are supported. The filepath of these other images are on the current row. The “Image Markers” are image-files that:
- …have with a specific name (typically: TIMi_img1, TIMi_img2, TIMi_img3, etc.)
- …have been inserted inside the .docx/.pptx document using a very specific procedure.
¶ Example of processing for “Text Markers”
Let’s give an example of processing for “Text Markers”: Let’s assume that we have the following template named “myTemplate.docx”:

We run this pipeline:
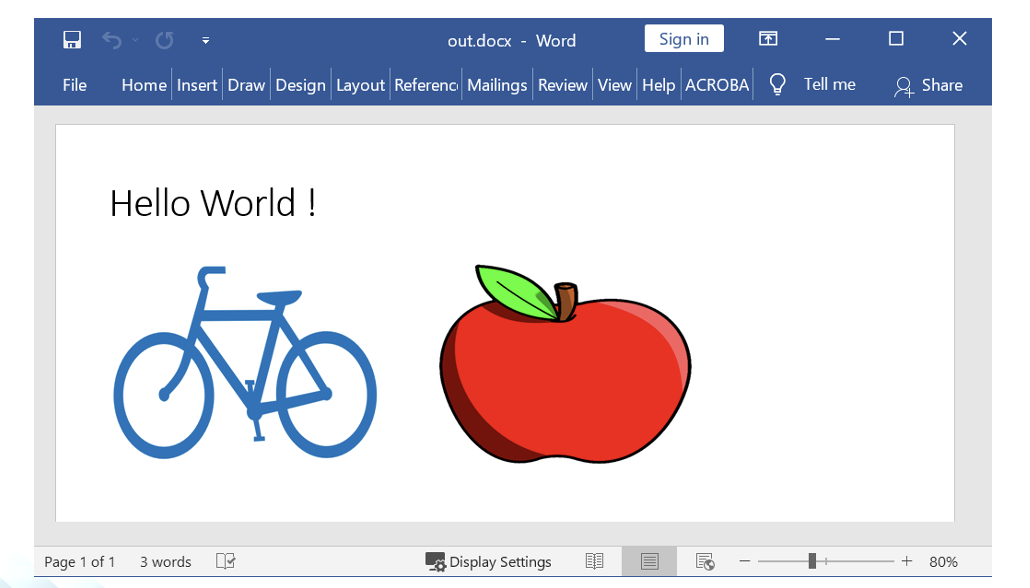
This will produce a MS-Word file named “out.docx” (and a PDF file named “out.pdf”) that contains:

¶ MS-Word Template pre-processing.
New versions of MS-Word are adding some invisible tags inside the .docx documents. These invisible tags might prevent the “marker substitution process” to work. Hopefully, there is a way to remove all these invisible tags and have a “template” that is cleaned and working properly. The process to clean your template .docx files is in 3 steps:
Step 1 (get rid of the “w:rsidR” tags).
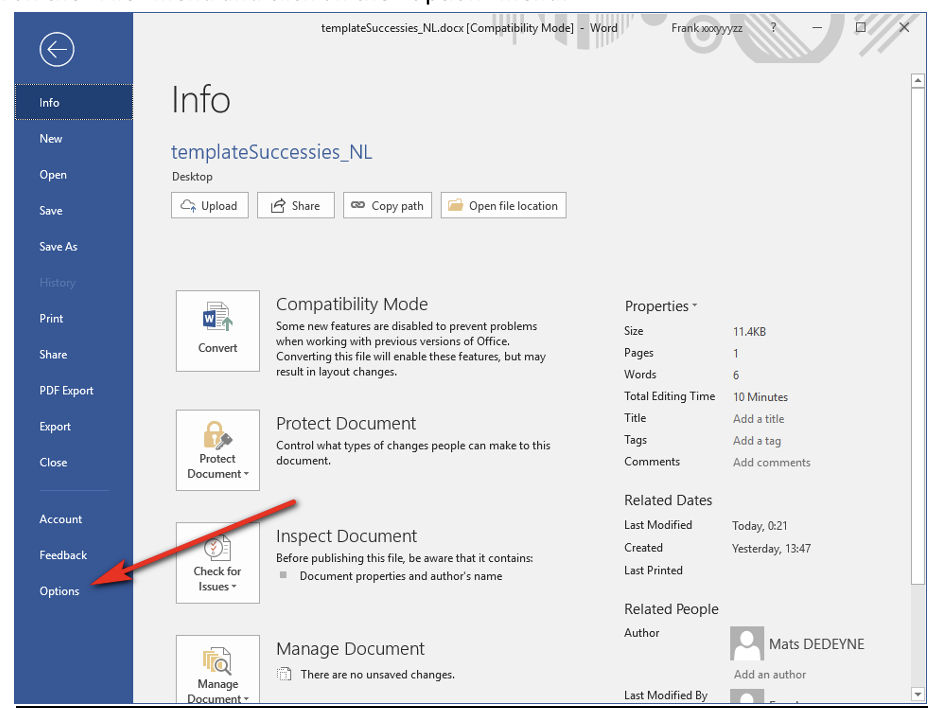
- Open your ".docx" template document in MS-Word.
- Click on the "File" menu and click on the "Option" menu:
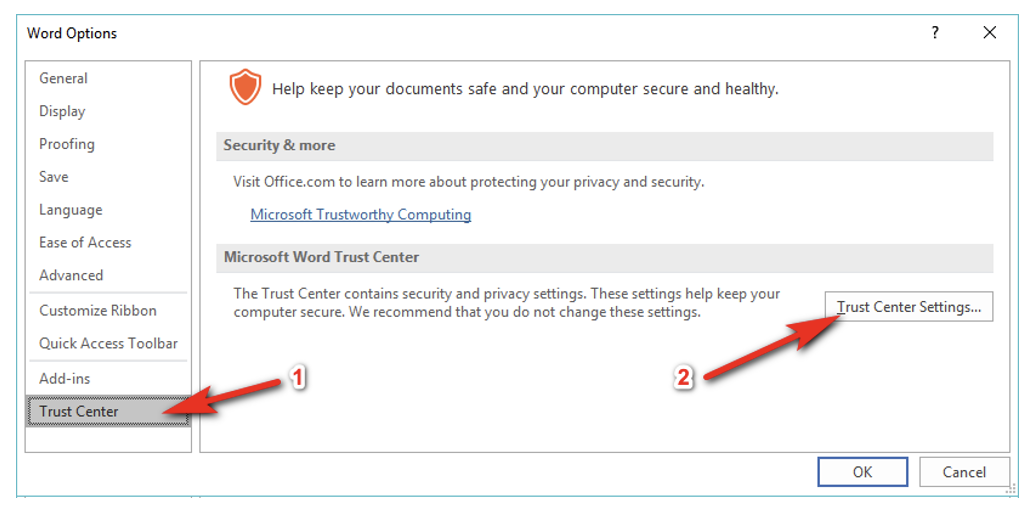
- Click on the "Trust Center" option and on the "Trust Center Settings" button:
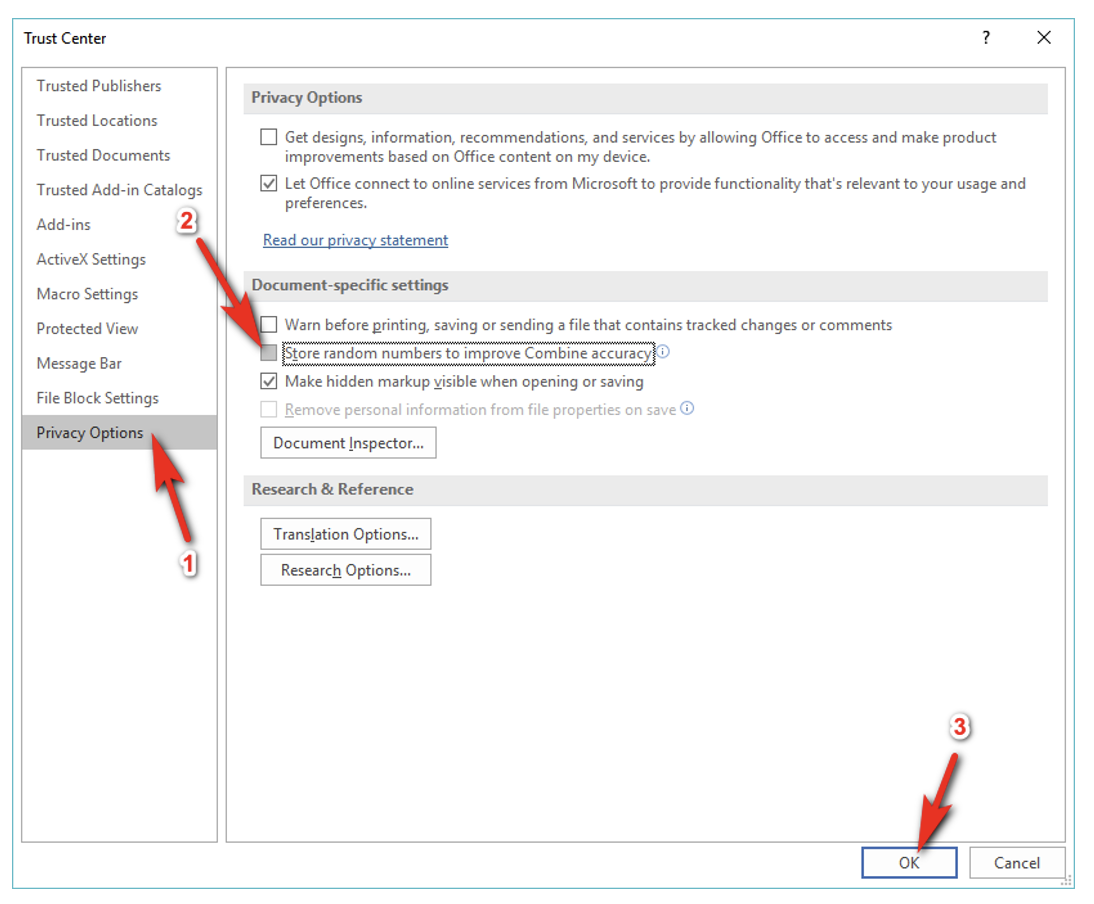
- Click on the "Privacy Options", uncheck the checkbox "Store random numbers to improve combine accuracy". Then, click the "OK" button at the bottom to confirm:
- Close the "Word Options” window (click the "Ok" button) and save the .docx file (press [CTRL]+[S]).
Step 2 (get rid of the auto-correct/proofing tags).
- Open your ".docx" template document in MS-Word.
- Select the whole document: Press the keys [CTRL]+[A] on your keyboard.
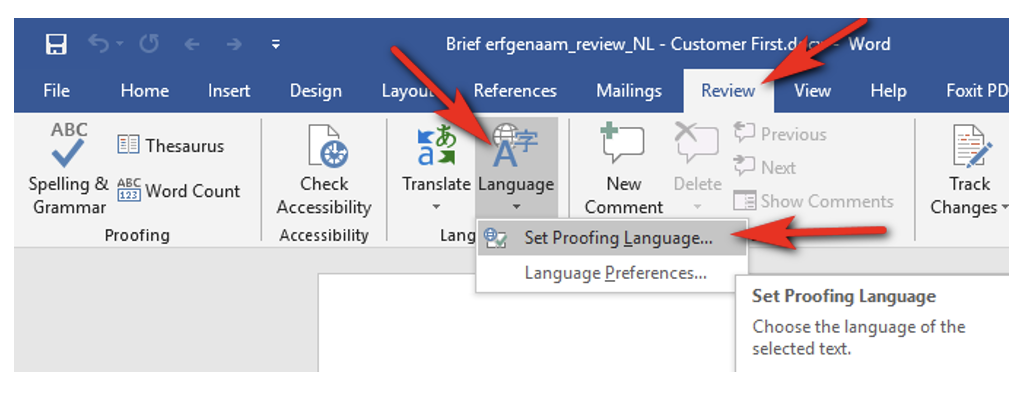
- Go to the "Review" tab, select "Language" -> "Set Proofing Language":
- Check the checkbox named "Do not check spelling or grammar" and click the "OK" button:
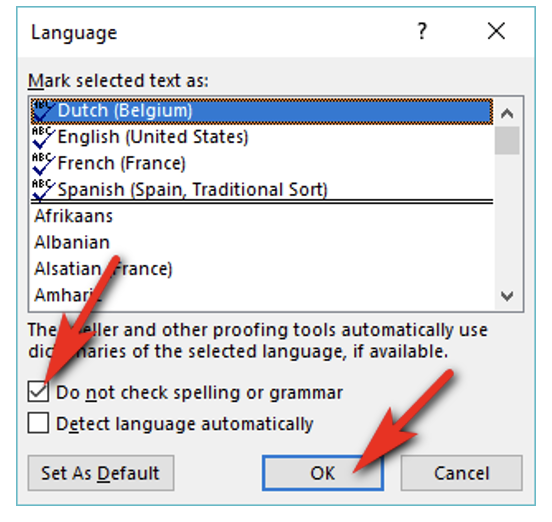
- Save the .docx document (i.e. press [CTRL]+[s]).
Step 3 (get rid of the “_goback” bookmarck)
When you open a .docx focument for the second time, MS-Word offers you to “go back” where you made your last change inside the document: i.e. You see on your right scroll-bar something like:
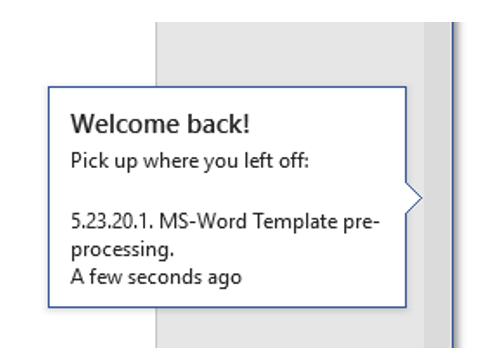
To offer this functionality, MS-Word insert an invisible “_goback” bookmarck tag at the exact location of your last edition. If this “_goback” tag is in the middle of an “ETL Marker” (to replace), then ETL won’t be able to process the marker.
The solution is simple:
- Open your ".docx" template document in MS-Word.
- Move your cursor outside of any Marker (e.g. press the [CTRL]+[End] keys on your keyboard) and do a small edition (e.g. add a space character and remove it just afterward).
- Save the .docx document (i.e. press [CTRL]+[s]).
¶ Insertion of “Image Markers” inside .docx and .pptx documents
ETL automatically replaces a serie of specific images inside your .docx/.pptx template documents. These images are your “Image Markers”. These “marker images” have specific filenames that must match the names given inside the parameter P4 of the writeDoc action. These “marker images” must be inserted inside your document following a very specific procedure:
Insertion of “Marker Images” inside a .docx document
- Open your .docx document with MS-Word and position your cursor where you want to insert your “marker image”.
- Inside the “Insert” toolbar in MS-Word, click on “Quick Parts”, and select “Field”:

- Inside the list on the left column, select “IncludePicture”.
IMPORTANT: Inside the “Field options” on the right column, check the checkbox named “Data not stored with document”.
Inside Filename parameter the middle column, select an image filepath. The filename of this image is the name of your “Image Marker”.
¶ Example of processing for “Image Markers”
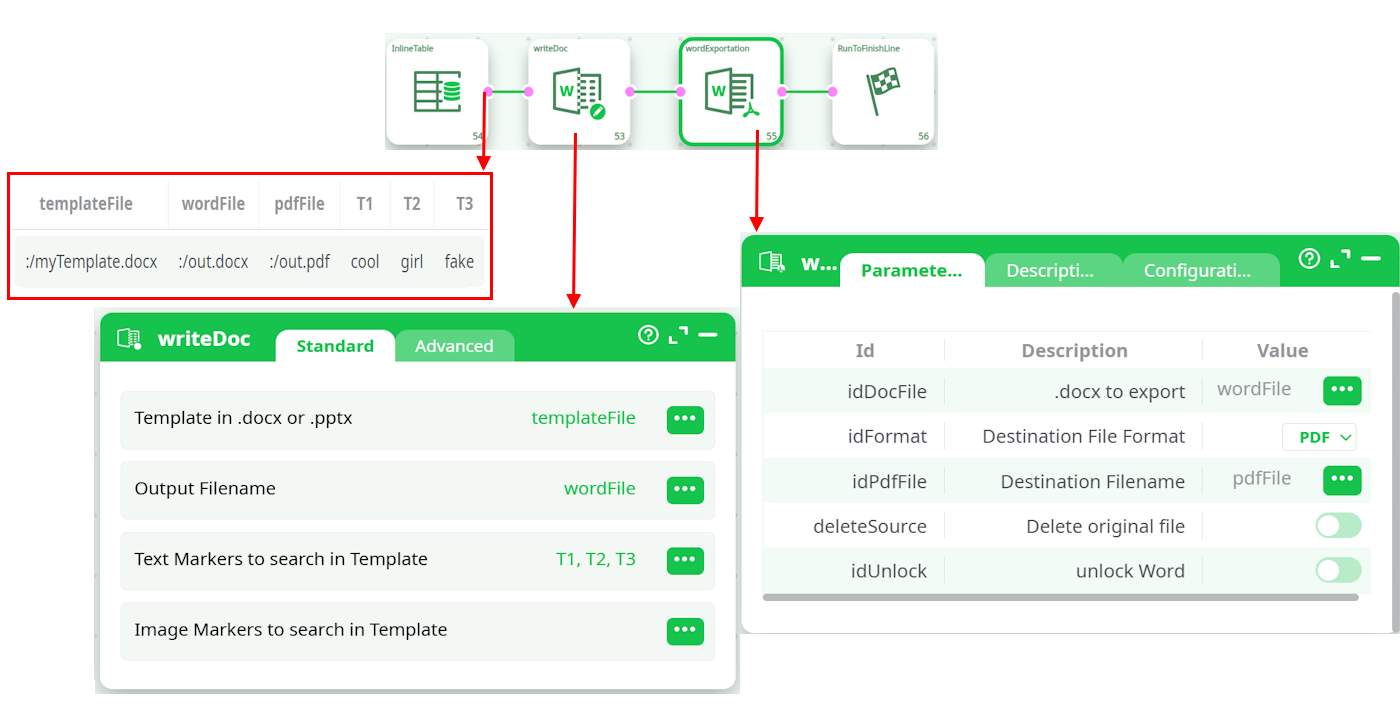
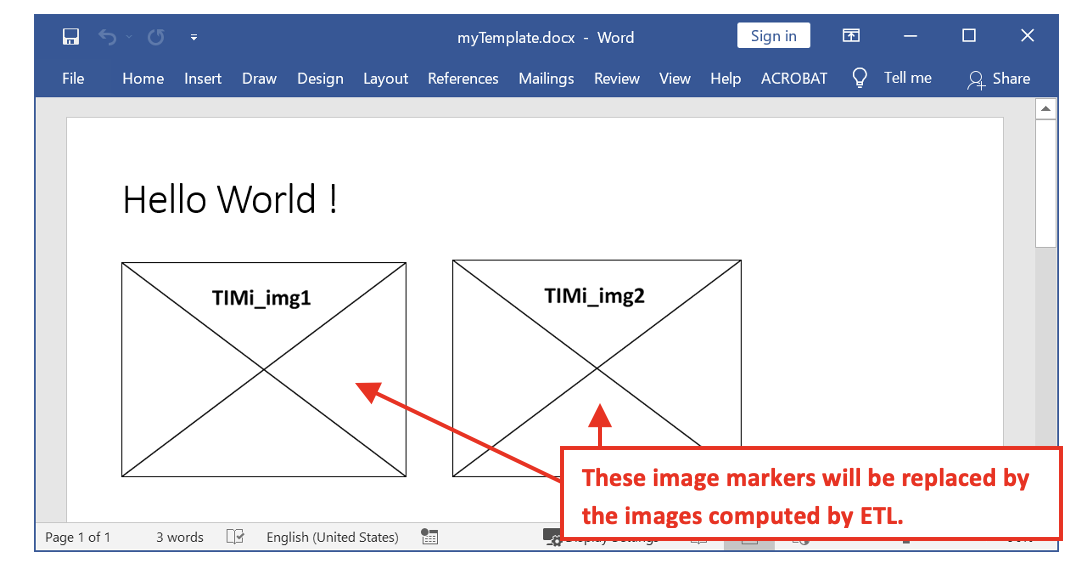
Let’s give an example of processing for “Image Markers”: Let’s assume that we have the following template named “myTemplate.docx”:
We run this pipeline:
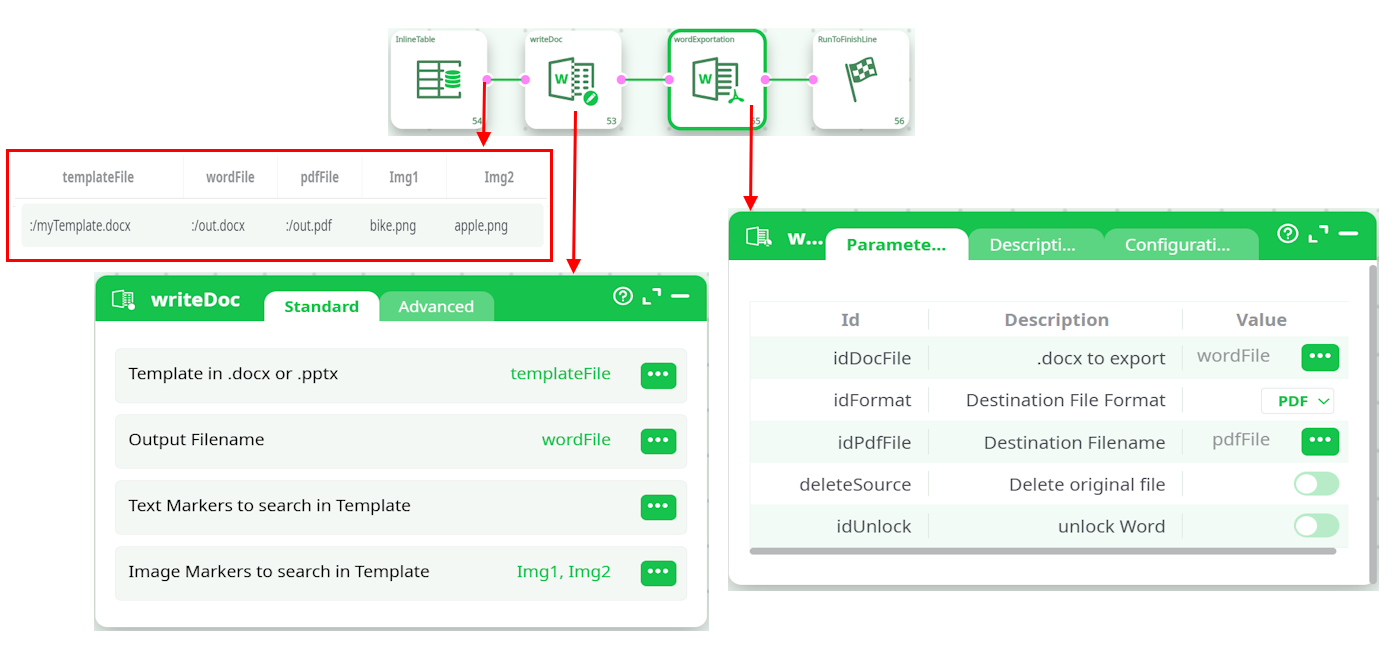
This will produce a MS-Word file named “out.docx” (and a PDF file named “out.pdf”) that contains: