¶ Description
Unlock access to Google services.
¶ Parameters
¶ Parameters Tab
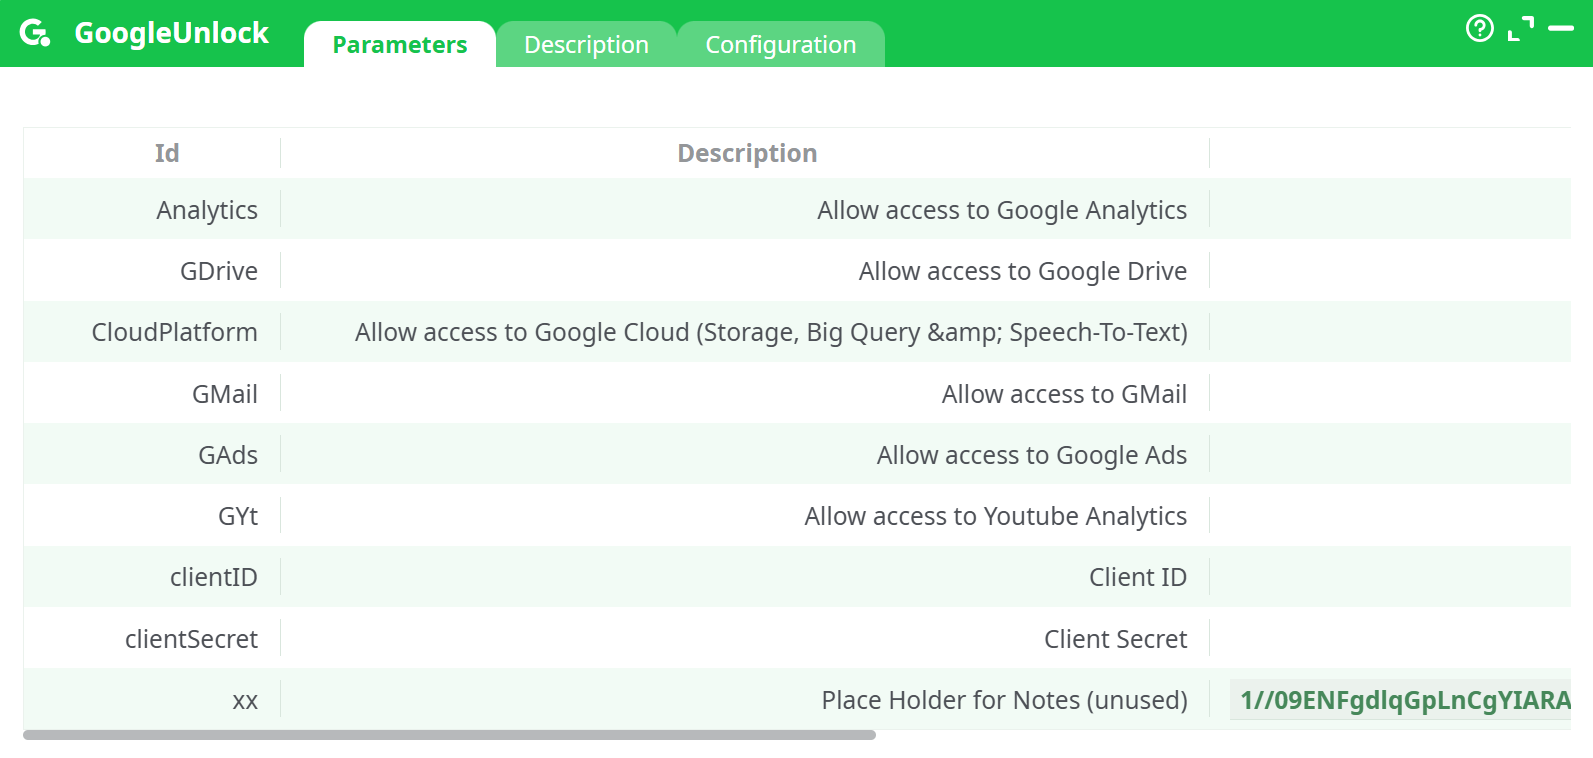
Parameters:
- Developer mode
- Access to Google Anatytics
- Access to Google Drive
- Access to Google Cloud (storage, big query& Speech-to-text)
- Access to Gmail
- Access to google Ads
- Client ID
¶ Description Tab
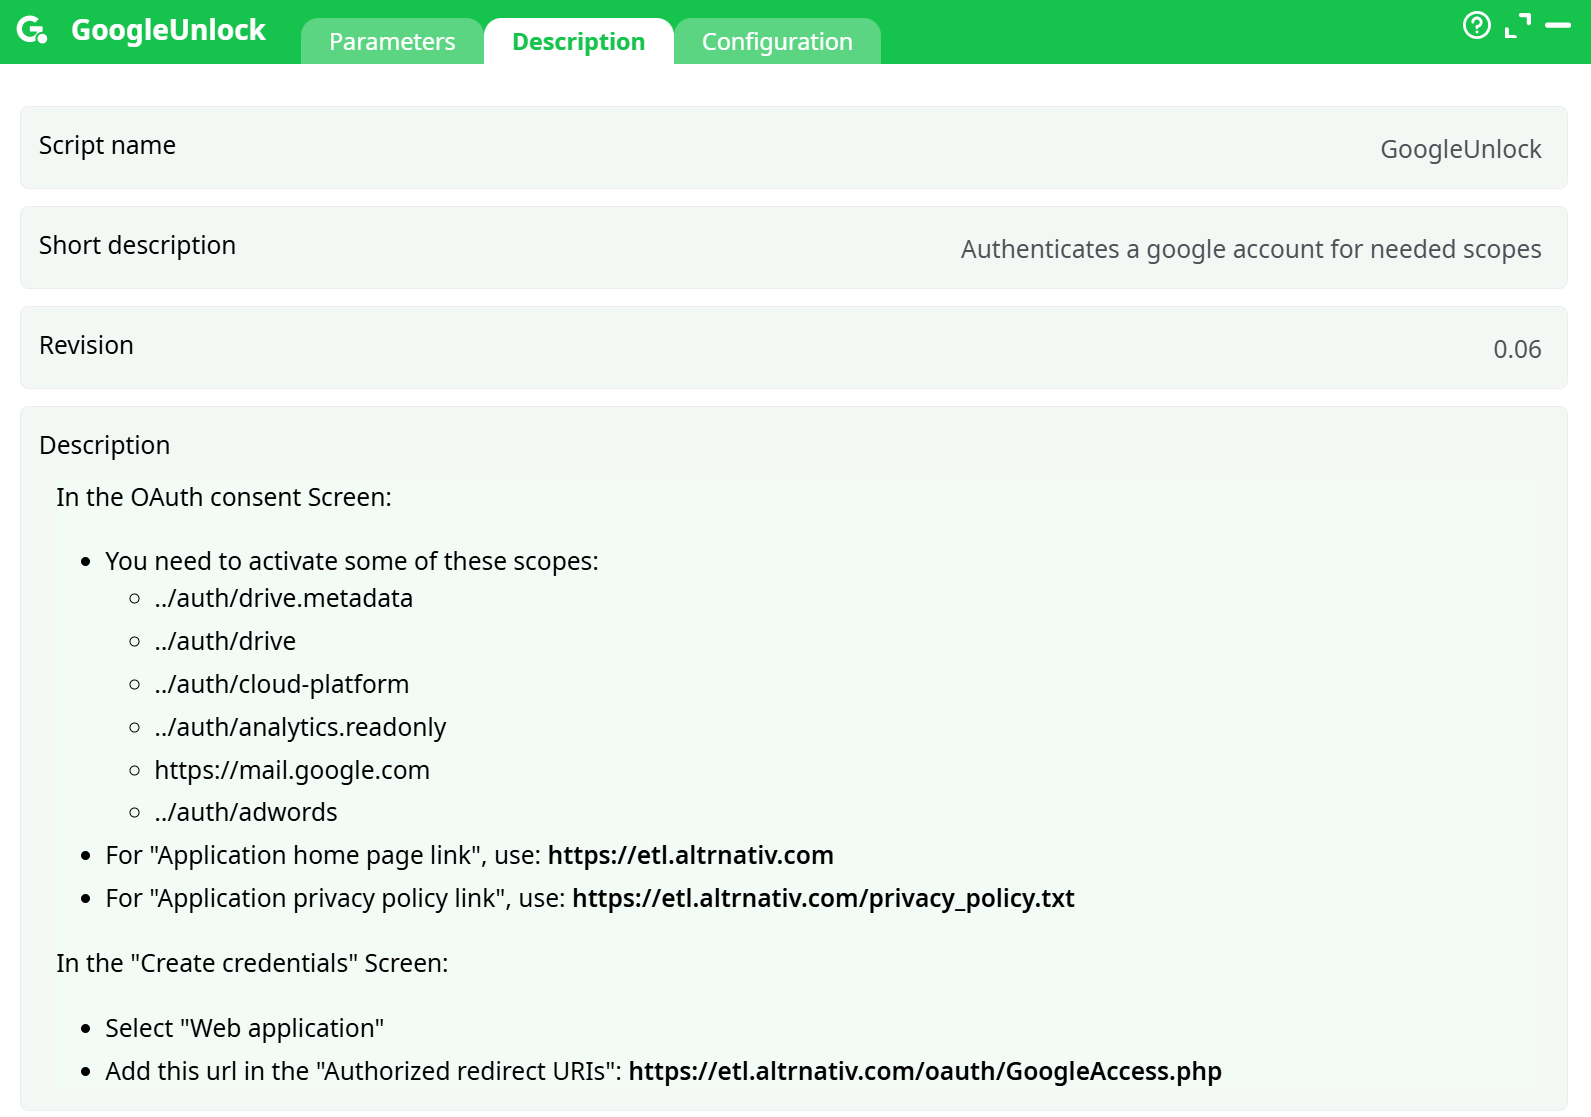
Parameters:
- Script name
- Short description
- Revision
- Decription
¶ Configuration Tab
See dedicated page for more information.
¶ About
Before using any of the following actions, you need to obtain Google credentials.
Specifically, you must retrieve the following three parameters from Google:
- Client ID
- Client Secret
- Refresh Token
These credentials are required for the following modules:
-
GDrive
- List files on a GDrive
- Download files from a GDrive
- Upload files to a GDrive
- Delete files stored in a GDrive
-
Cloud Storage
- List files on Google Cloud Storage
- Download files from Google Cloud Storage
- Upload files to Google Cloud Storage
- List all your Google Cloud Storage Buckets
- Delete files from Google Cloud Storage
-
BigQuery
- Execute a SQL query on BigQuery
- Upload CSV files to BigQuery
-
Google Analytics
-
Google Speech-to-Text
NOTE:
To get your Google credentials, you must be a paying customer of G Suite Basic or G Suite Business.
As of June 2020, the “G Suite Basic” subscription is $6/month.
You can cancel your subscription as soon as you have obtained your credentials — i.e., once you have your Client ID (obtained at step 9.7), Client Secret (also at step 9.7), and Refresh Token (obtained at step 9.11).
These credentials do not expire, even if you stop paying for your G Suite account.The procedure described in this section allows you to obtain Google credentials (Client ID, Client Secret, and Refresh Token) that will unlock all Google services: GDrive, Google Cloud Storage, Google BigQuery, and Google Speech-to-Text.
For security reasons, you might want to obtain credentials that are more limited (e.g., credentials that provide access only to GDrive, and not Cloud Storage).
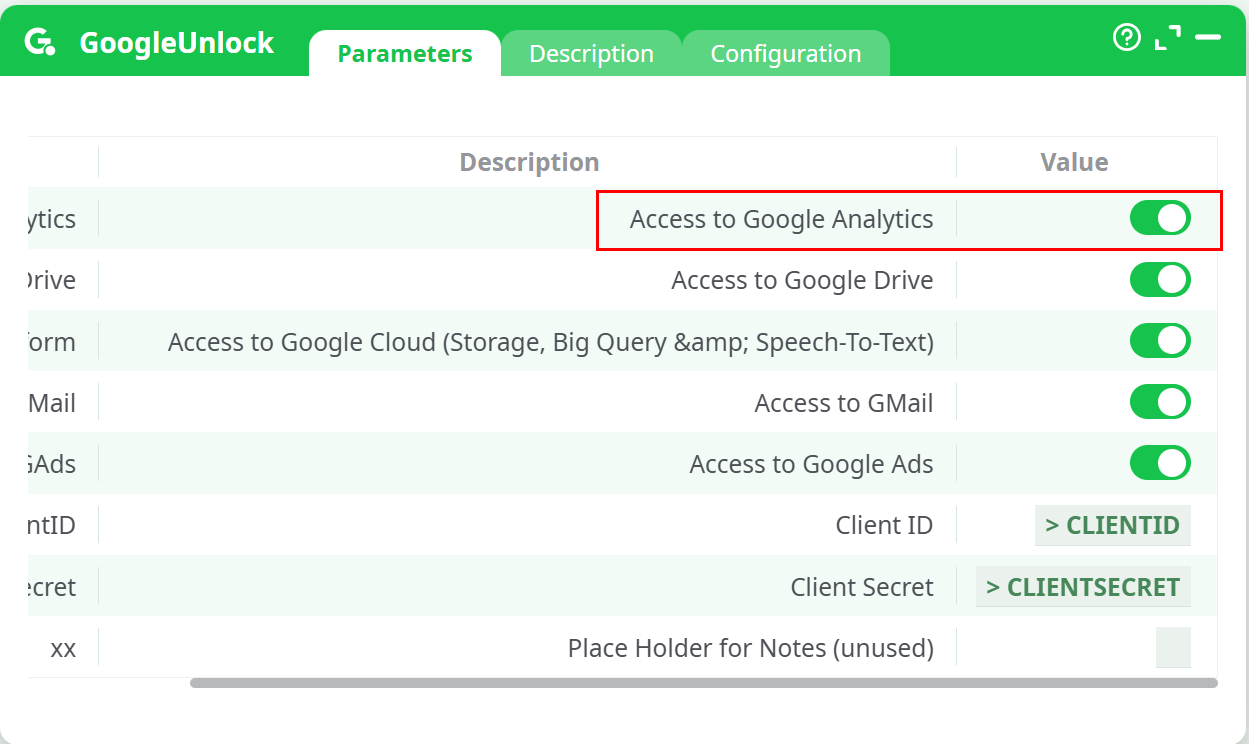
If you want credentials that are:• …limited to “Google Analytics” only:
- Skip steps 4, 5, and 6 in the procedure below.
- At step 8.4, select only the following scope:
- ../auth/analytics.readonly
- At step 9.7, enable (i.e., check) the option “Access to Google Analytics”.
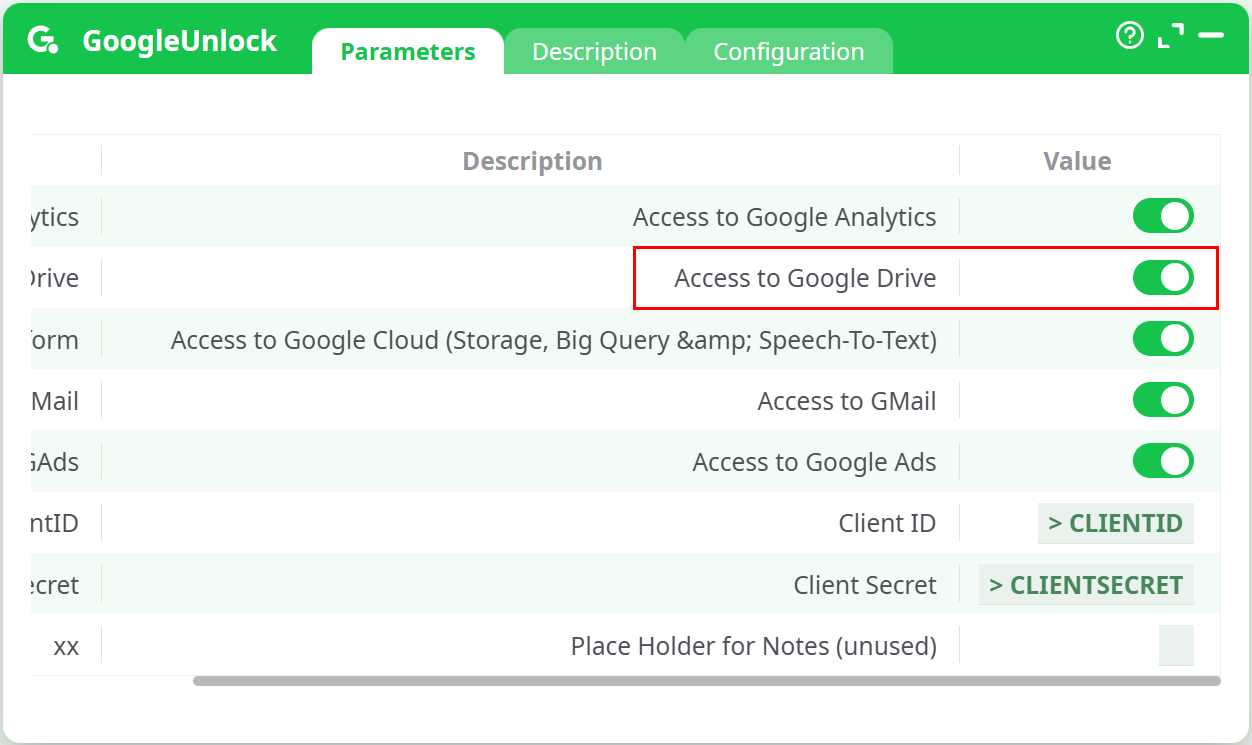
•> • …limited to “GDrive” only:
- Skip steps 5, 6, and 7 in the procedure below.
- At step 8.4, select only the following scopes:
- ../auth/drive.metadata
(Change file-related metadata in your Google Drive)- ../auth/drive
(See, download, and upload files from/to your Google Drive)- At step 9.7, enable (i.e., check) the option “Access to GoogleDrive”.
…limited to “Cloud Storage, BigQuery, and Speech-to-Text” only:
- Skip steps 4 and 7 in the procedure below.
- At step 8.4, select only the following scope:
- ../auth/cloud-platform
- At step 9.7, enable (i.e., check) the option “Access to Cloud Storage and BigQuery”.
The procedure to obtain your Google credentials (i.e., your Client ID, Client Secret, and Refresh Token) is as follows:
-
First, a word of caution:
You will need your Client ID, Client Secret, and Refresh Token to use nearly all Google Services actions inside ETL.There is no way to copy/paste these three values from one ETL action to another (this behavior is by design).
Therefore, you should store these three credentials in a secure location if you intend to reuse them later.
-
Open the Google Developer Console in your web browser:
Go to the URL:
https://console.developers.google.com
...and sign in to your Google account. -
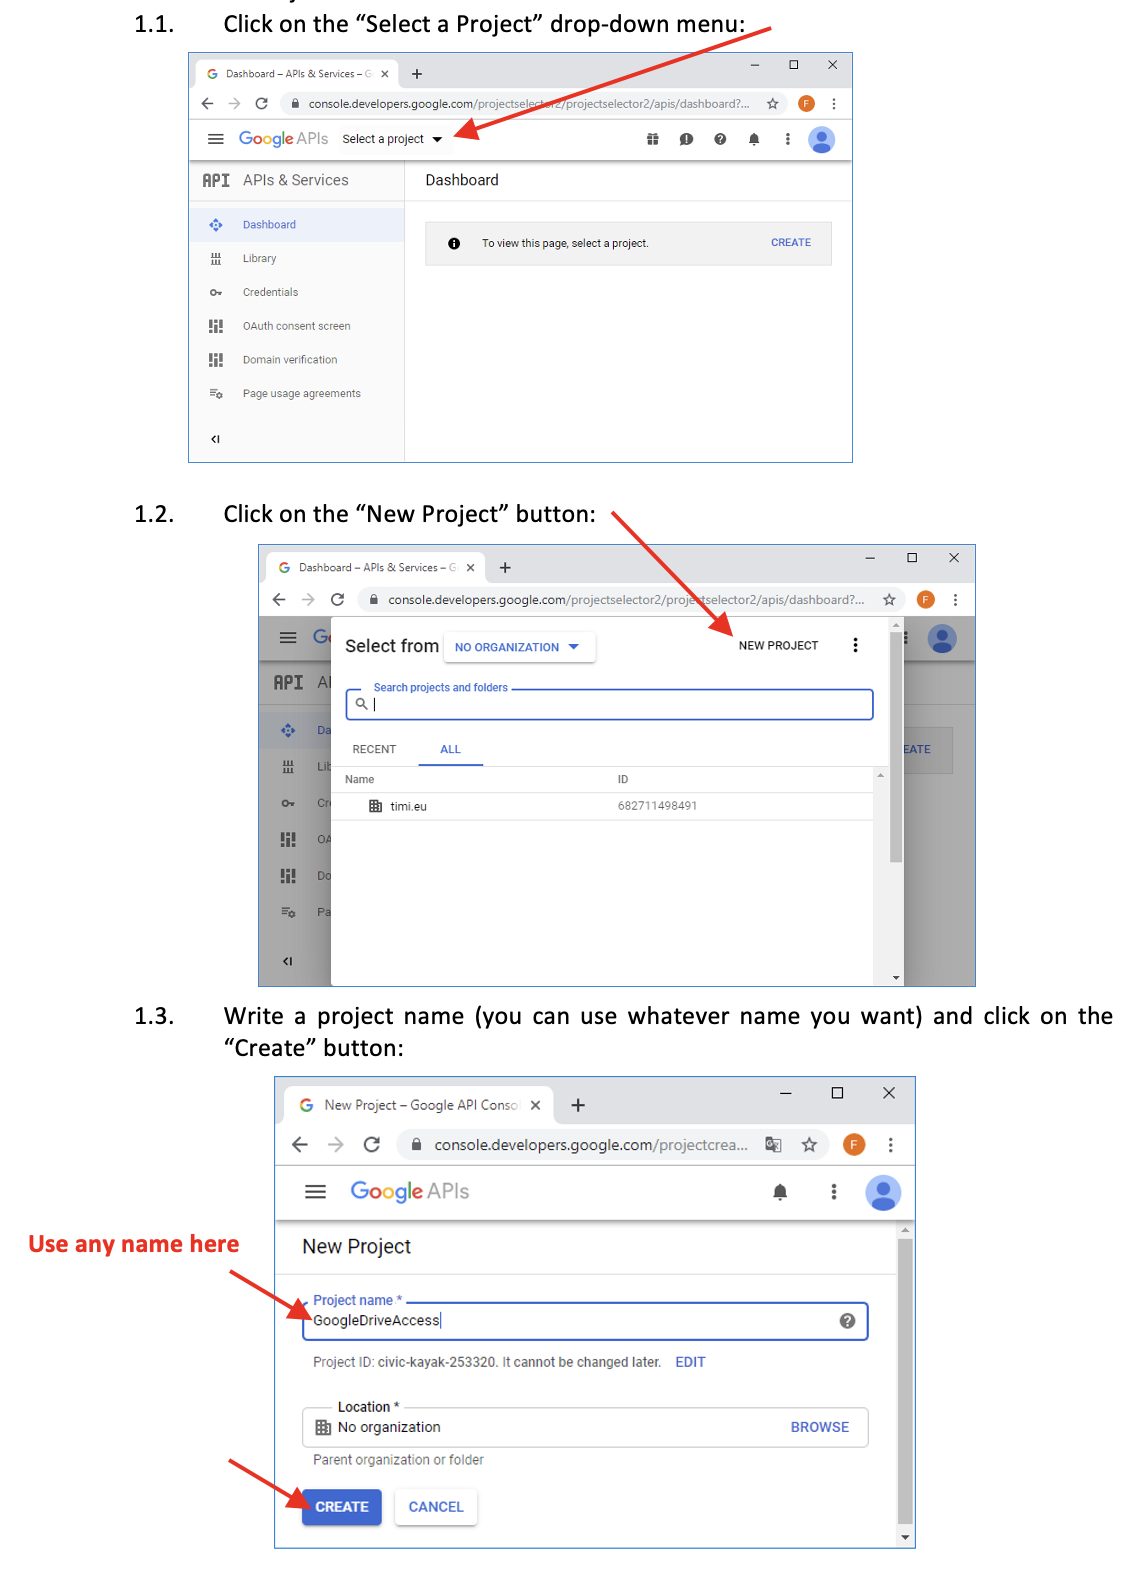
Create a new Project.
-
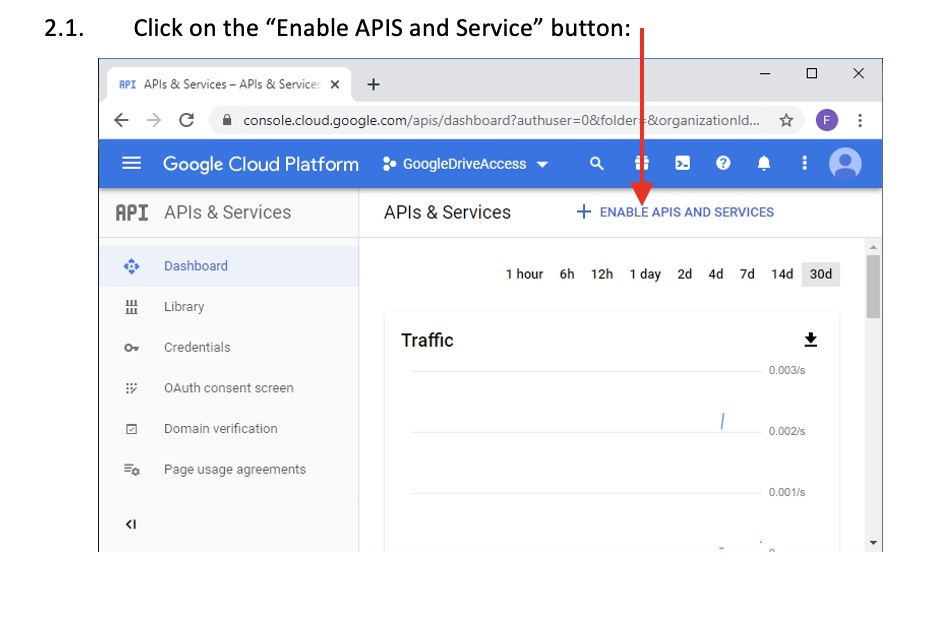
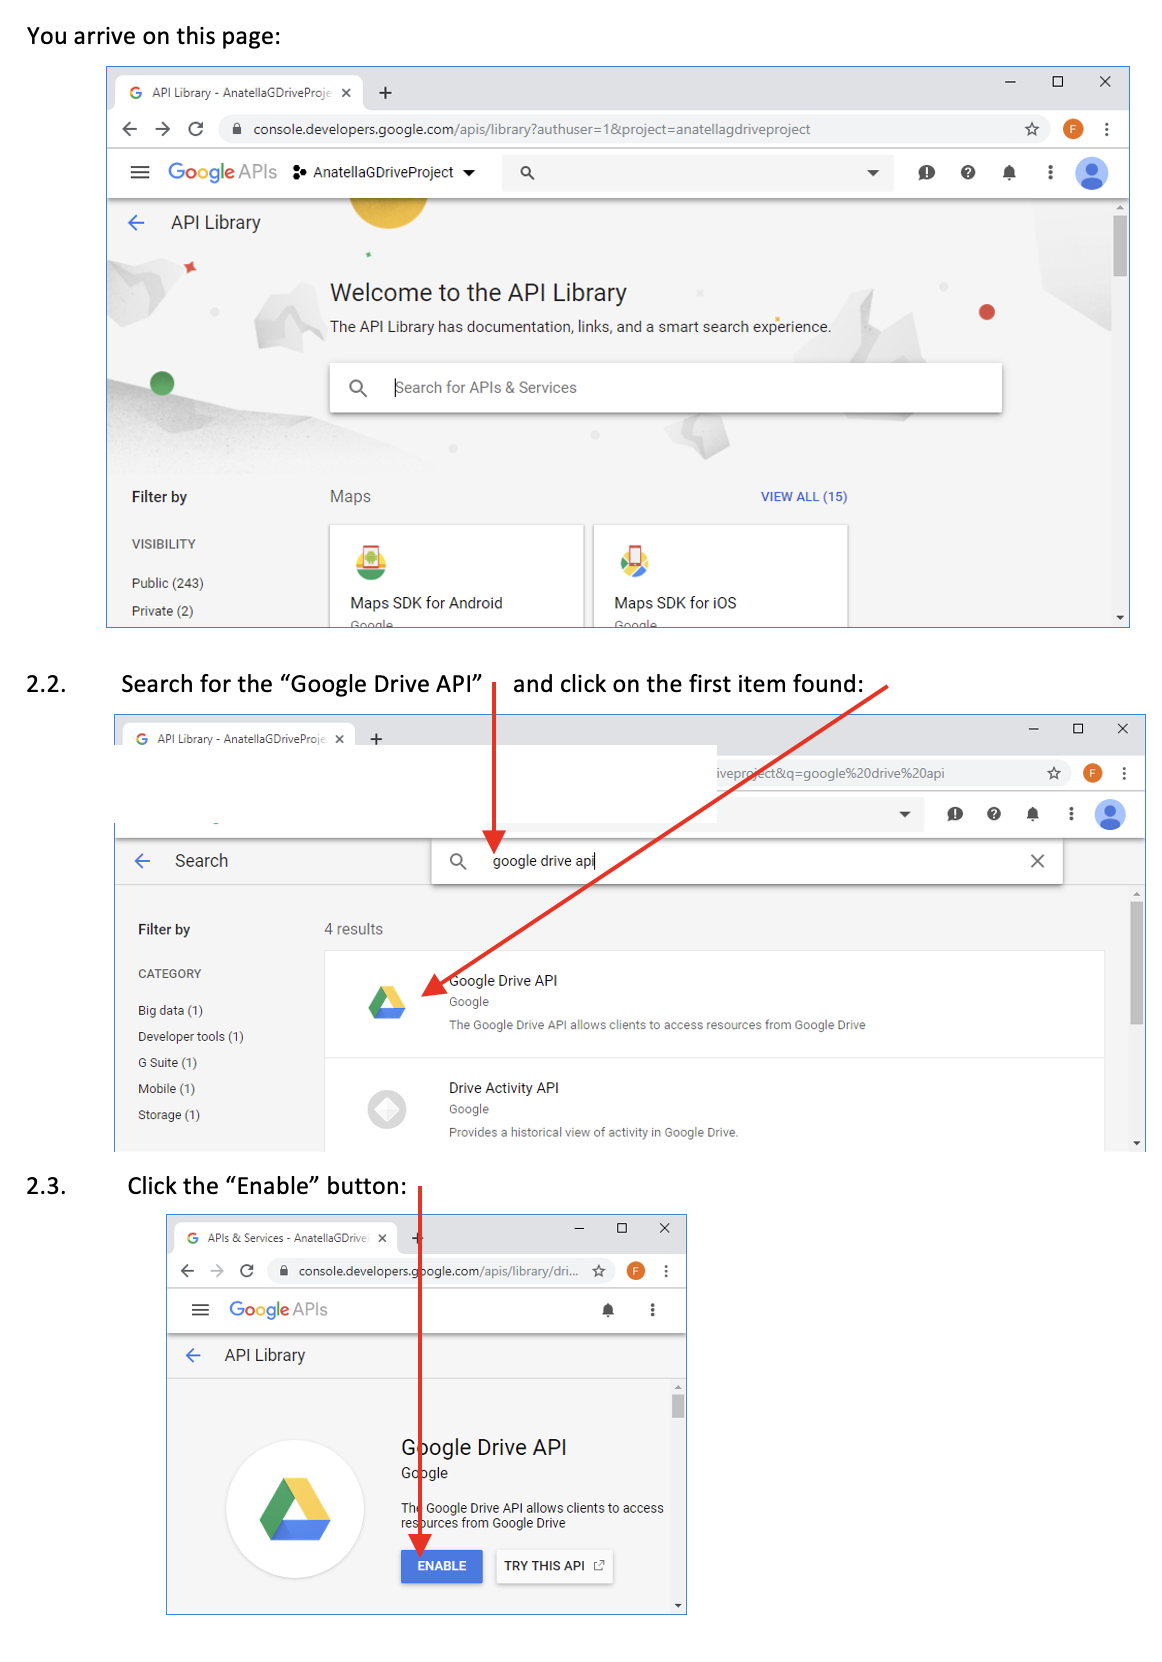
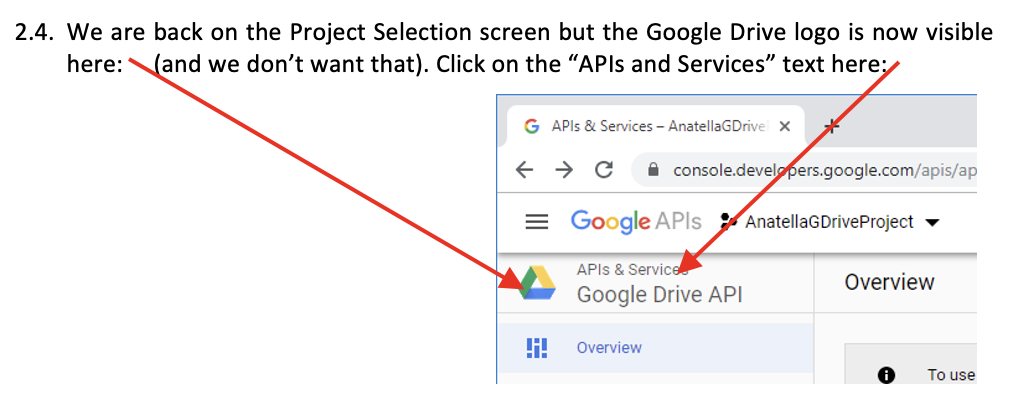
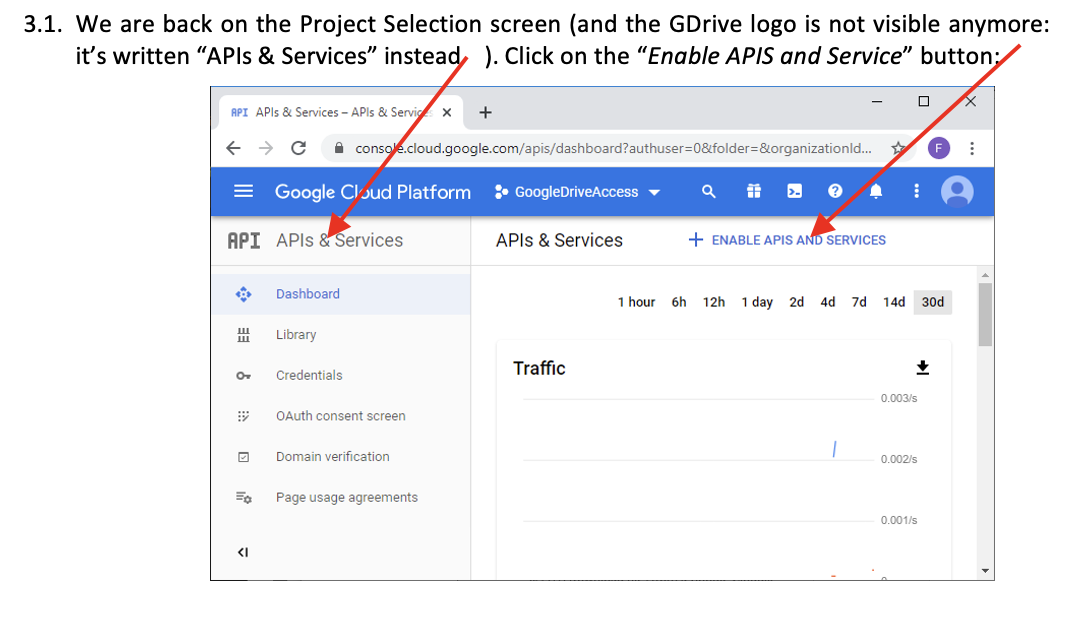
We will now enable the Google Drive API.
This API is required in order to use the Google Drive actions. These actions include:- List the files on a GDrive
- Download files from a GDrive
- Upload files to a GDrive
- Delete files stored in a GDrive
-
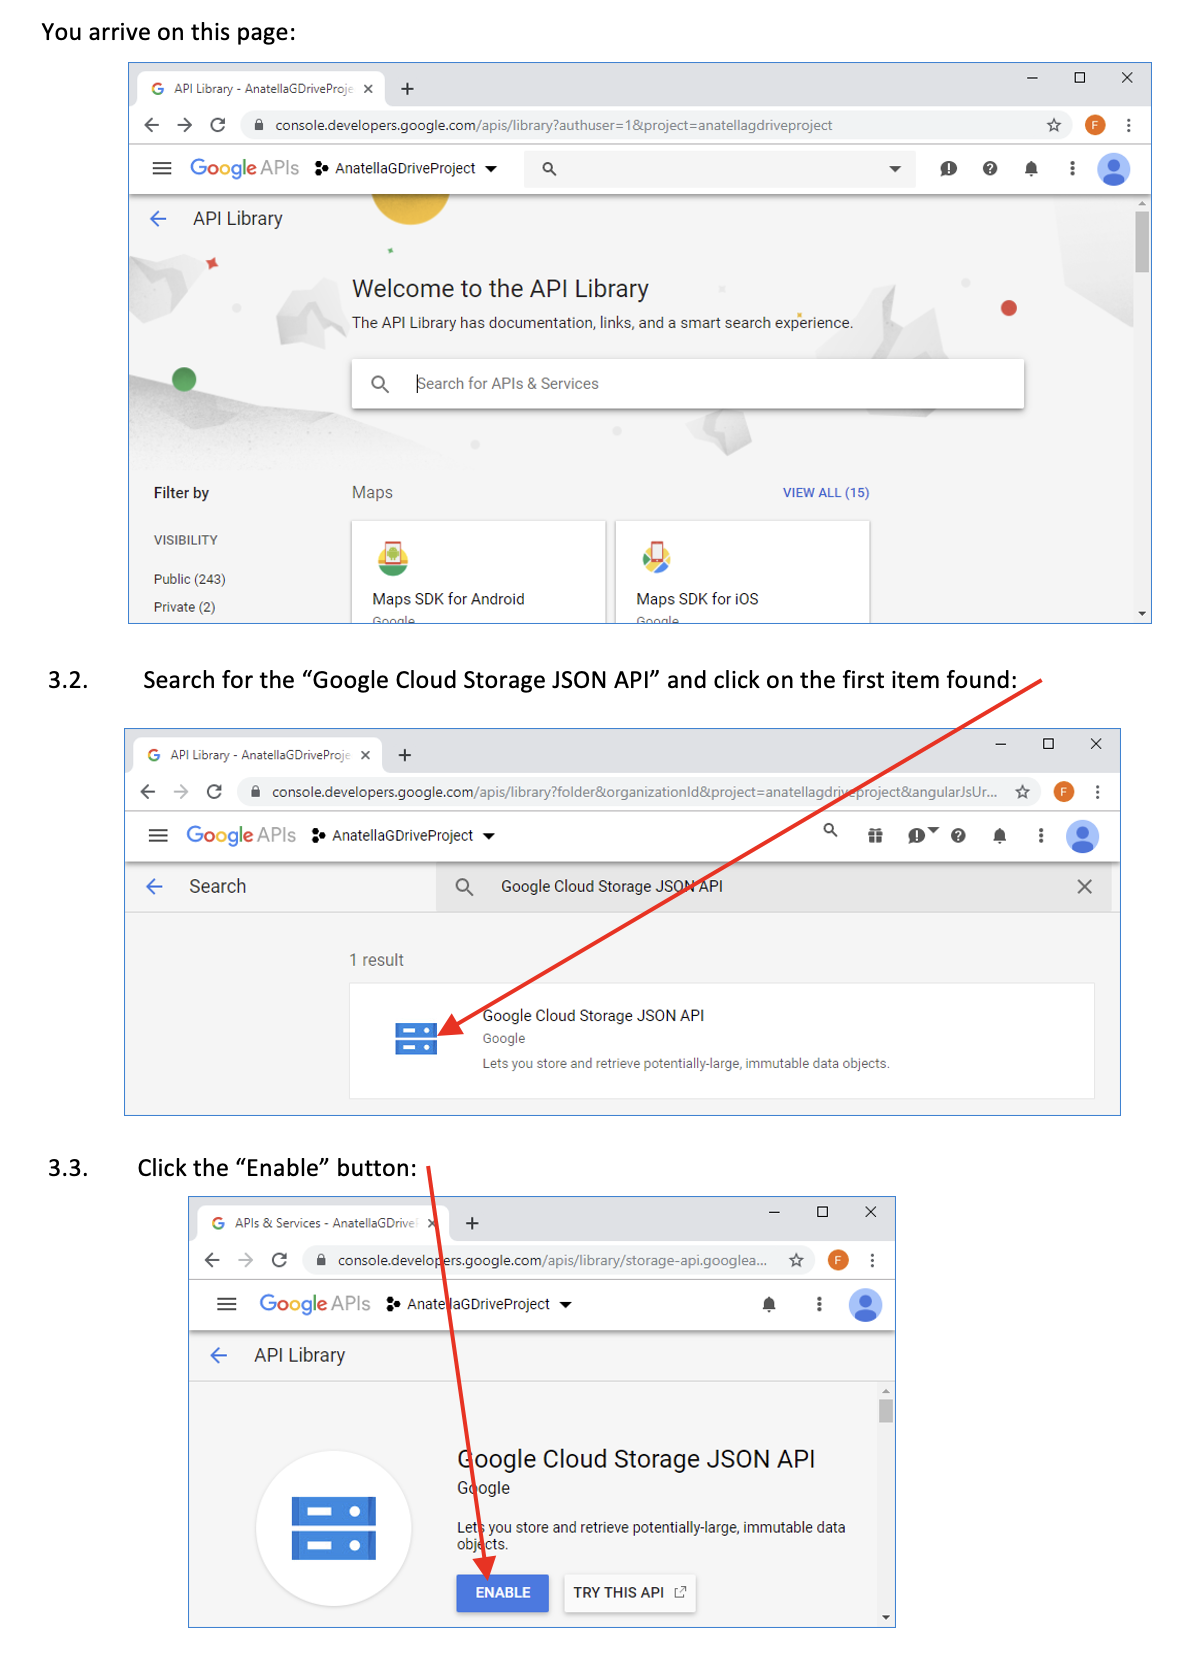
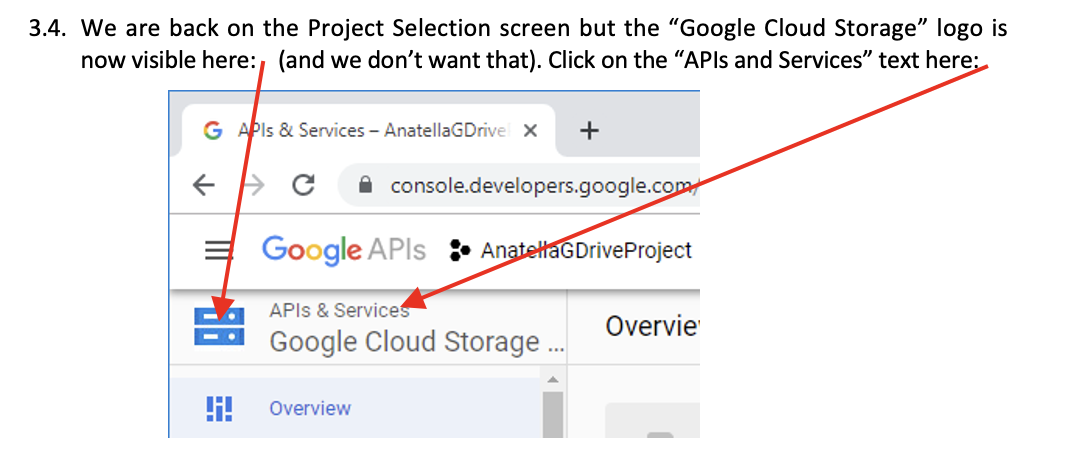
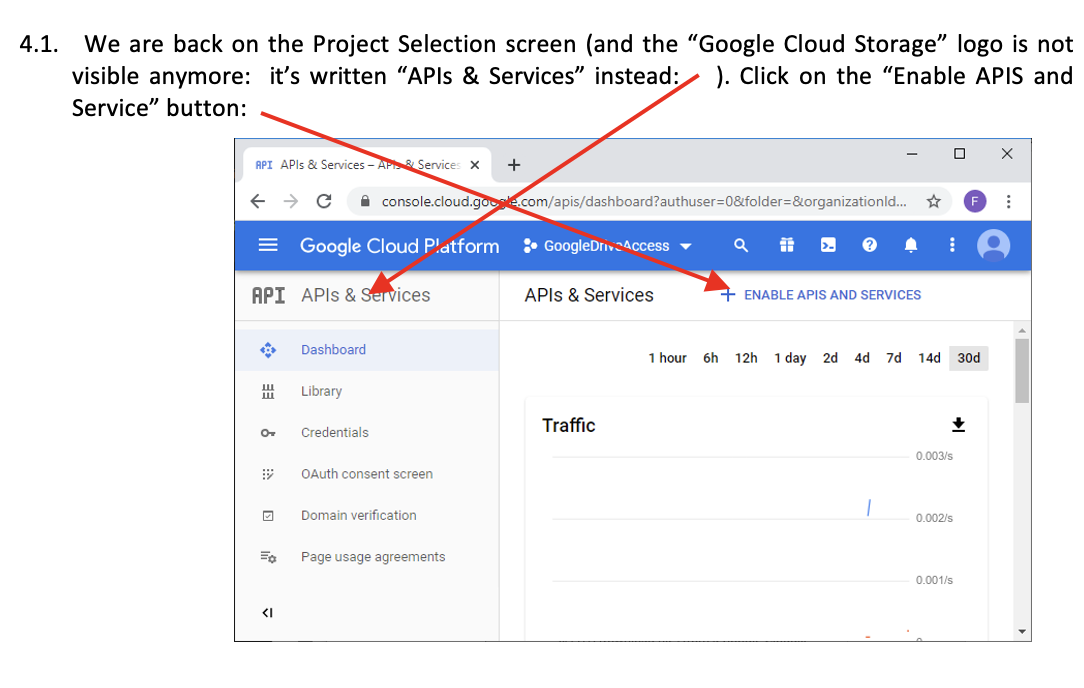
We will now enable the Google Cloud Storage JSON API.
This API is required in order to use the Google Cloud Storage actions. These actions include:- List the files on a Google Cloud Storage
- Download files from a Google Cloud Storage
- Upload files to a Google Cloud Storage
- List all your Google Cloud Storage Buckets
- Delete files from a Google Cloud Storage
-
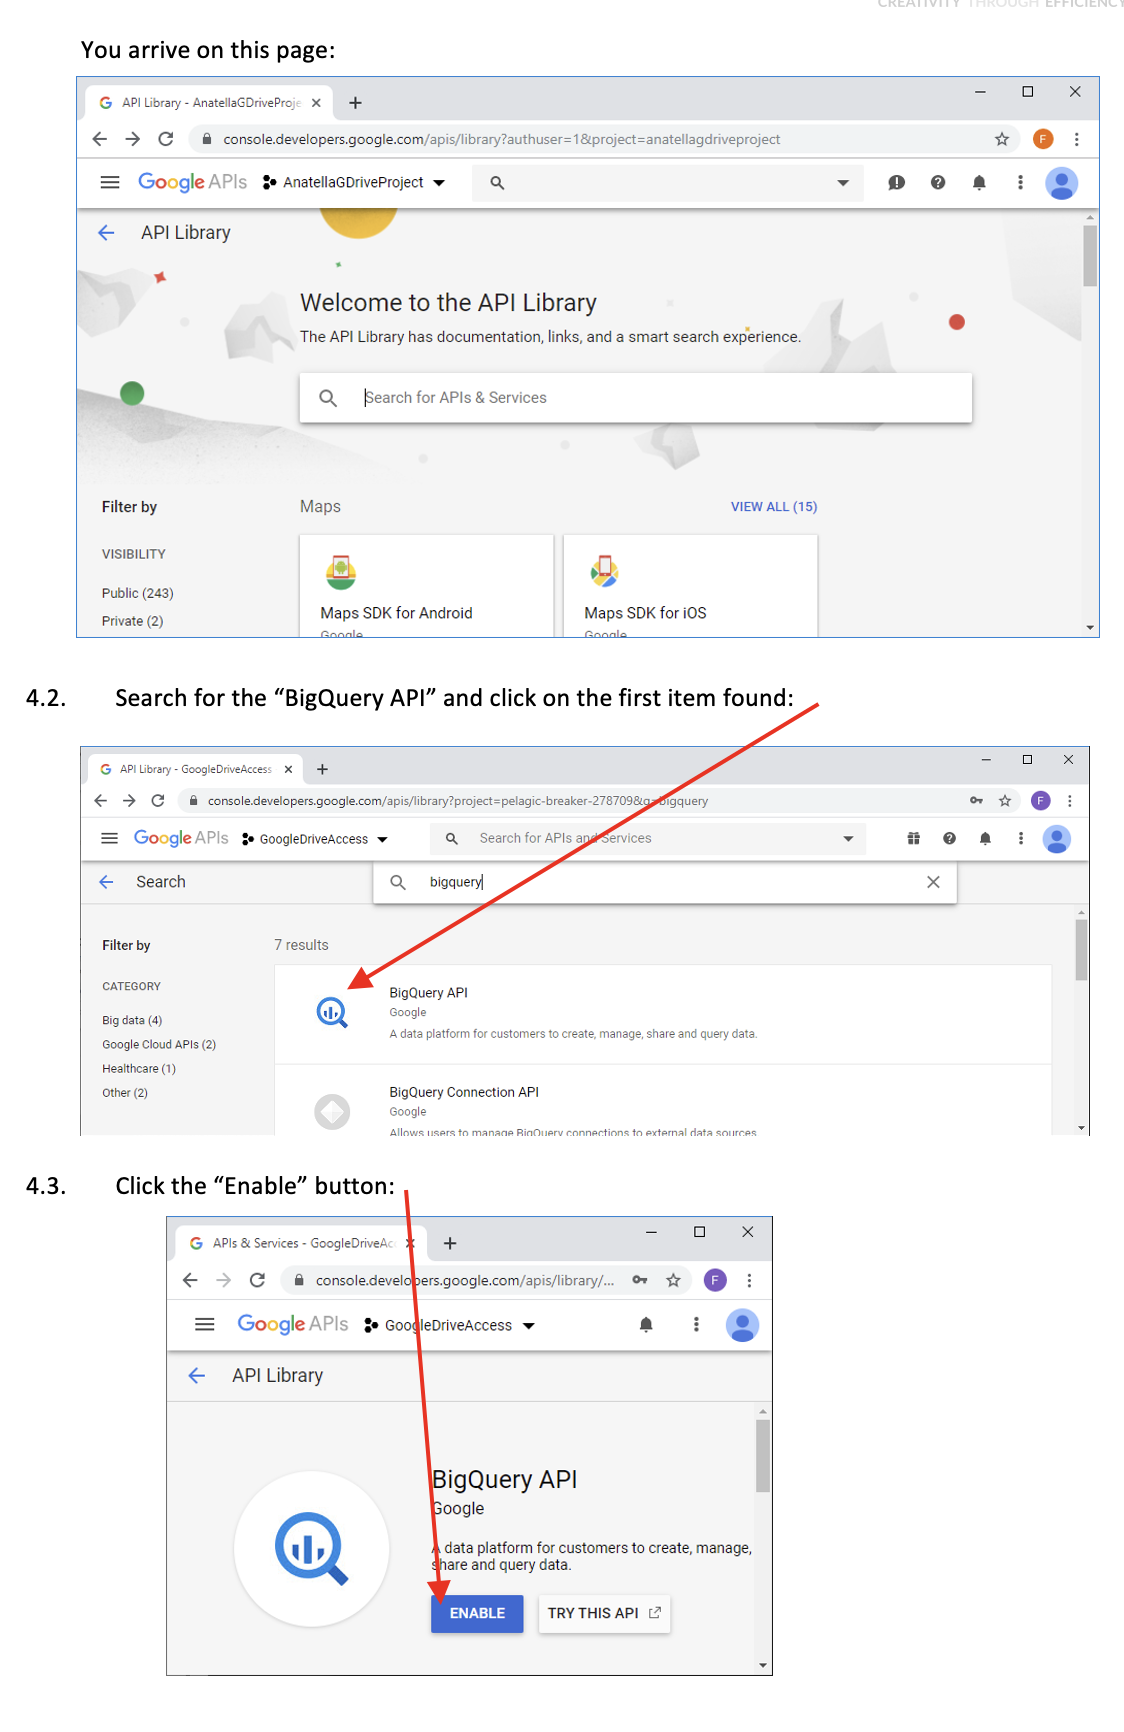
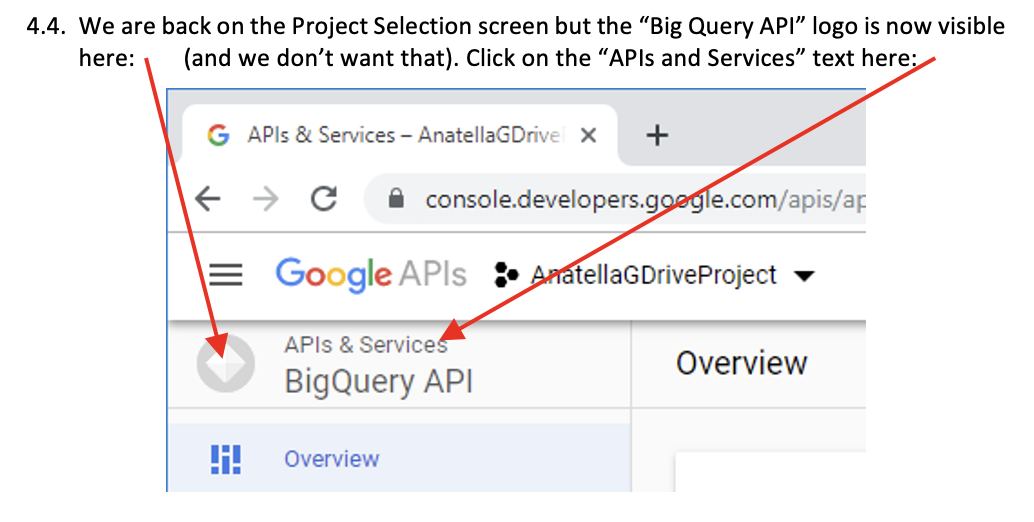
We will now enable the BigQuery API.
This API is required in order to use the Google BigQuery actions. These actions include:- Execute a SQL query on BigQuery
- Upload CSV files to BigQuery
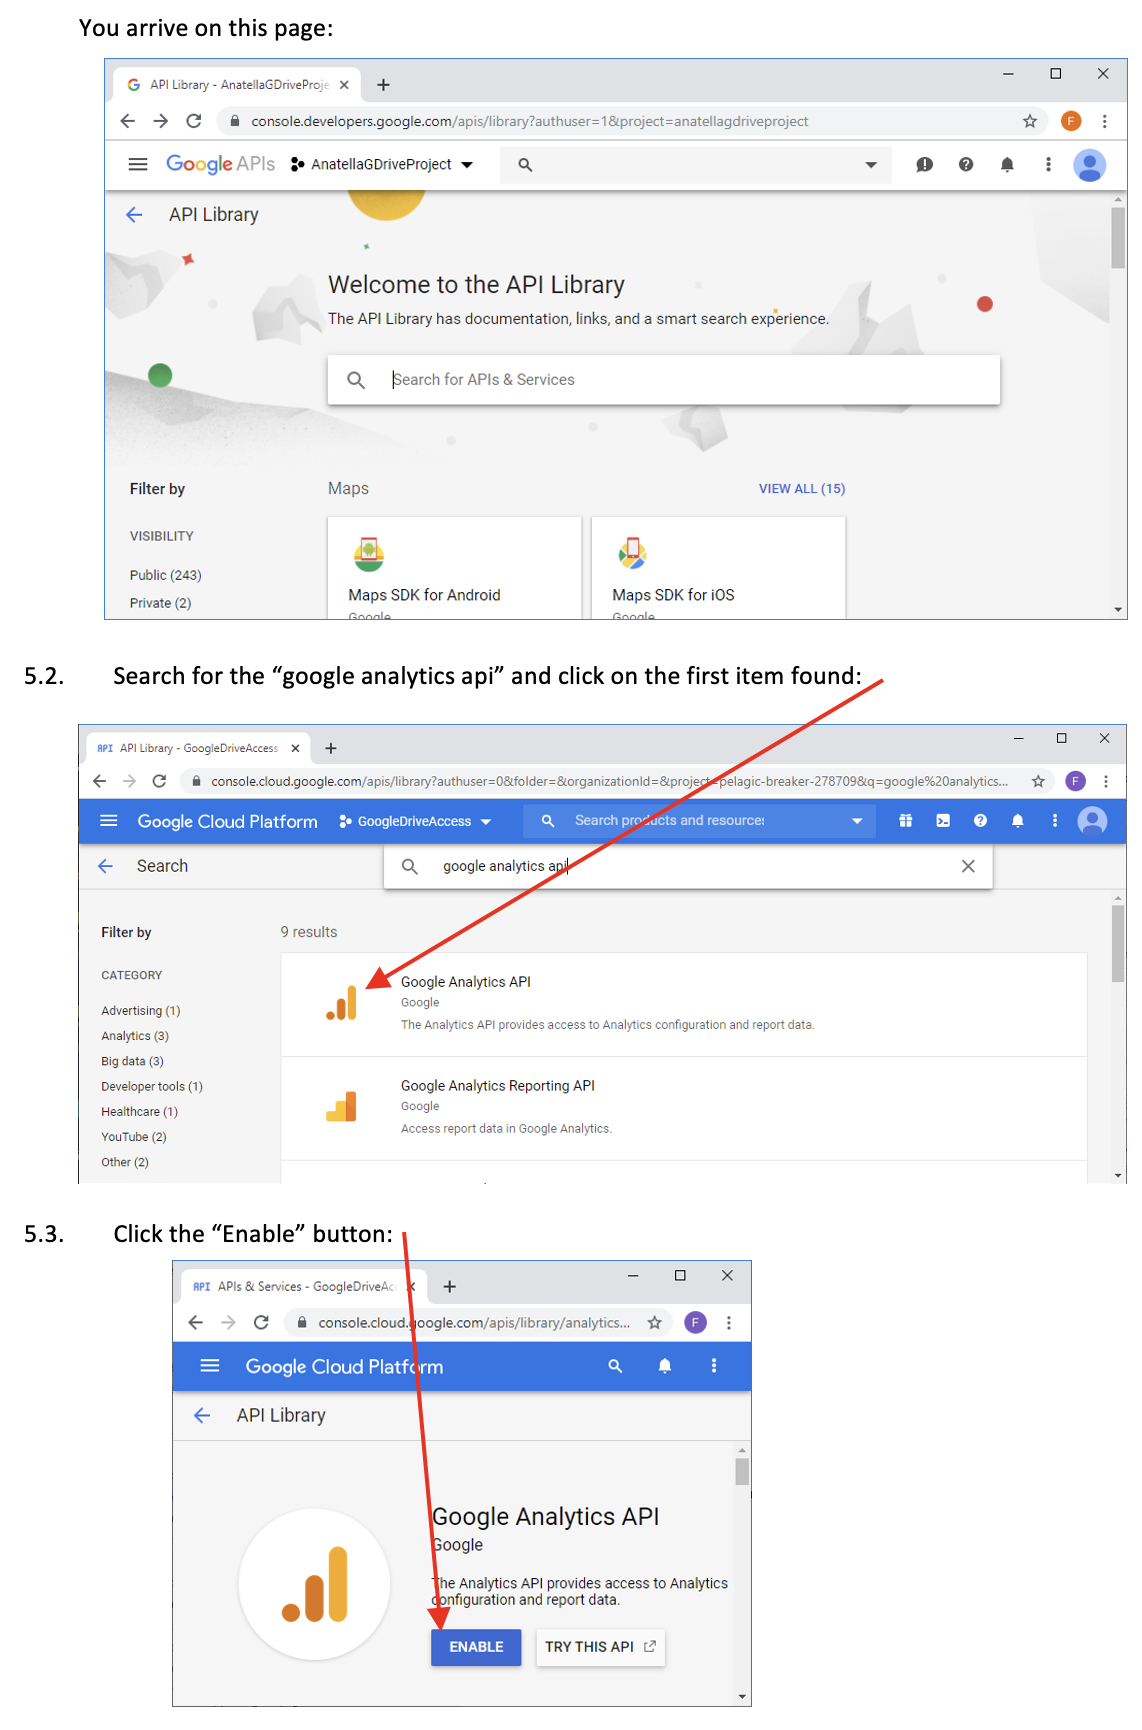
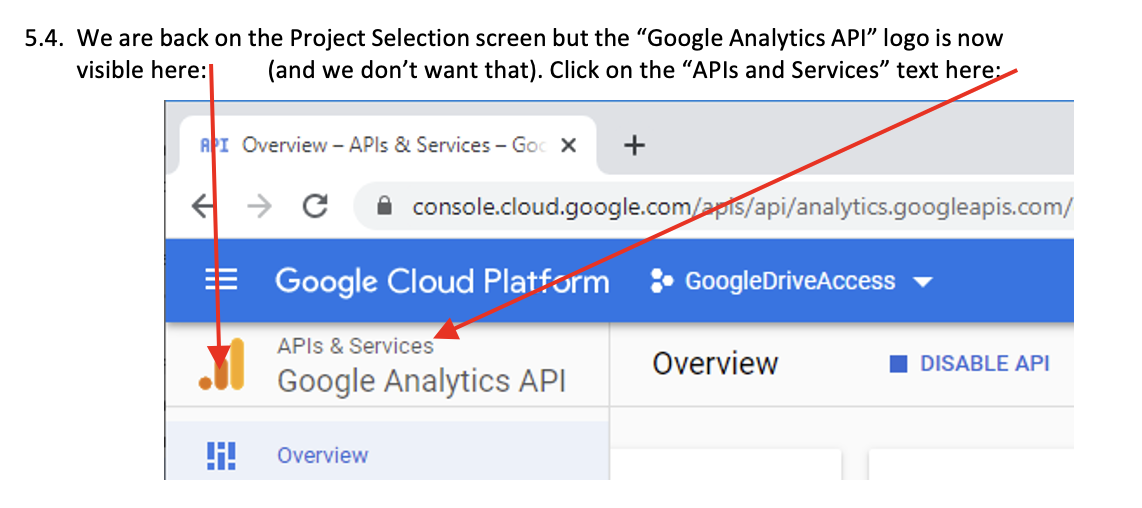
- We will now Enable the “Google Analytics API”:
This API is required to be able to use the “Google Analytics” action
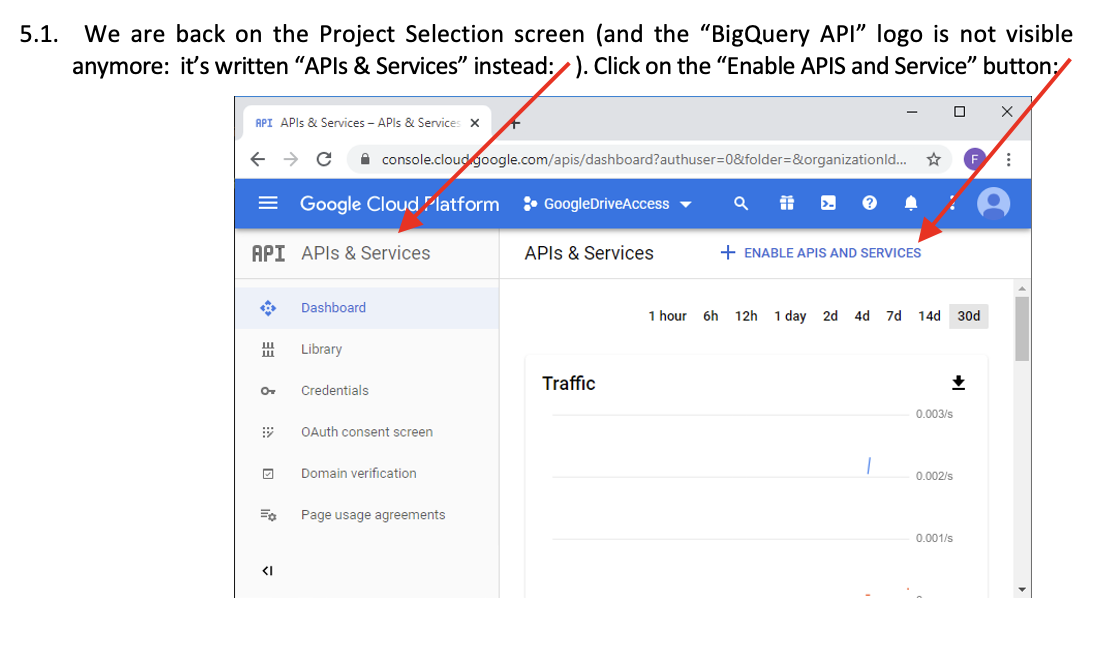
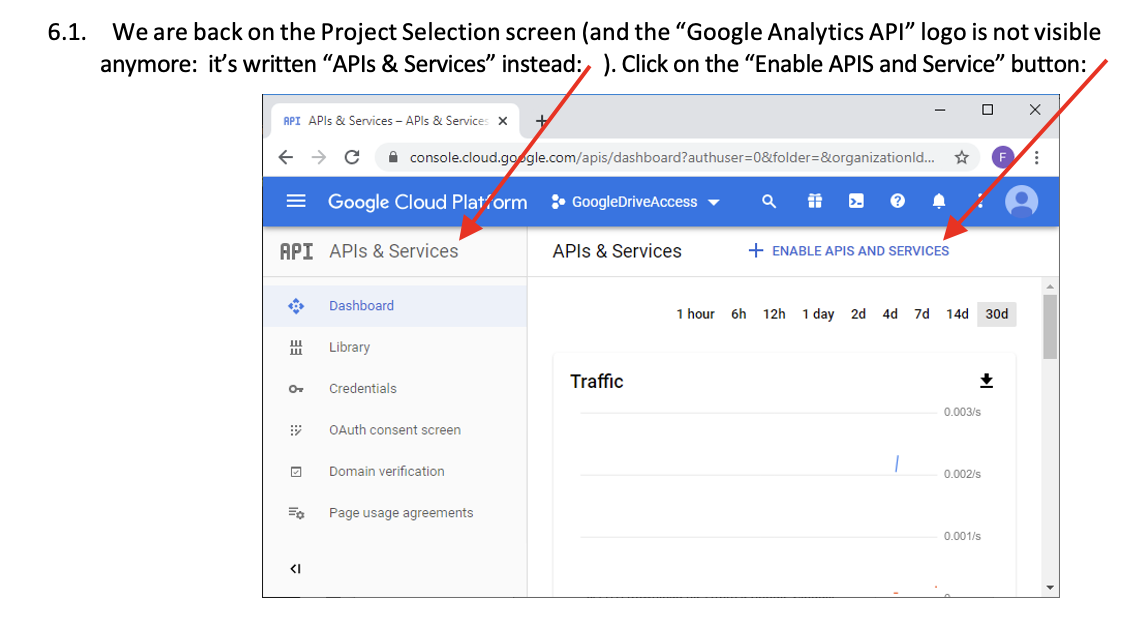
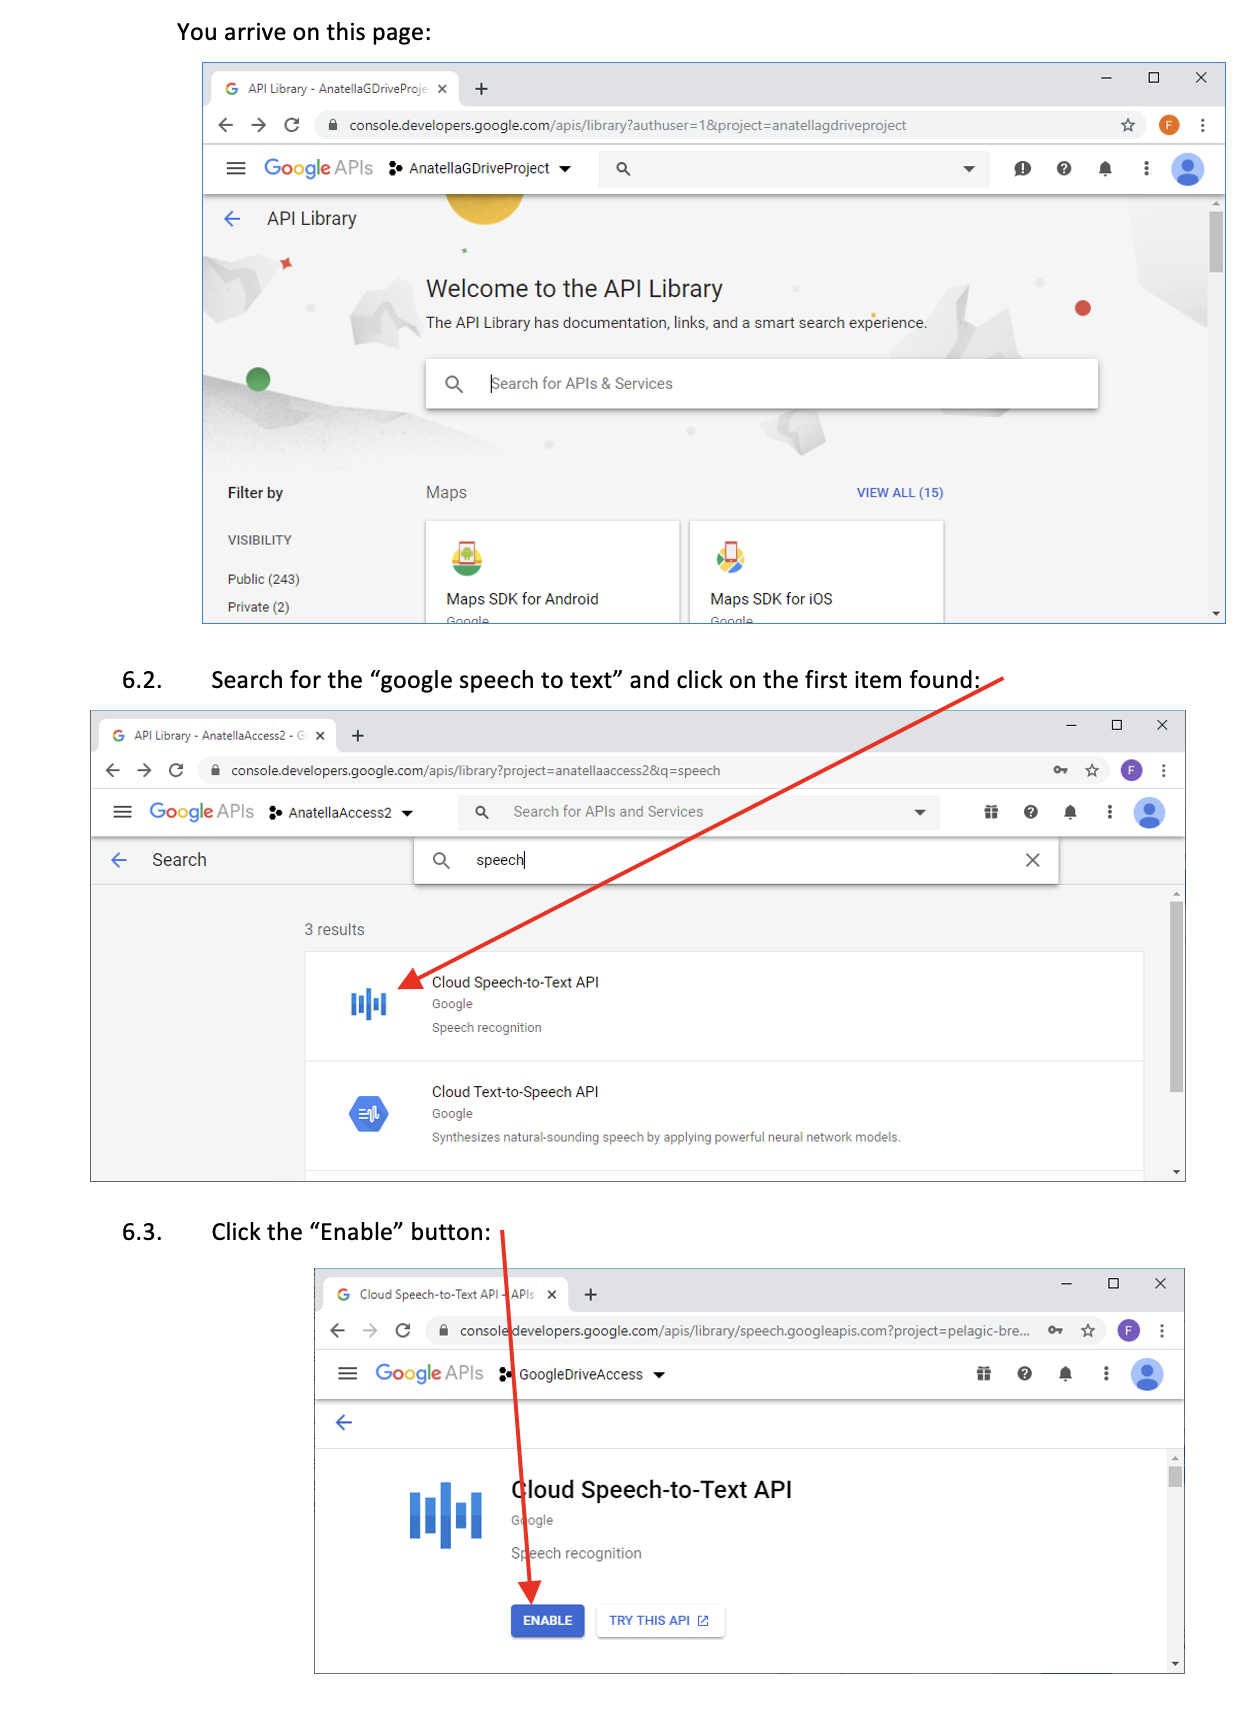
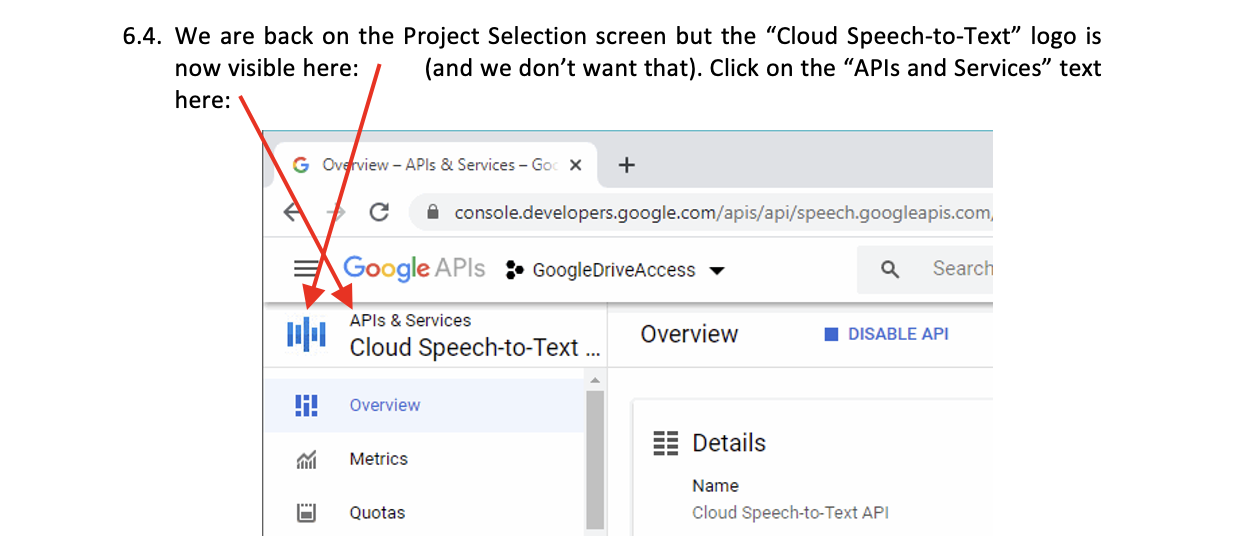
- We will now enable the Google Speech-to-Text API.
This API is required in order to use the Google Speech-to-Text action.
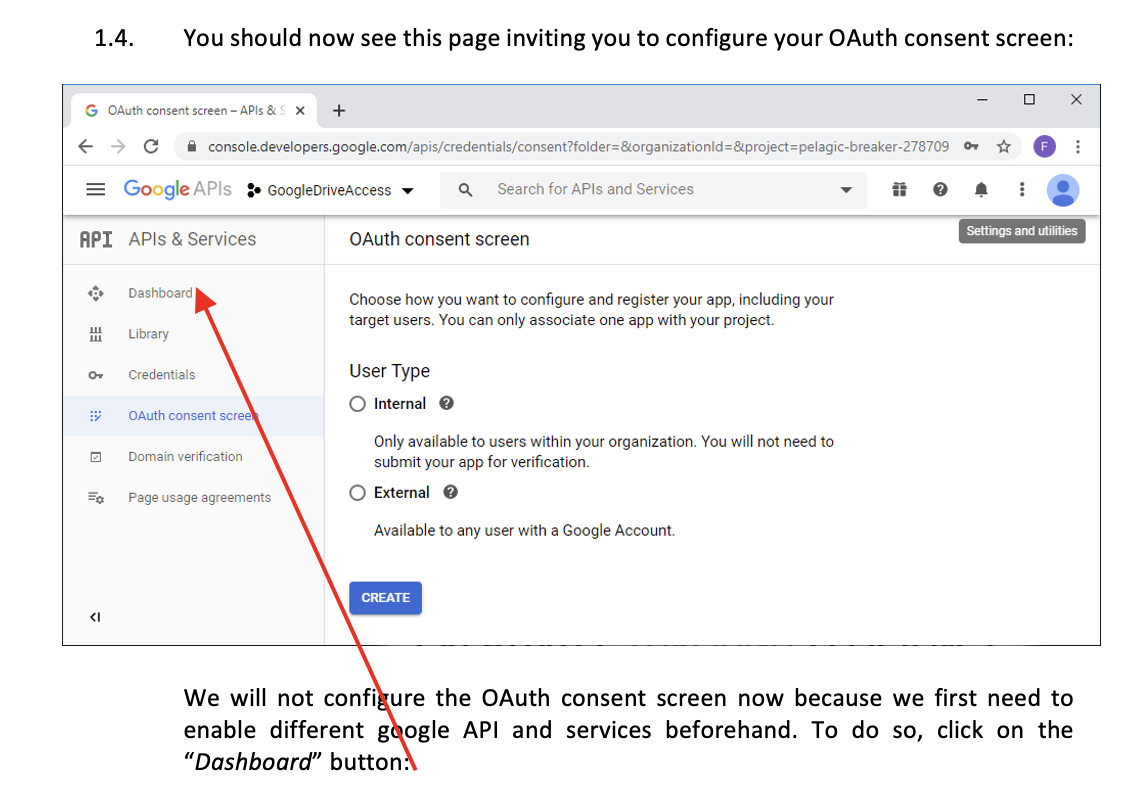
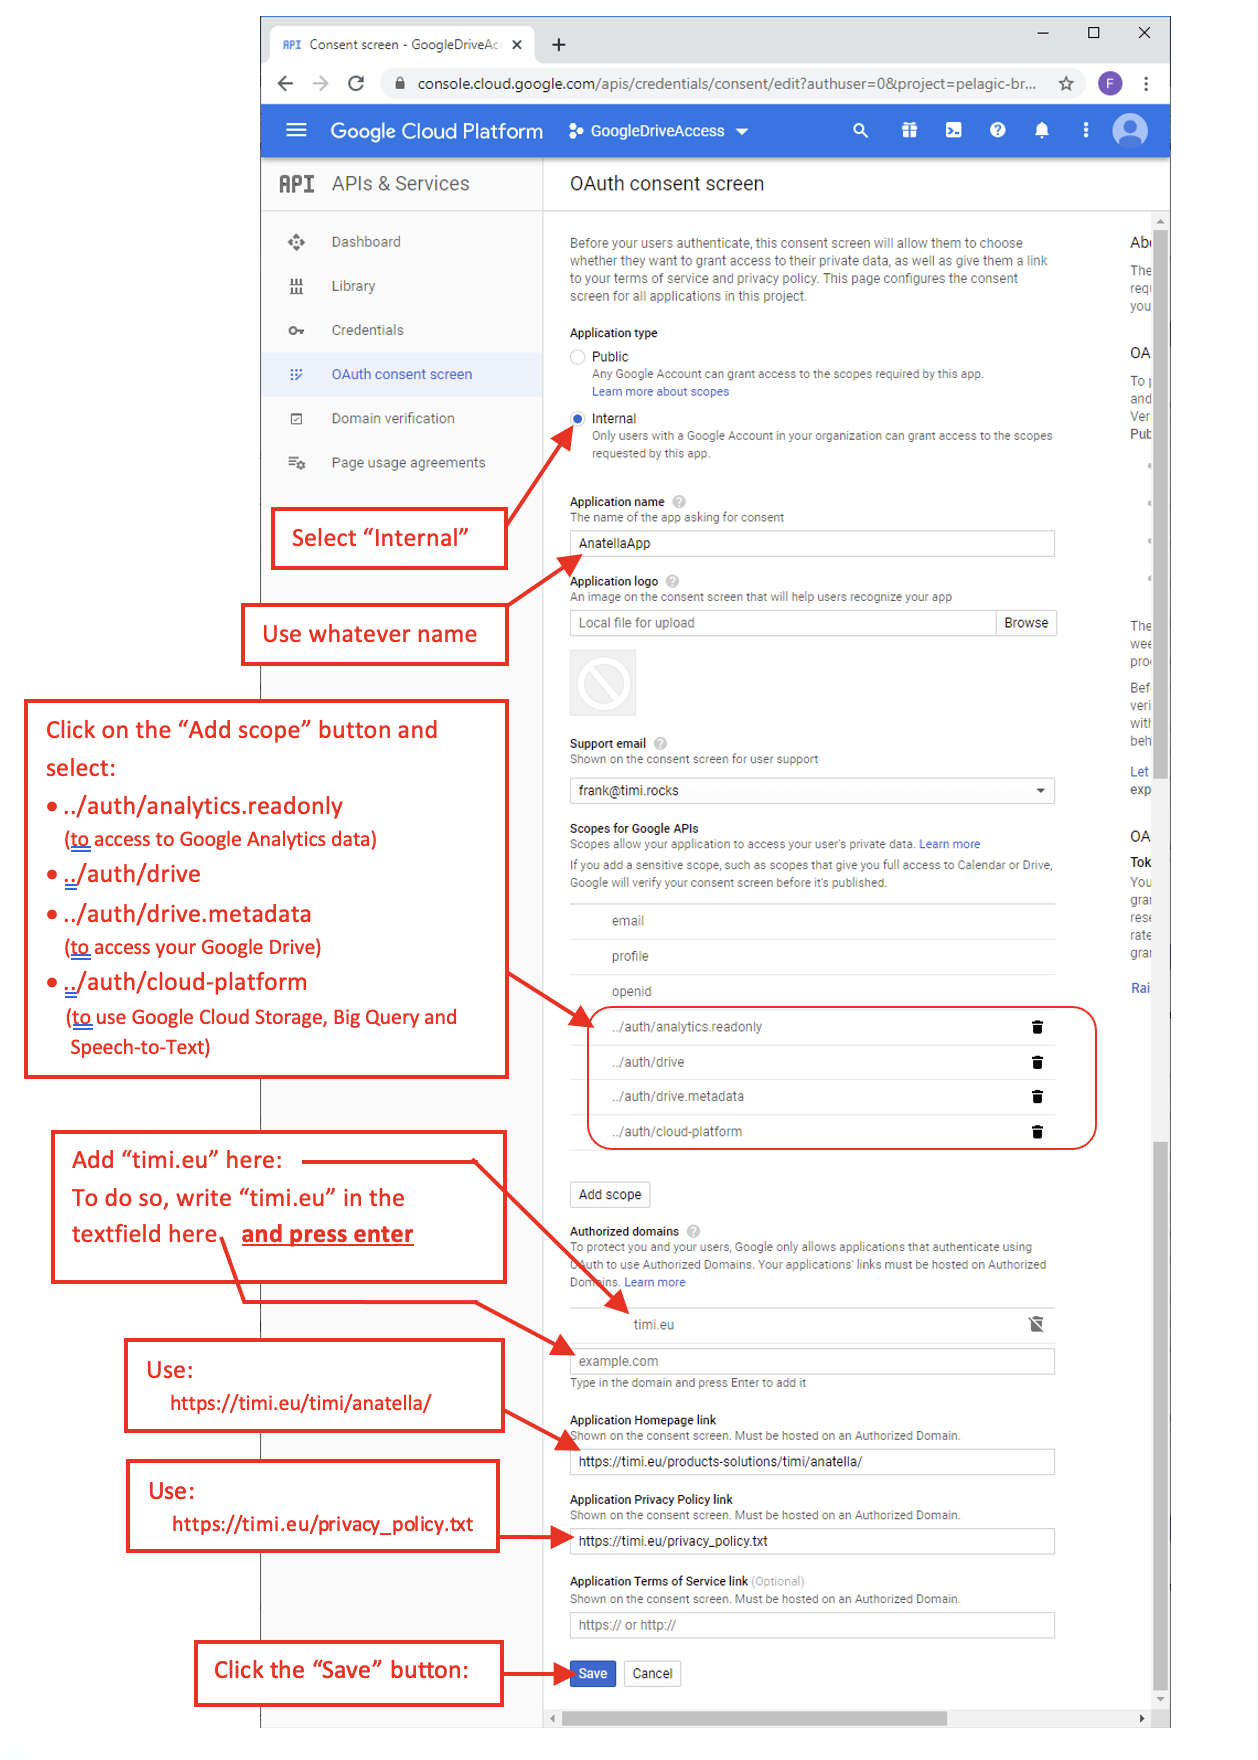
- Configure OAuth consent Screen
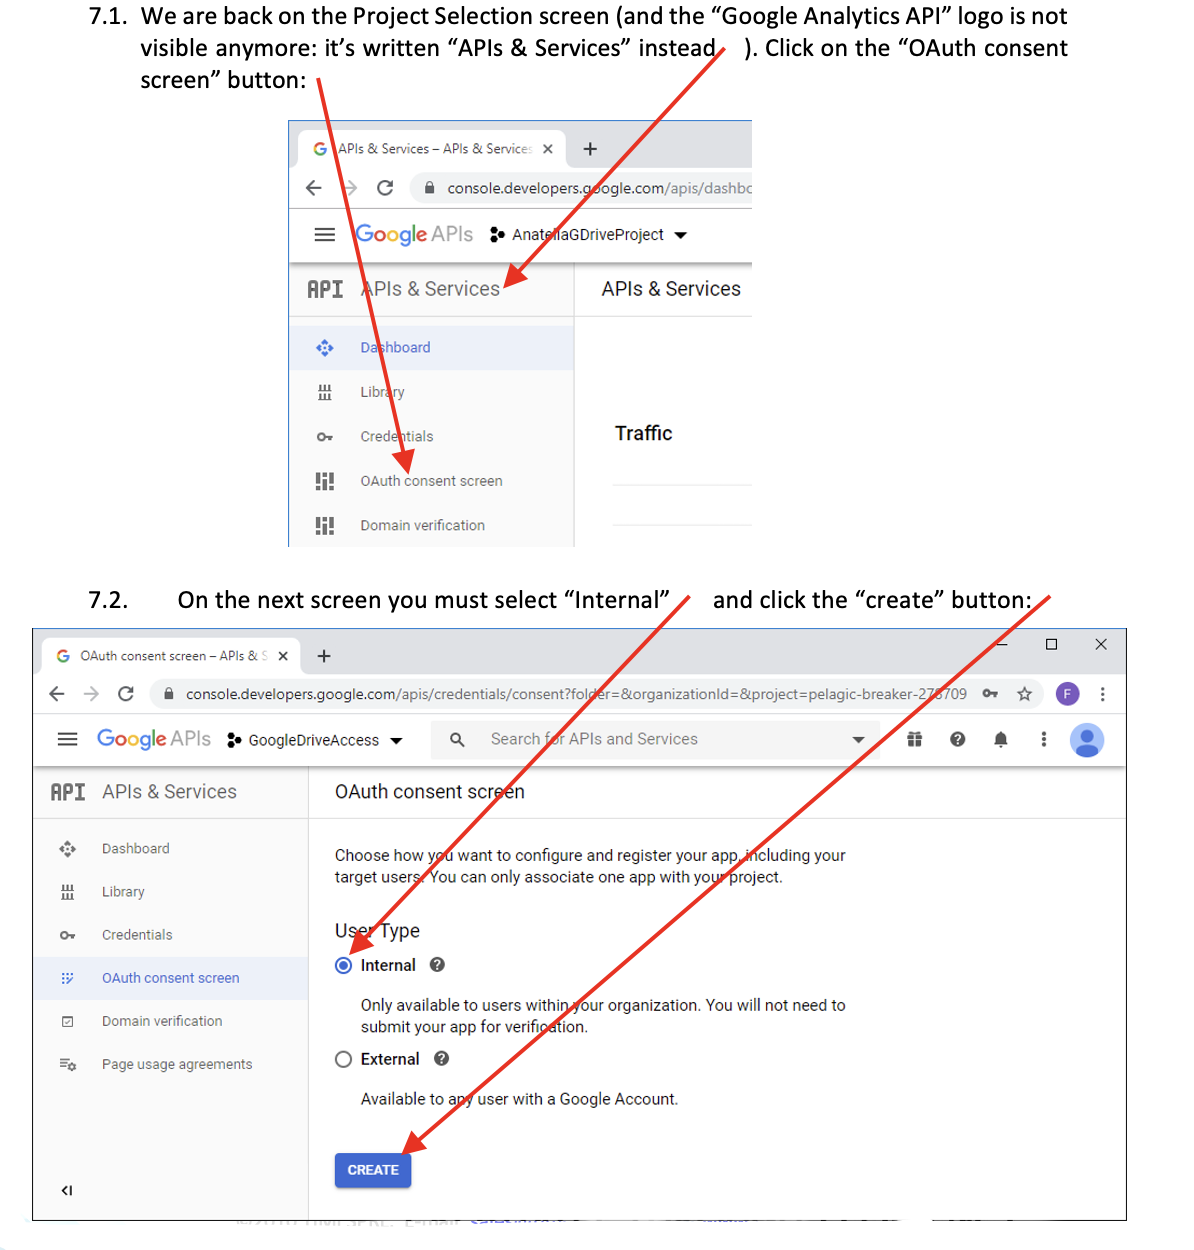
NOTE :
You can only select the “Internal” option if you are a paying customer of “G Suite Basic” or “G Suite Business”. On June 2020, the “G Suite Basic” subscription is 6$/month.
The “External” option also works but you’ll have more administrative work.
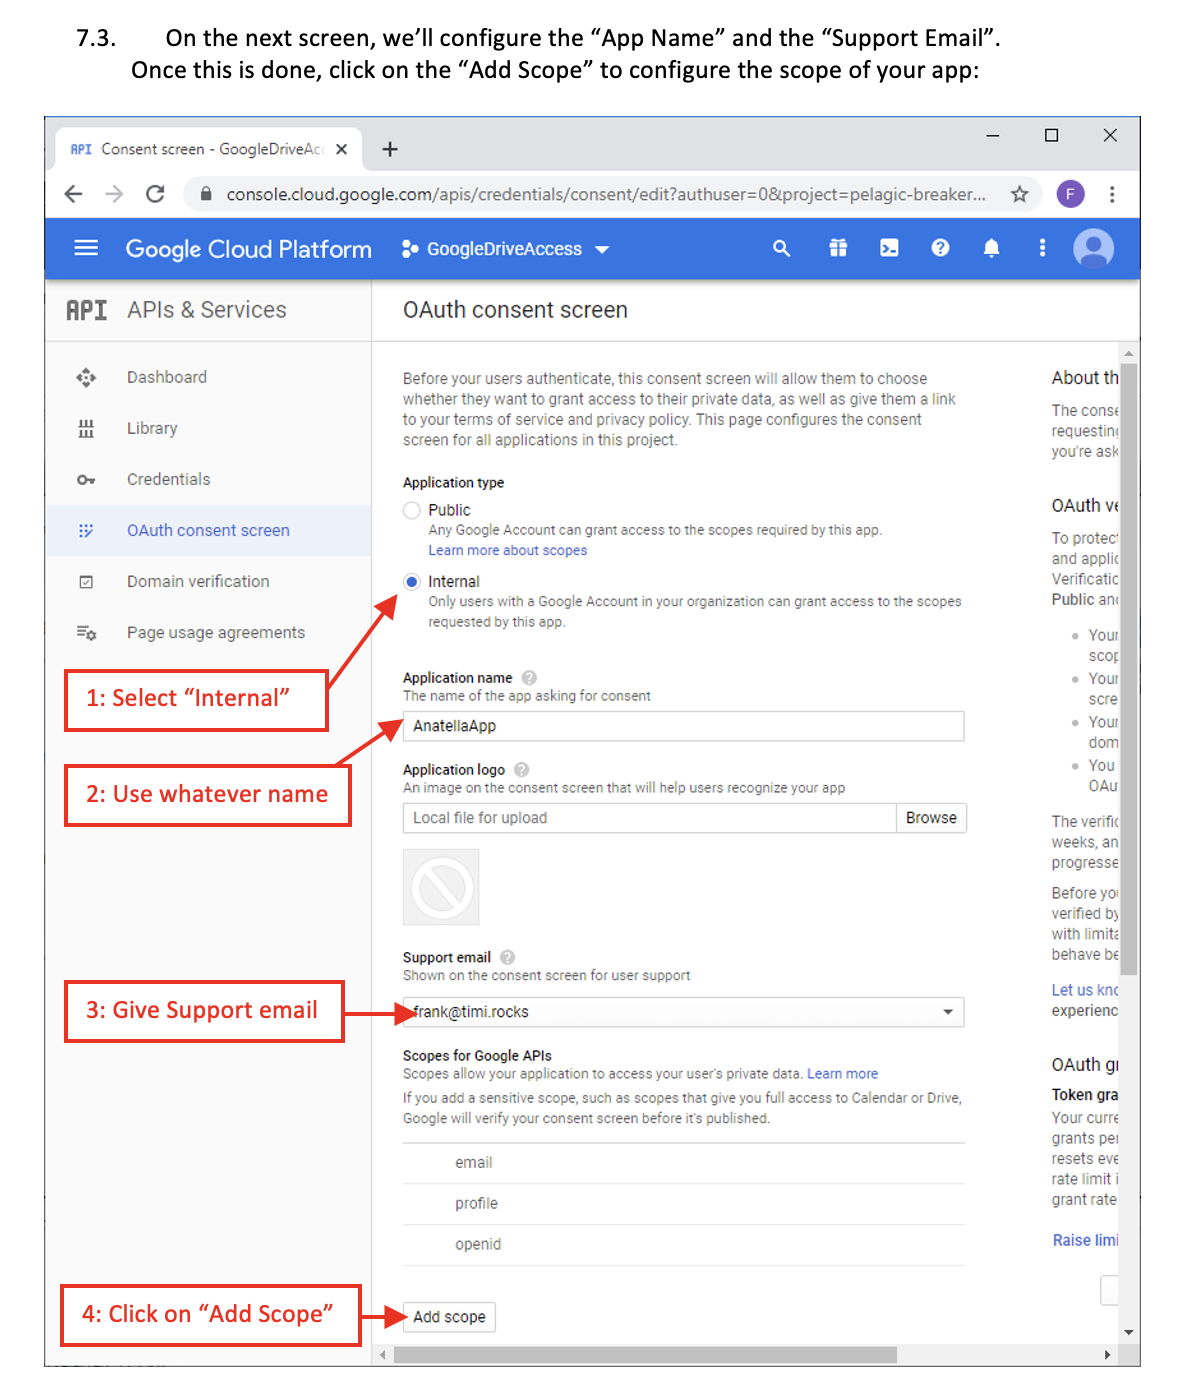
NOTE
On the next configuration screen, pay attention to the “Scopes”: For security reasons, you may want to limit the scopes to the minimum. For example, if you only intend to...
• ...use Google Analytics: Activate only the following scope:
../auth/analytics.readonly
• ...use GDrive: Activate only the following 2 scopes:
../auth/drive.metadata
../auth/drive
• ...use Google Storage, Big Query or Speech-to-Text: Activate only the
following scope:
../auth/cloud-platform
Once this is done, click on the “Add Scope” to configure the scope of your app:
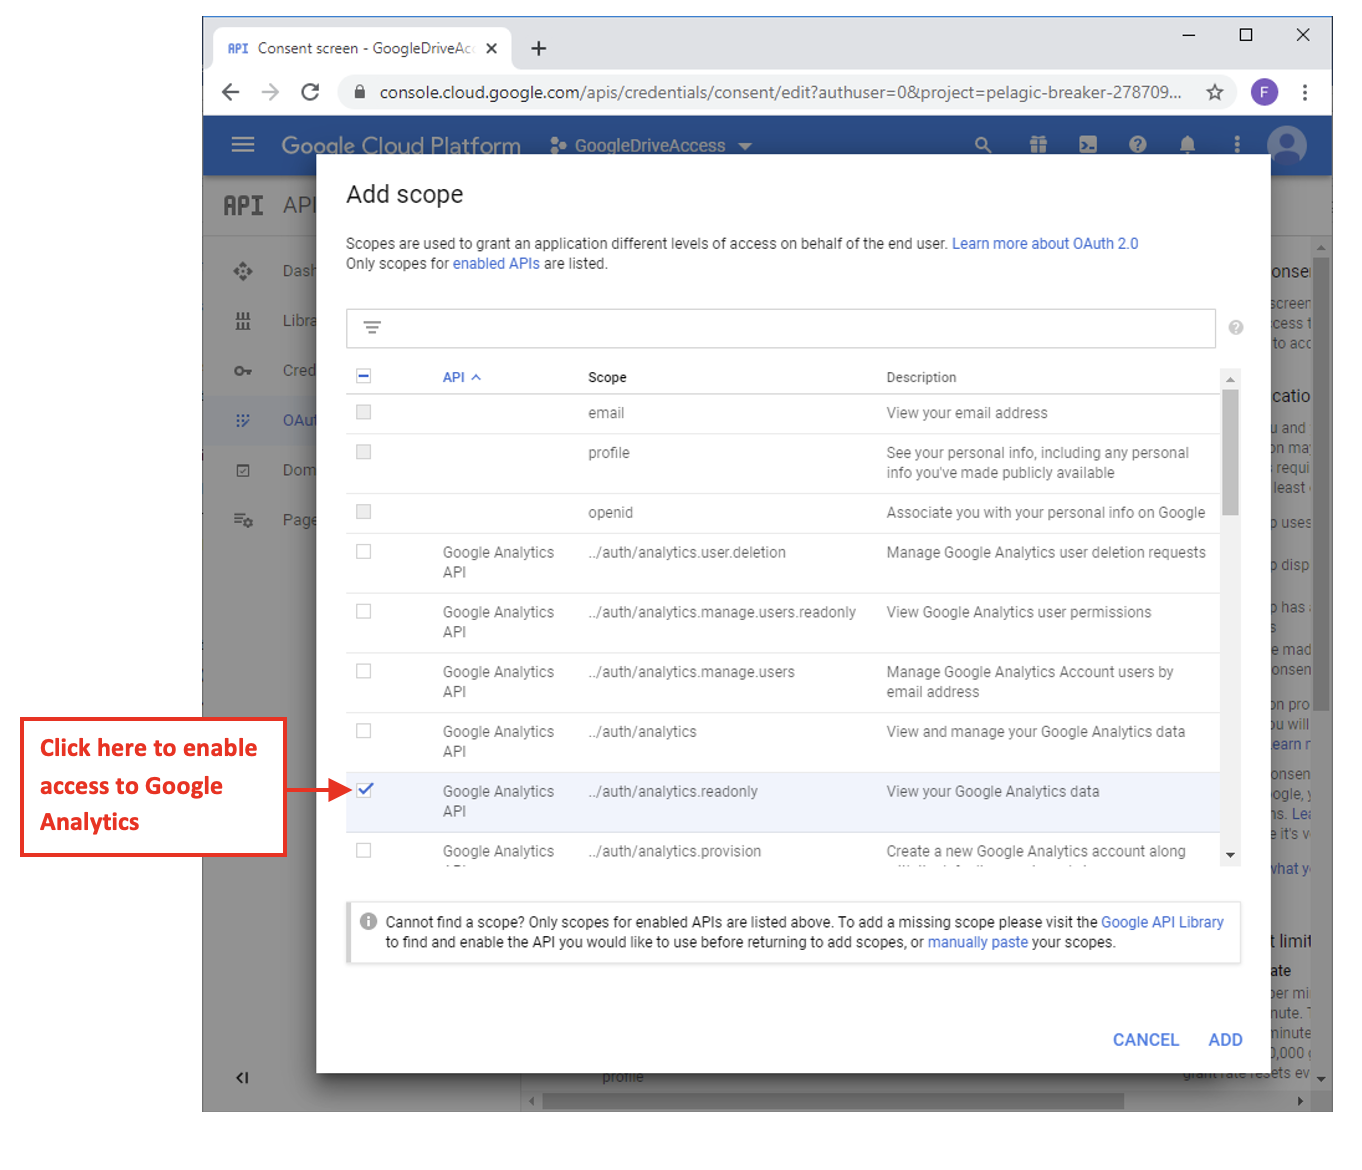
7.4. Enable the following scopes:
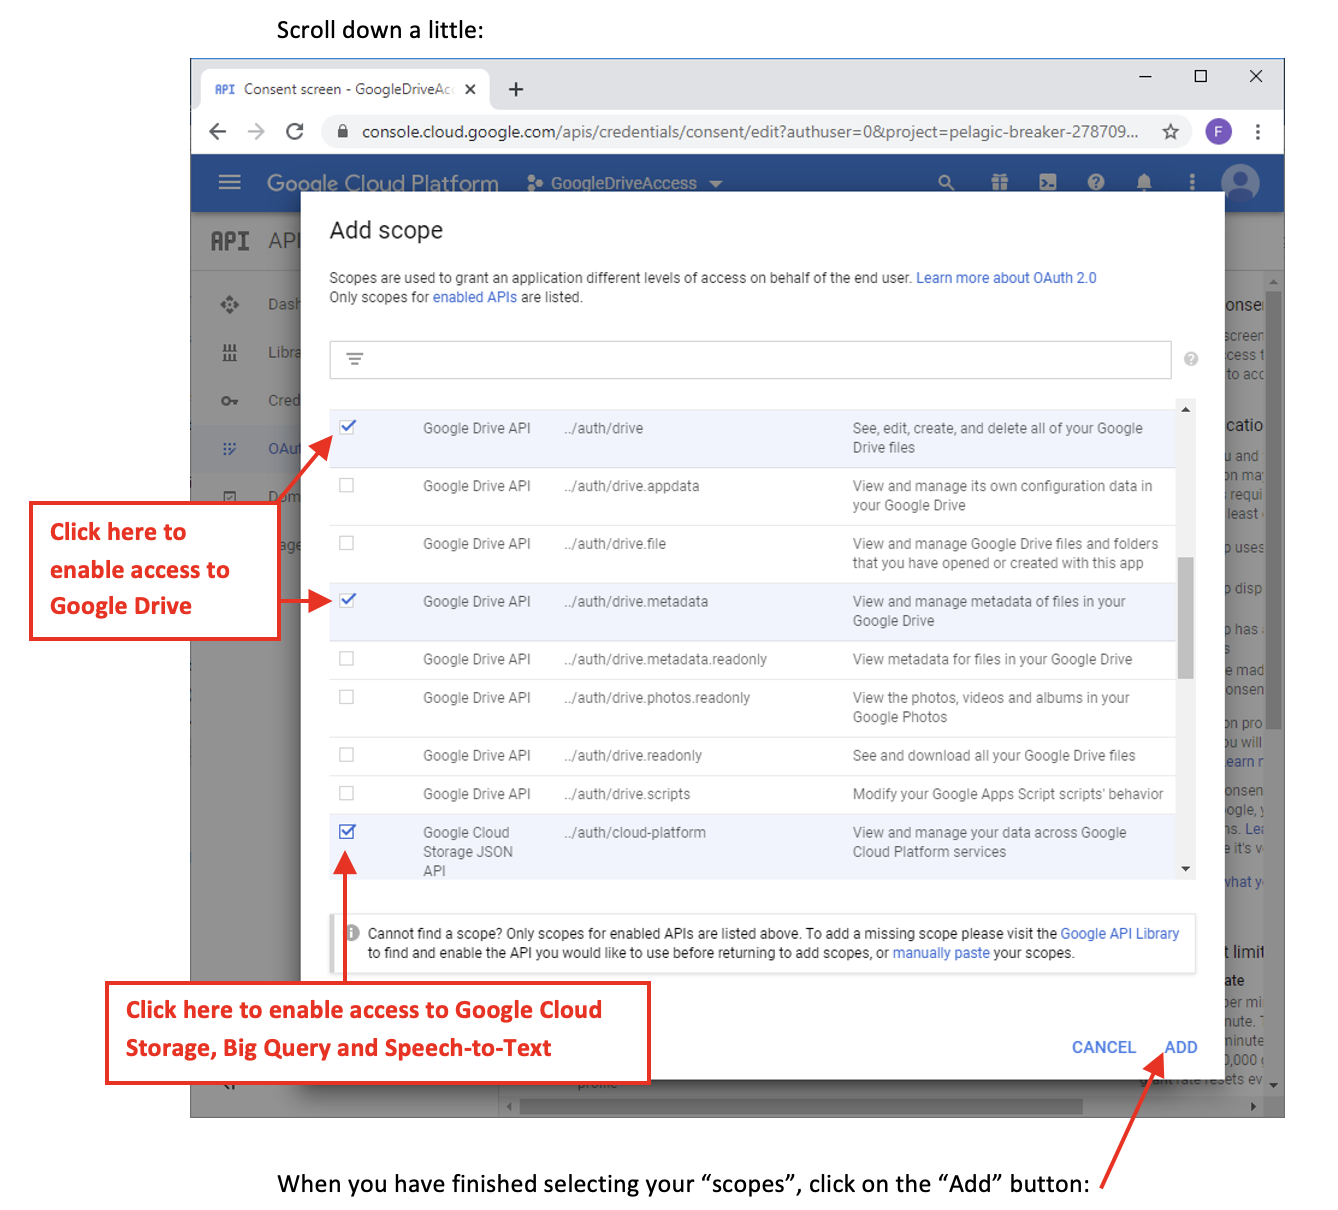
When you have finished selecting your “scopes”, click on the “Add” button:
7.5. Finish configuring the OAuth consent Screen.
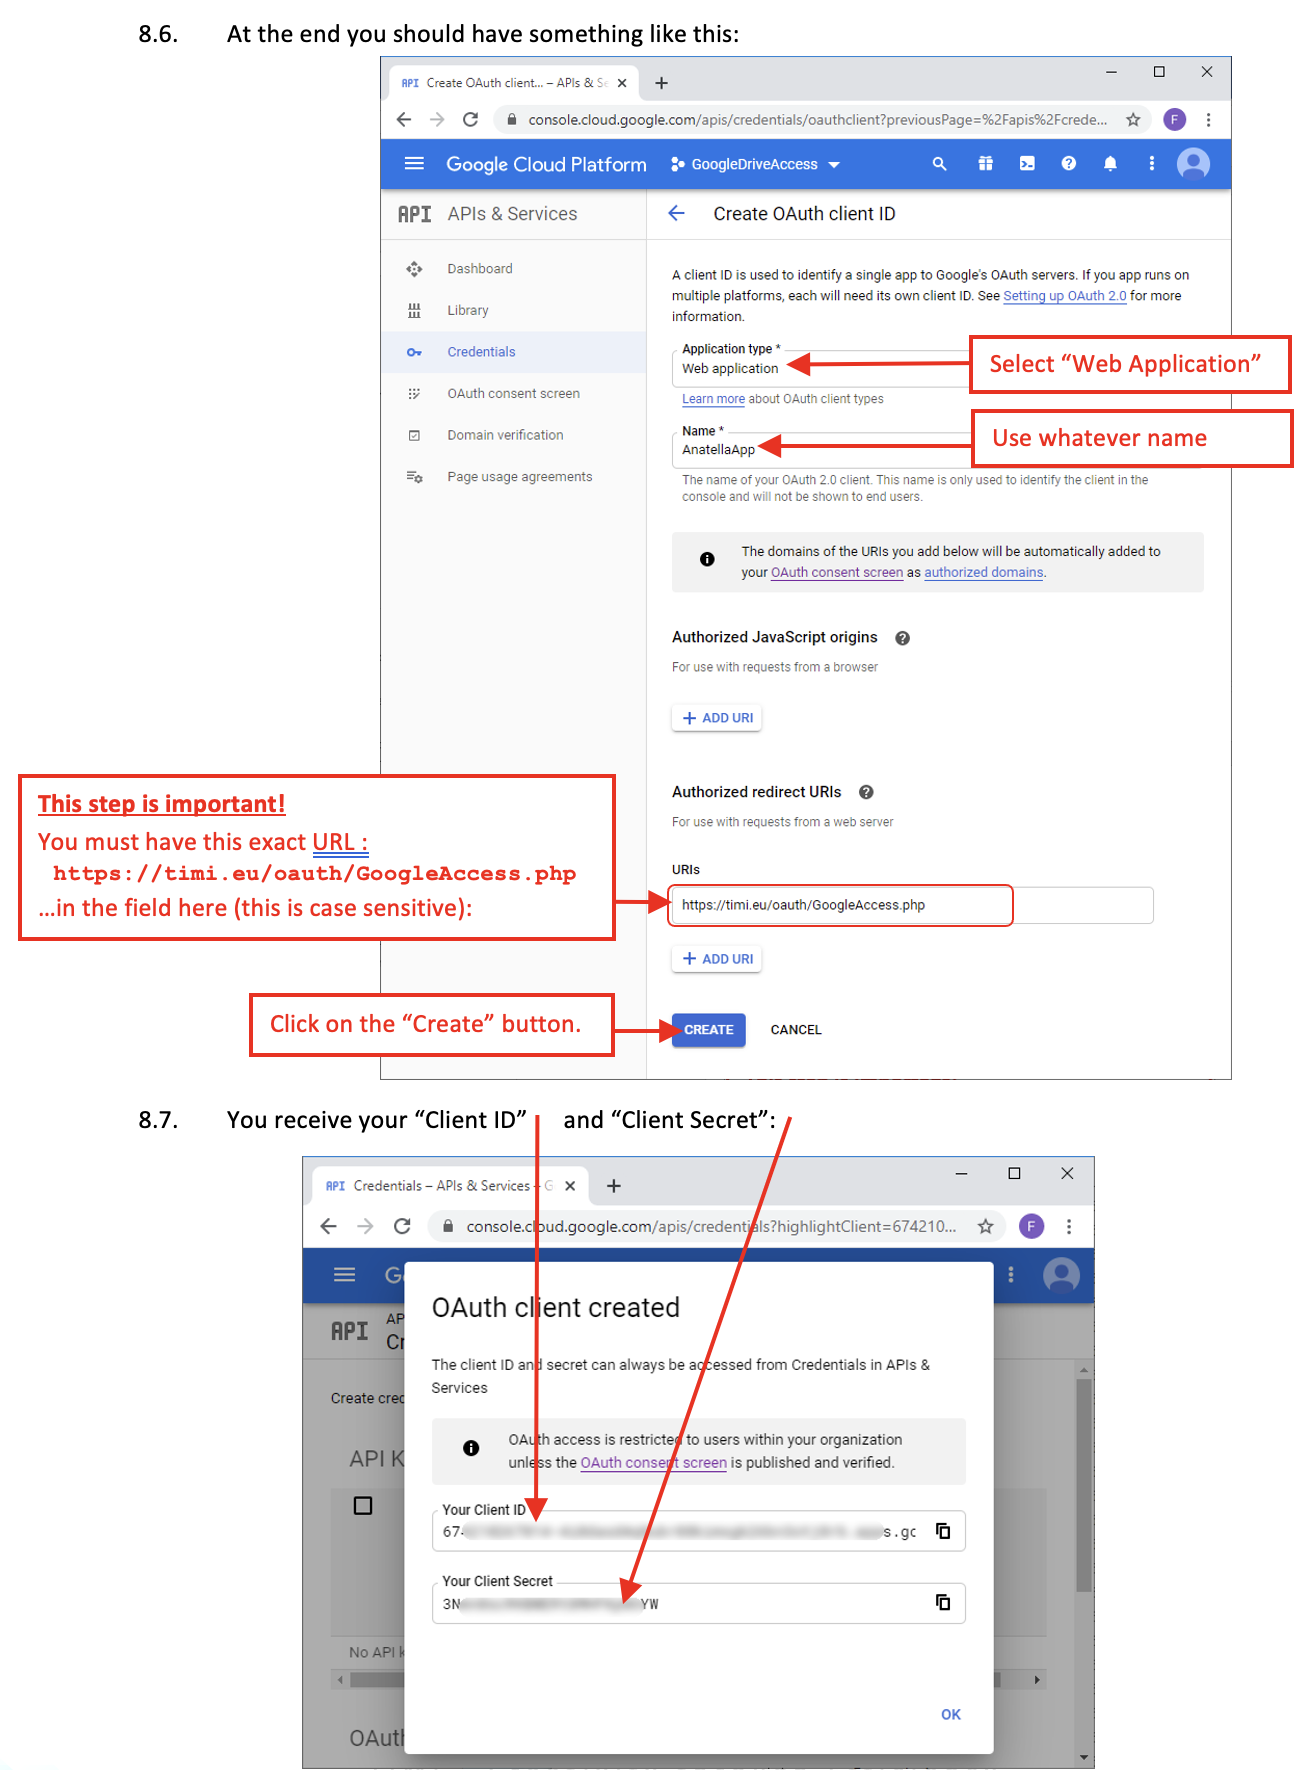
At the end, you should have something like this:
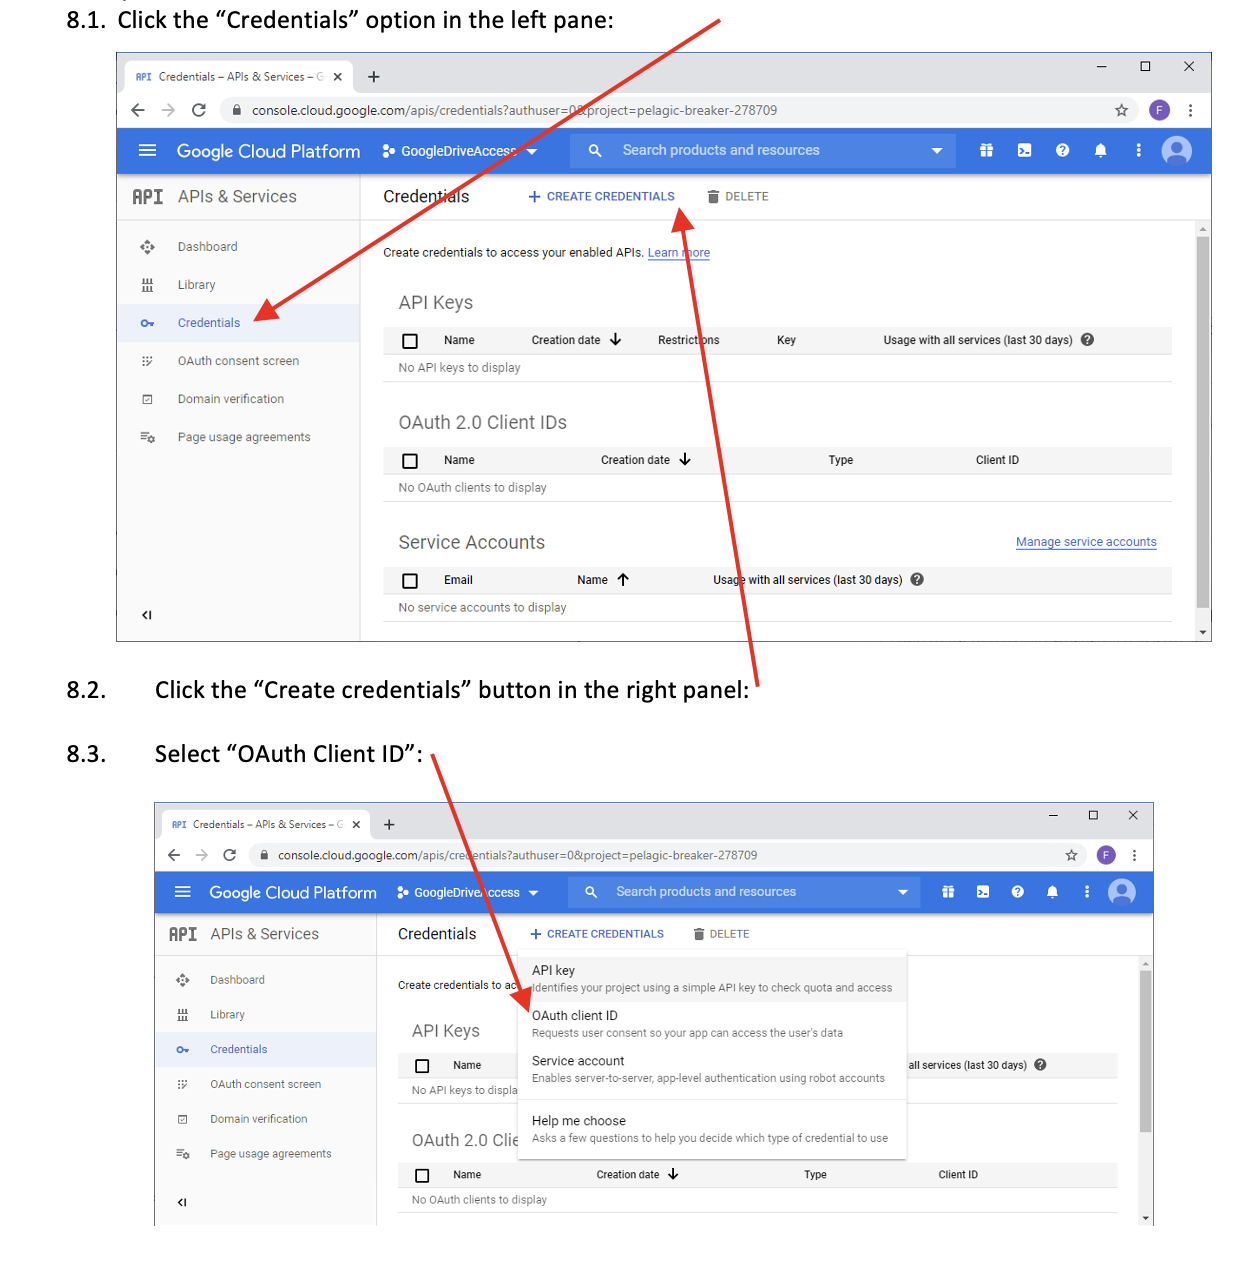
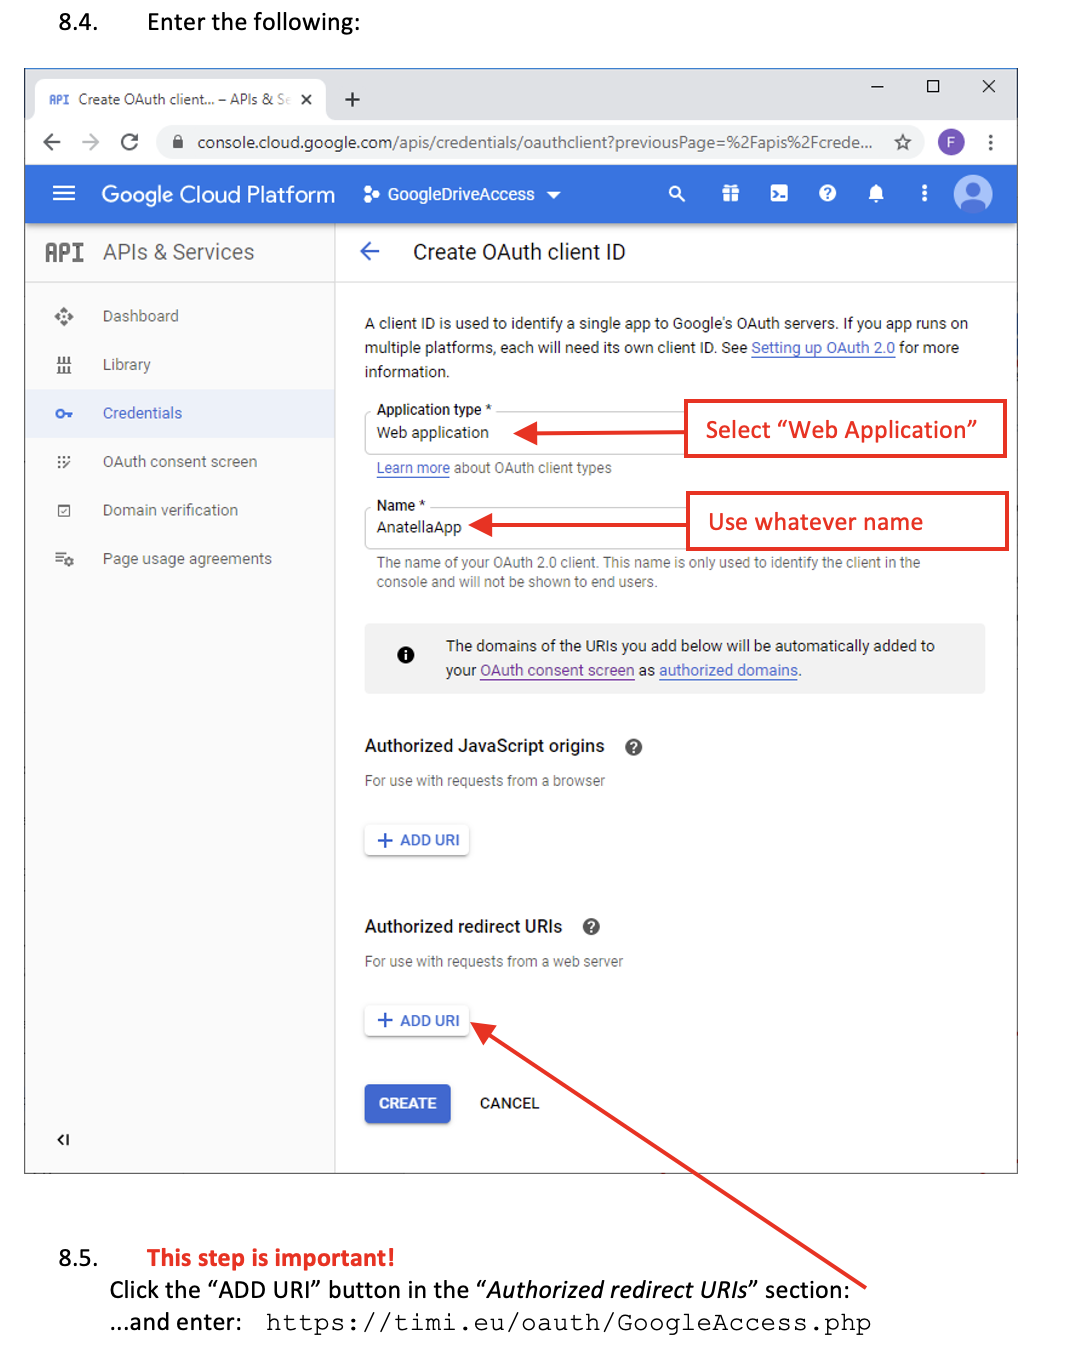
- Get your Credentials
Copy/paste your your “Client ID” and “Client Secret” inside ETL here:
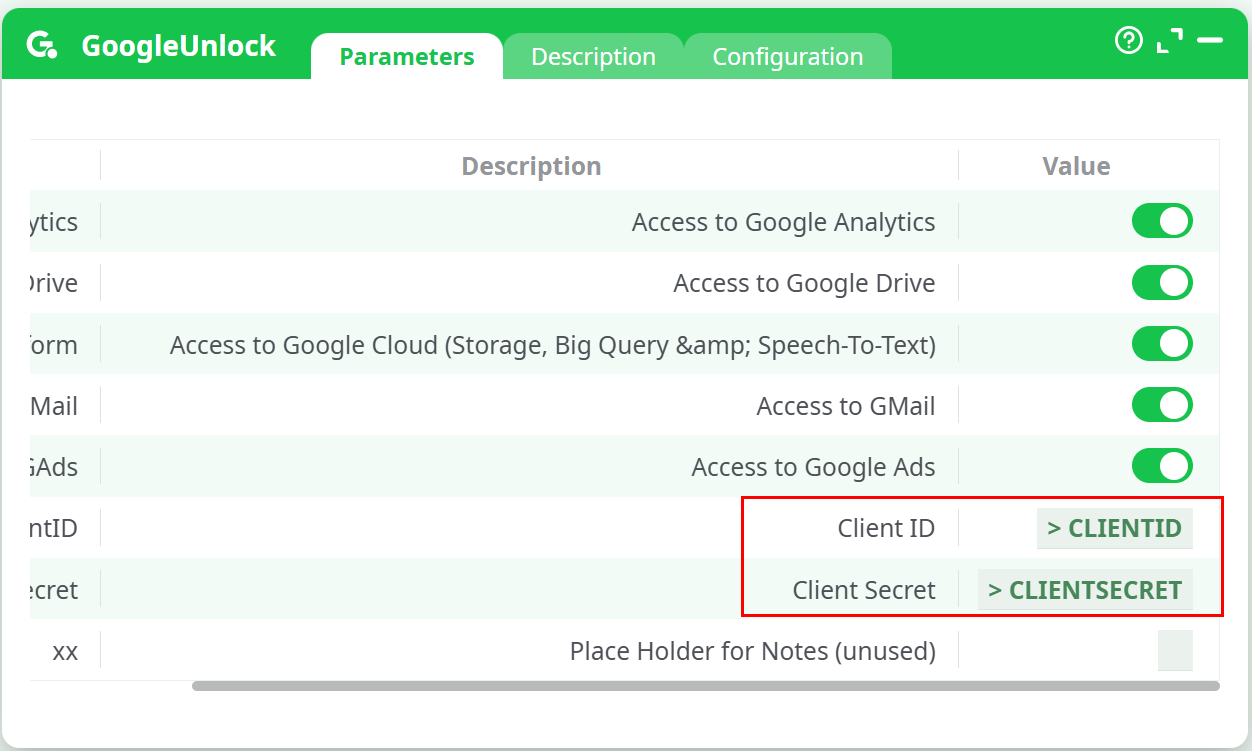
NOTE :
Inside the ETL action, the 3 parameters that are named “Access to…” must match the scopes that you selected at step 9.4. For security reasons, you may have limited the scopes to the minimum. For example, if you only intend to...
• ...use Google Analytics: You only activated the following scope:
../auth/analytics.readonly
• ...use GDrive: You only activated the following 2 scopes:
../auth/drive.metadata
../auth/drive
• ...use Google Storage, Big Query or Speech-to-Text: You only activated the
following scope:
../auth/cloud-platform
Don’t worry if the Window in your browser closes before you can copy/paste your “Client ID” and “Client Secret”: You can always see again later these 2 informations by clicking the “edit” icon here:
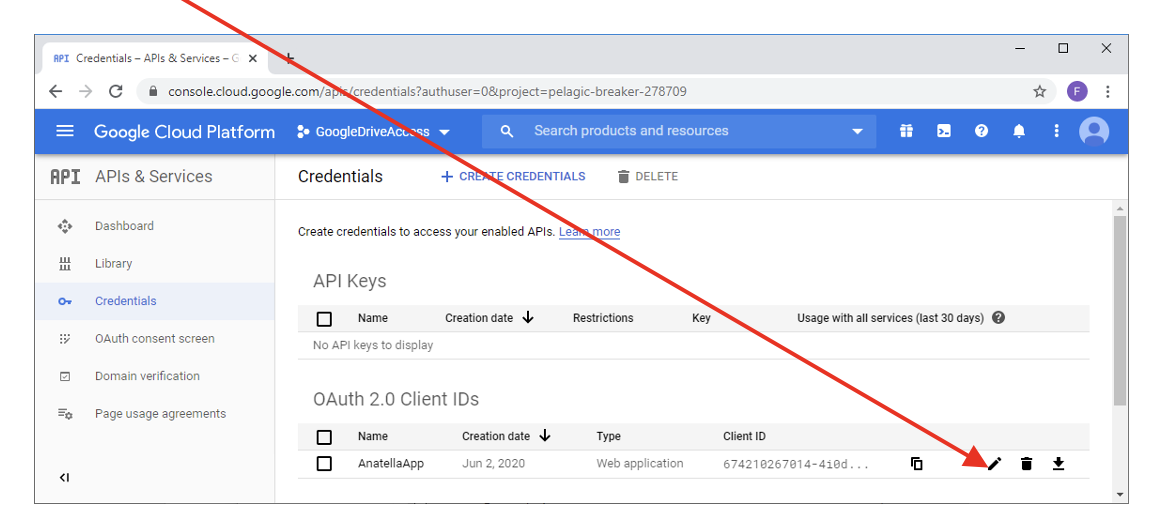
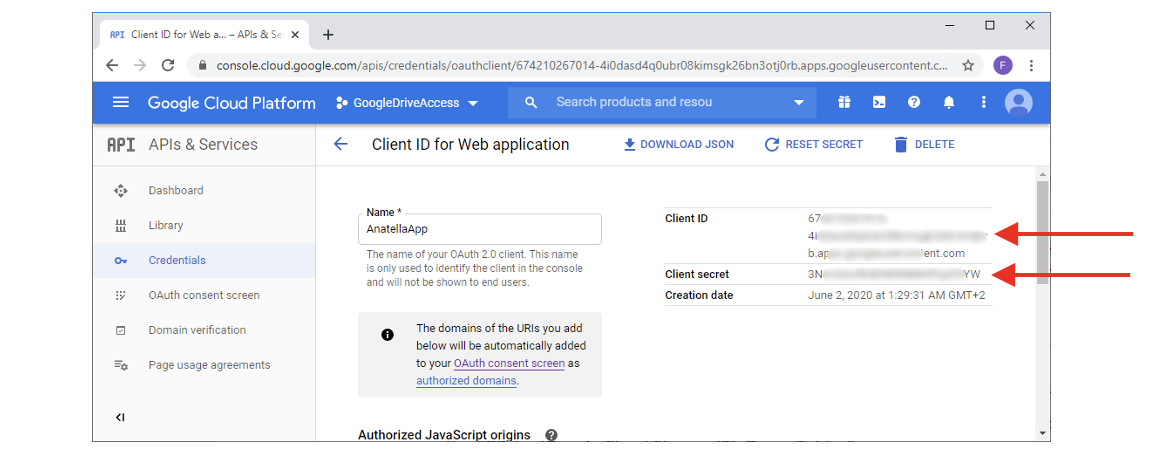
…Then, you’ll again see your “Client ID” and “Client Secret” here:
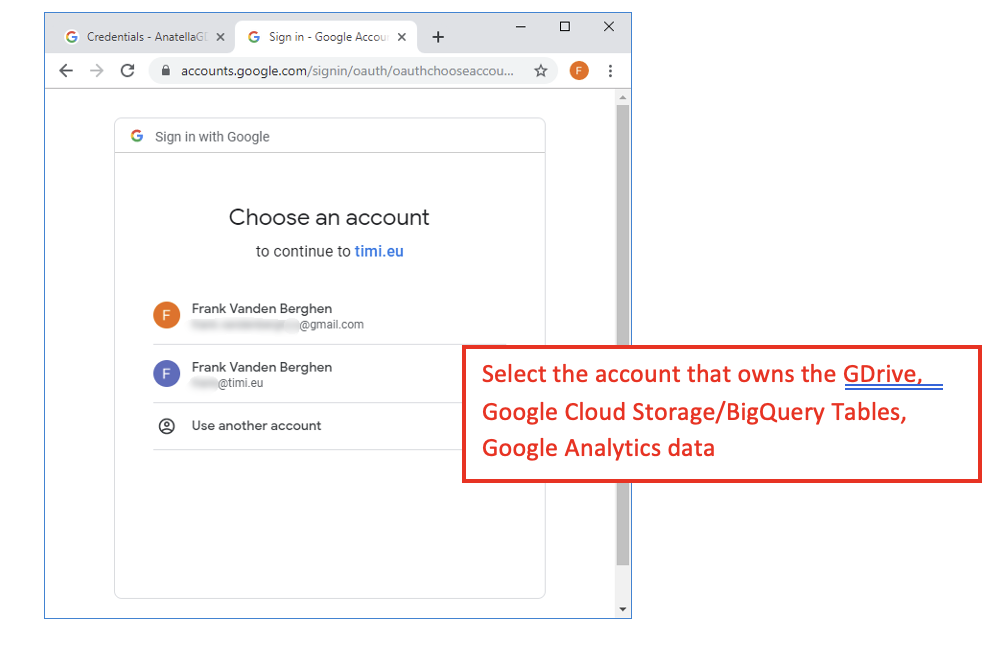
8.8. Run (i.e. click the output pin) the UnlockGoogle action in ETL (with the correct “Client ID” and “Client Secret” obtained from the previous step): A web browser opens: Select the account that owns the “GDrive/Google Cloud Storage/BigQuery Tables”:
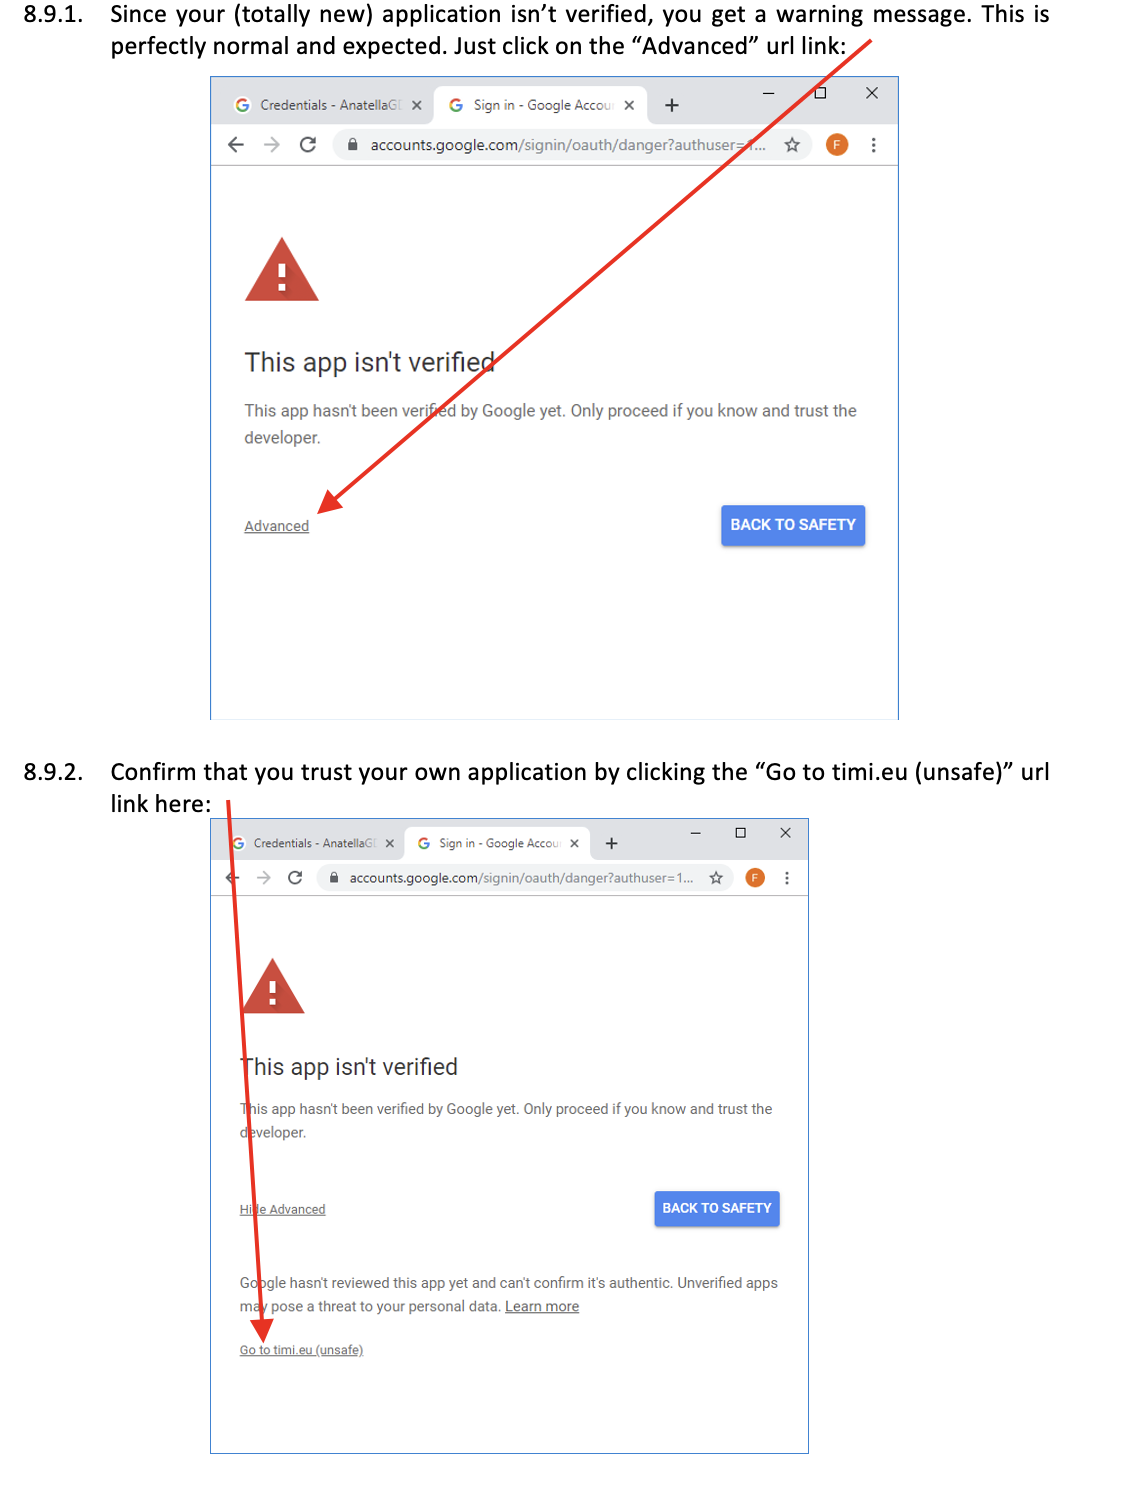
8.9. The following 2 confirmation screens do not appear all the time:
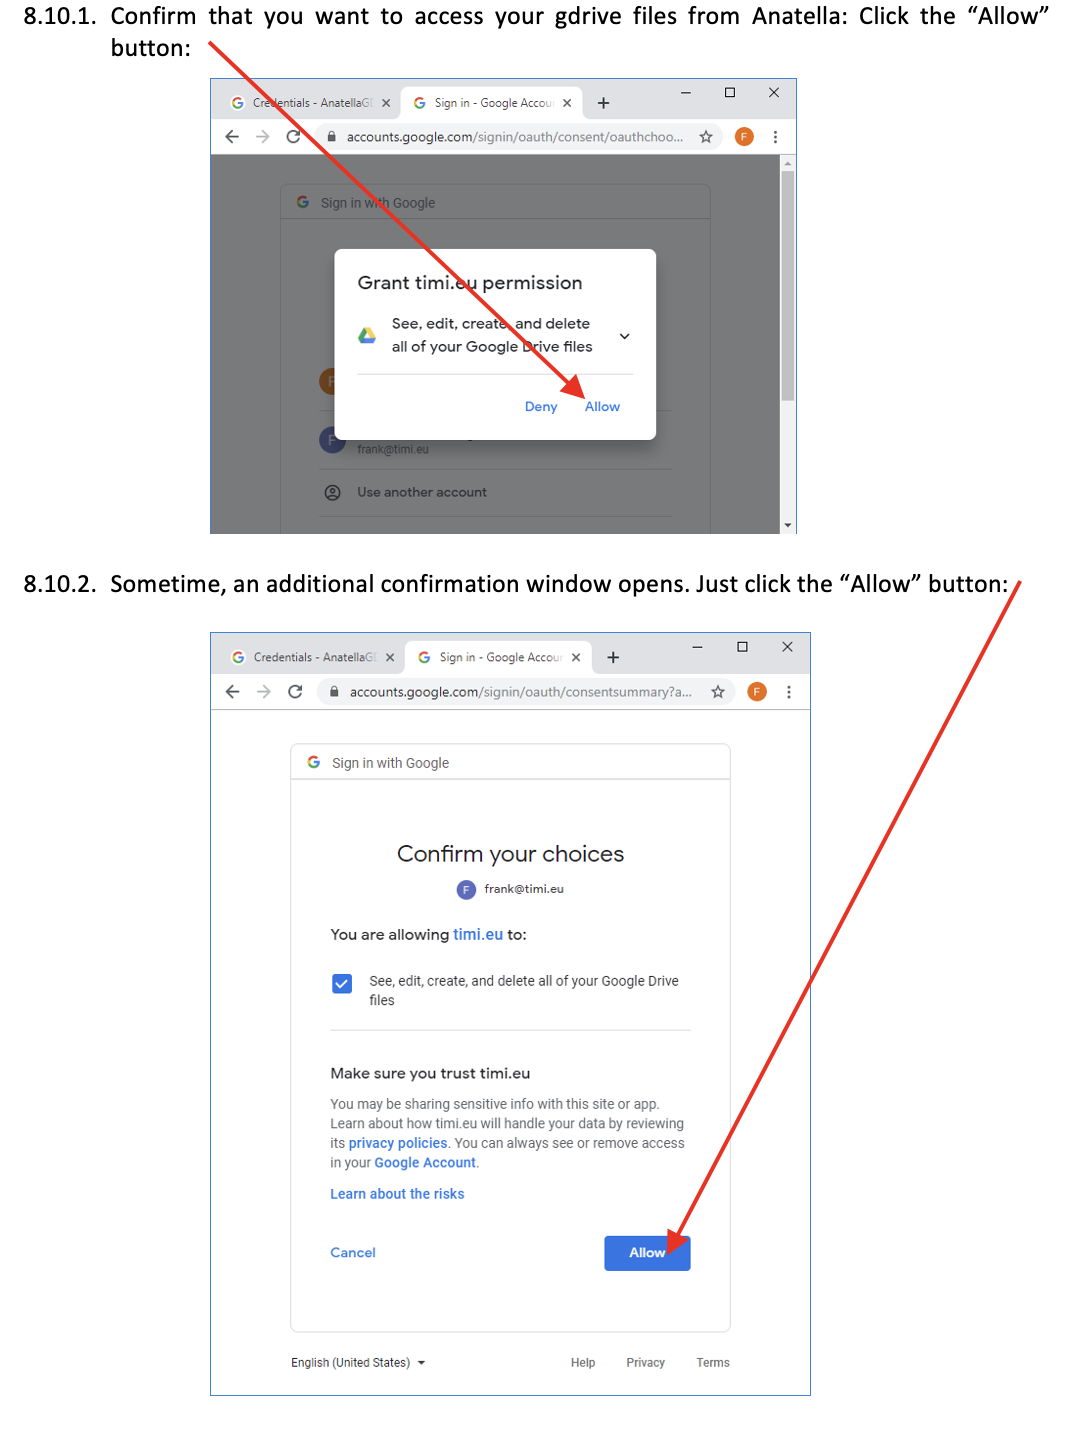
8.10. The following confirmation screens does not appear all the time:
8.11. Finally, you receive your “Refresh Token”!
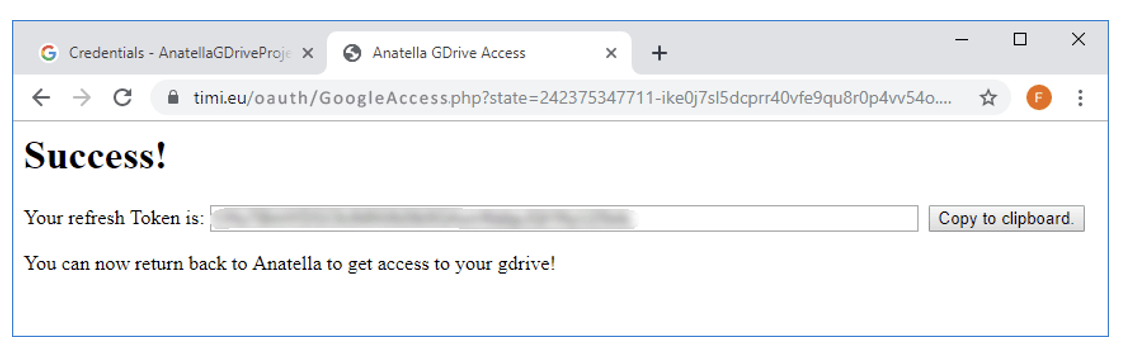
If you don’t see any “Refresh Token” (i.e. the “Refresh Token” field is empty), then you’ll need to redo the whole procedure starting from the step 10.1.
Please write your “Refresh Token” in a safe place. There is no way to retrieve your “Refresh Token” in anyway: If you lose it, you’ll need to redo the whole procedure starting from the step 10.1. You now have your complete credentials:
- A “Client ID” (obtained at step 8.7)
- A “Client Secret” (obtained at step 8.7)
- A “Refresh Token” (obtained at this step 8.11)
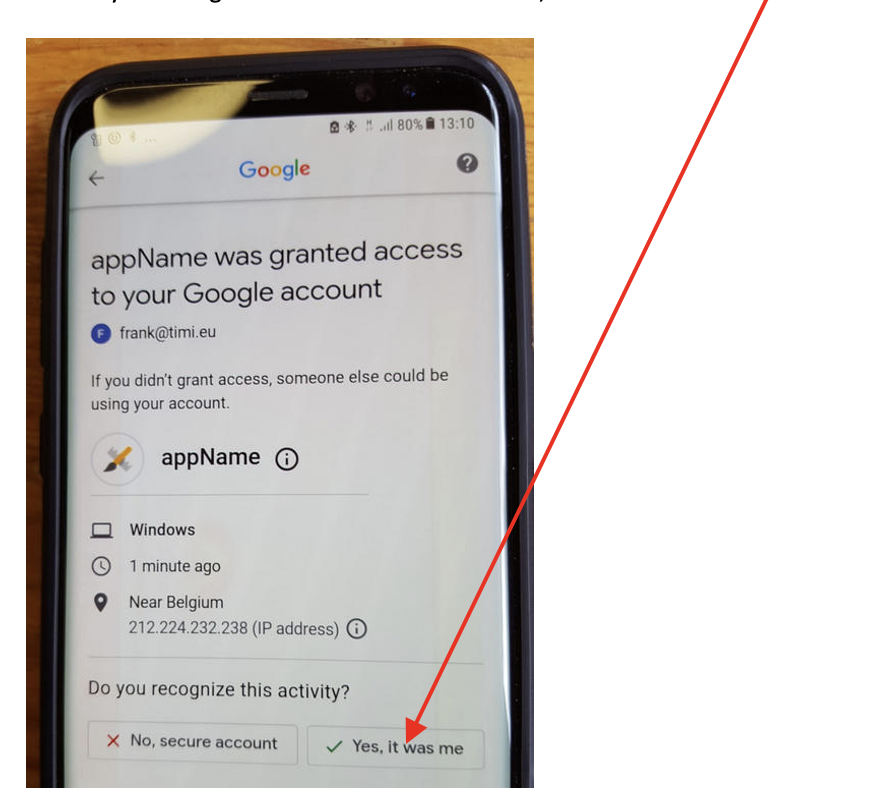
9. After a few seconds, you should also receive on your mobile phone a security message that warns you that someone accessed your Google Account. Just click the “Yes, it was me” button:
10. Save your “Refresh Token” in a safe place.