¶ Description
Distributed Run of several ETL pipeline.
¶ Parameters
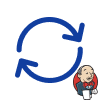
¶ Parameters tab
Parameters:
- Jobs to run
- Pipeline parameters
- Jenkins server URL
- Login/user
- User password (or token)
- Optional: extra parameters for cURL
- Thottling: max number of requests per minute (0 = unlimited)
- Thottling: number of retries when server is busy
- Debug mode
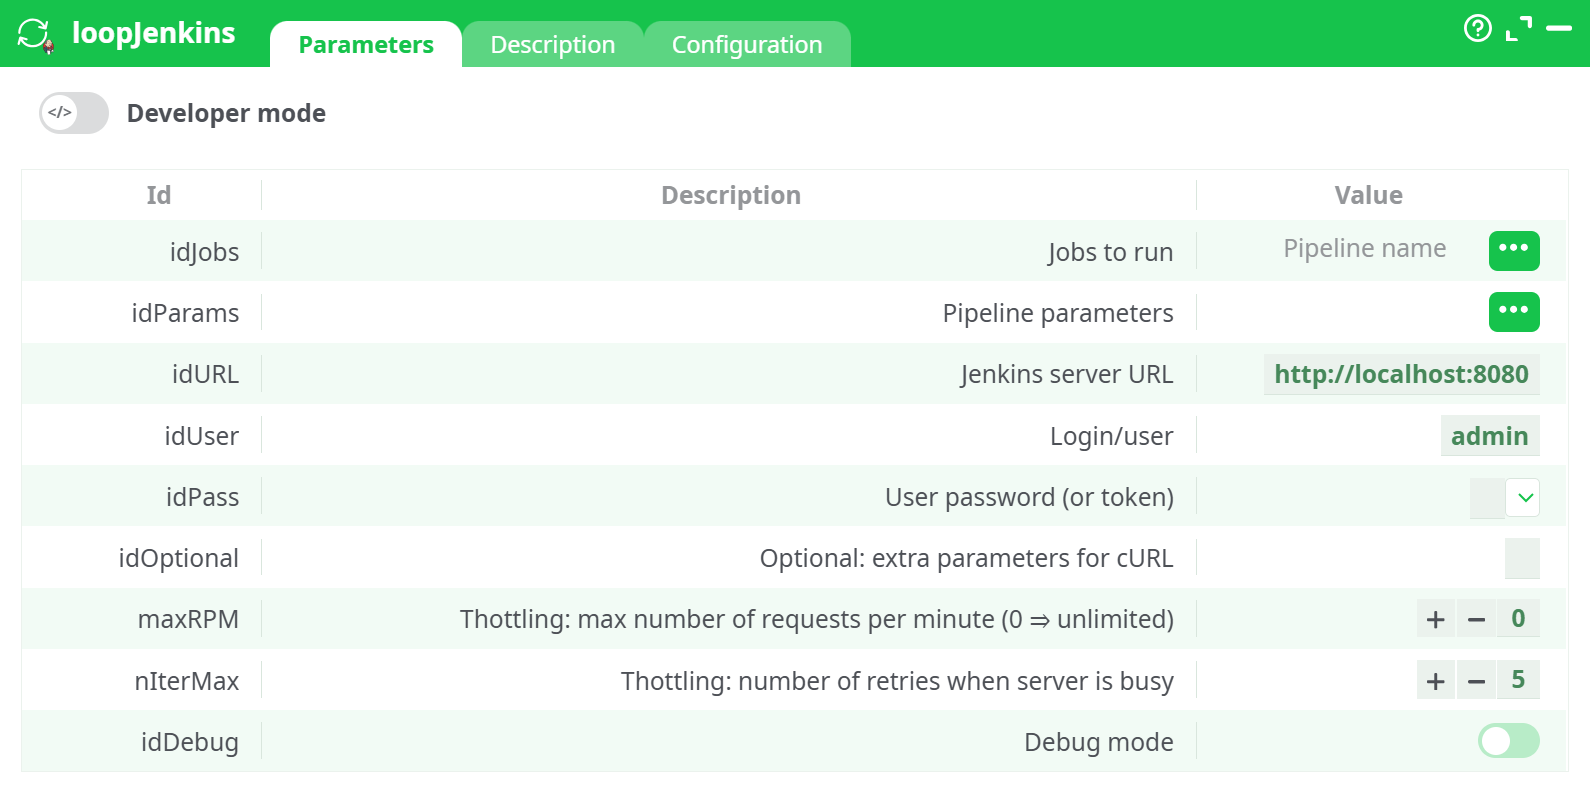
¶ Description tab
Parameters:
- Script name
- Short description
- Revision
- Decription
¶ Configuration tab
See dedicated page for more information.
¶ About
The loopJenkins action runs several ETL pipelines using Jenkins. The principle is very similar to the loopPipelines action i.e. We also have the same “2-pipelines-structure”:
- The first pipeline is the “control” pipeline: This pipeline is supervising the “loop” and decide how much iterations will be performed. This is inside the “control” pipeline that you’ll typically find the loopJenkins action.
- The second pipeline is the “inner part” of the loop. At each iteration of the loop, the “inner” pipeline is executed with a different set of values inside its “pipeline global parameters”.
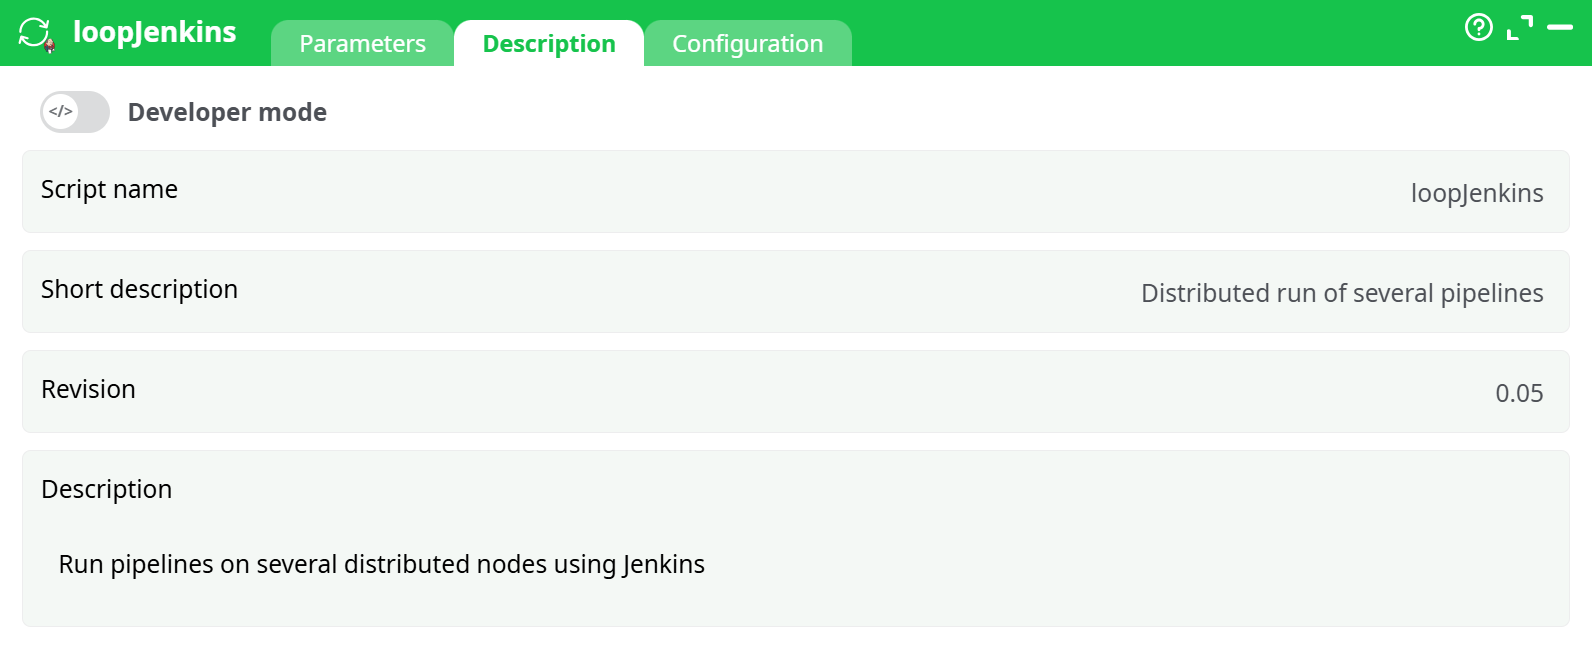
Let’s start with a small example: These 2 “control” pipeliness are performing, basically, the same thing:
More precisely: These 2 “control” pipelines are running two times (i.e. during the 2 iterations of the “loop”) the ETL pipeline named “:/inner.ETL”.
For the first run, the 2 global parameters named “sortvar” and “myMessage” are initialized to, respectively, “age” and “héhé”.
For the second run, the 2 global parameters named “sortvar” and “myMessage” are initialized to, respectively, “education” and “foo bar”.
The main difference between the above two “control” pipelines is the action that controls each iteration of the loop:
• When using the loopPipelines action, the process that controls each iteration of the loop is directly the current ETLprocess.
• When using the loopJenkins action, the process that controls each iteration of the loop is an exterior, third party process: it’s the Jenkins Service. This has one big advantage: When Jenkins needs to run an ETL pipeline, it can freely decide to run the ETL pipeline on the local PC or on any other server where Jenkins is installed&running (this is named “distributed” computations).
In technical terms, a server where Jenkins is installed&running (and that is thus able to execute an ETL pipeline) is called a “node”.
This means that, if there are 10 nodes available, the loopJenkins action will run all the different ETL pipeline (that are given on the input pin) using all the 10 nodes (by default), dividing roughly the computing time by a factor of 10. That’s great! 😊
In other words, the loopJenkins action allows you to run your ETL pipeline using what is called “distributed computations on several nodes”.
Here are some interesting facts about the loopJenkins action:
• Before using the loopJenkins action, you must perform a very special configuration of Jenkins.
• This action does not, by default, transfer files. This means that, typically, you should save your files (i.e. your .ETL files and your .gel_ETL files) inside a “network drive” (a windows shared drive and/or a HDFS drive) that is accessible from all the nodes.
• This action “adds” the ETL pipelines to execute (obtained from the input pin) to an “Execution Queue” inside Jenkins. Thereafter, Jenkins will immediately start running all the pipelines inside the “Execution Queue” using all the computing power available inside all the available nodes.
• This action does not wait for the completion of the execution of the pipelines “added” inside Jenkins. This is a completely different behavior than the loopPipelines action, the loopPipelines action or the [runPipelines](/TransformationActions/runPipelines action that are waiting for the executed (sub-) pipelines to terminate before proceeding any further. You can use the waitJenkins action to wait for the completion of the pipelines “added” inside Jenkins.
• You can query at any time the status of the pipelines inside the “Execution Queue” inside Jenkins using the queryJenkins action.