¶ Description
Upload data To Microsoft Power BI.
¶ Parameters
¶ Connection tab
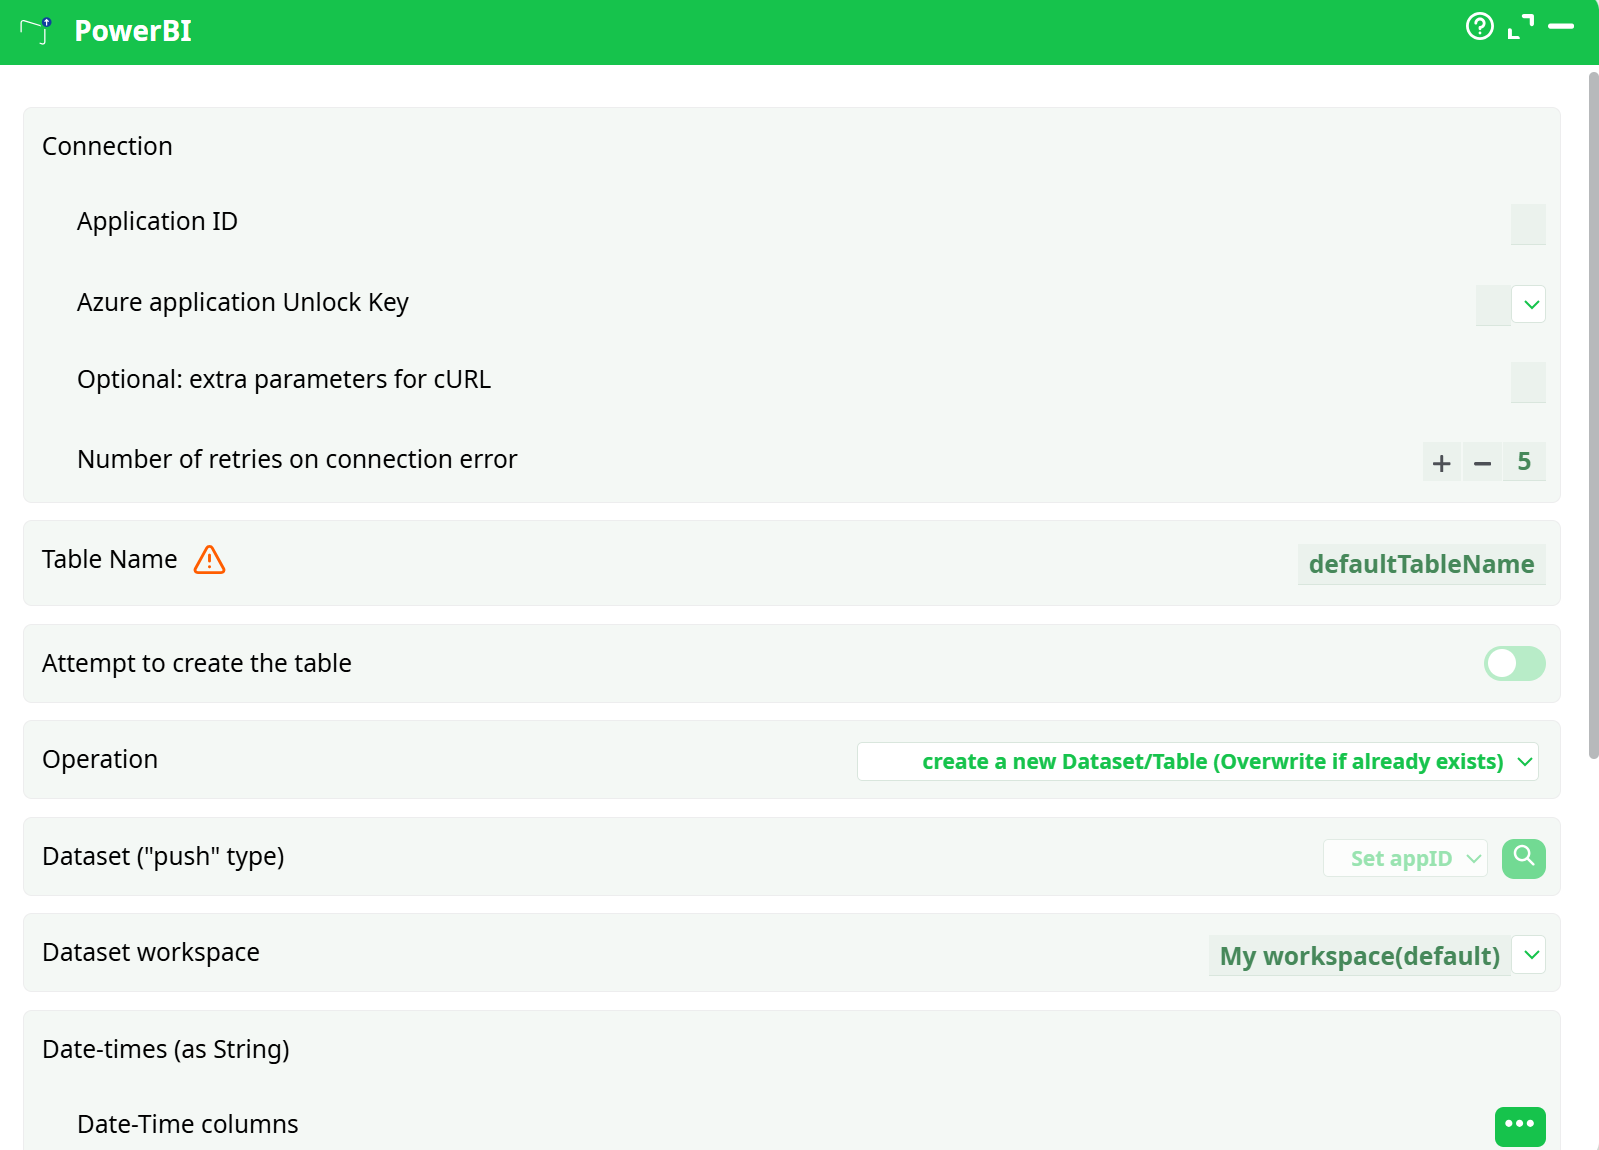
Parameters:
- Connection
- Application ID
- Azure application Unlock Key
- Optional: extra parameters for cURL
- Retries on connection error
- Table Name
- Attempt to create the table
¶ About
This action also works when accessing the web through a PROXY server.
To use this action, you’ll need to setup several parameters on the Microsoft Websites and you’ll also need to obtain your “Application ID” (parameter P6), also from the Microsoft Website.
- For detailed instructions on how to configure the Azure service, see: AzureServiceConfiguration
Once you have completed the “setup process”, you can use the parameters P1 to P5 to upload data to your Microsoft Power BI system.
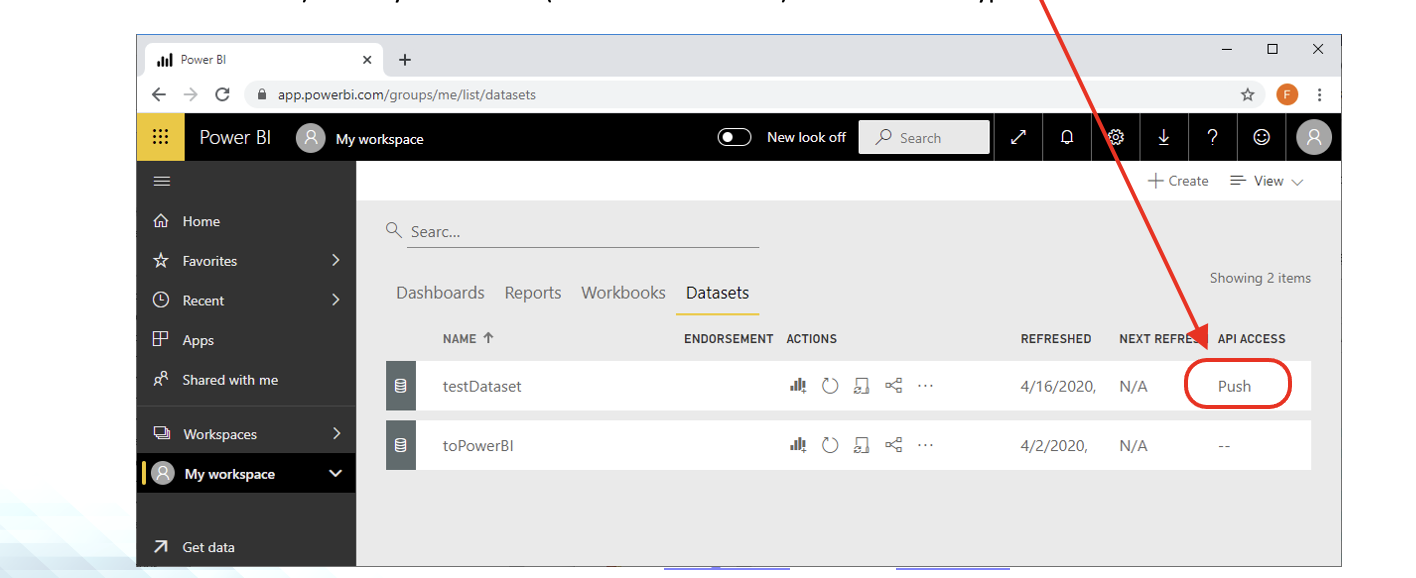
The PowerBI action creates and updates datasets of the “Push” type on the PowerBI website. For example, in the screenshot below, there are 2 datasets (that are named “testDataset” and “toPowerBI”) but only one dataset (i.e. the “testDataset”) is of the “Push” type:
On march 2020, inside Microsoft Power BI, the “Push” datasets have very strong limitations:
- 75 max columns
- 75 max tables (1 table per dataset; The table’s name in each dataset is defined in parameter P11)
- 1,000,000 rows added per hour per dataset
- 200,000 max rows stored per table in FIFO dataset
- Other, less important, limitations:
- 10,000 max rows per single POST rows request
- 5 max pending POST rows requests per dataset
- 120 POST rows requests per minute per dataset
- If table has 250,000 or more rows, 120 POST rows requests per hour per dataset
- 5,000,000 max rows stored per table in 'none retention policy' dataset
- 4,000 characters per value for string column in POST rows operation
These limitations are really restrictive for many use cases: Please pay attention to the above numbers: PowerBI is only useful if you have a very small data volume. In all other situations, we advise you to choose another BI solution.
The parameter P5 lists all the columns of the “Boolean” type. This “Boolean” type is a special type from PowerBI that only accepts TRUE/FALSE/NULL values. When exporting columns from ETL to the “Boolean” type of PowerBI, ETL applies the following conversion rules:

¶ PowerBI first time setup
Before uploading data to Microsoft PowerBI, you need to create and setup a new PowerBI application. Here are the steps:
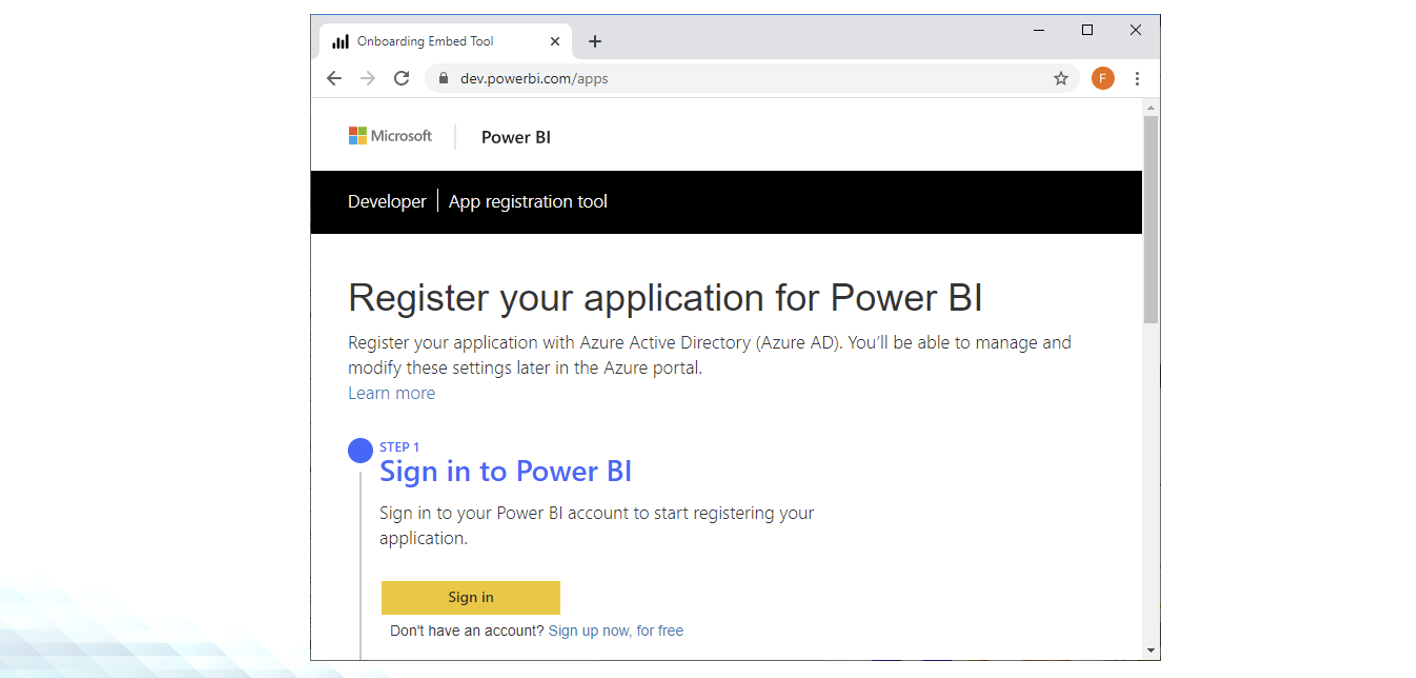
- Create your new “Power BI” Application.
1.1. Open the URL https://dev.powerbi.com/apps and click the “Sign in” button to log-in using your normal “Login” and “Password” for PowerBI (These are the same “Login” and “Password” that are required for parameters P7 and P8 inside ETL):
1.2. Configure your Application parameters:
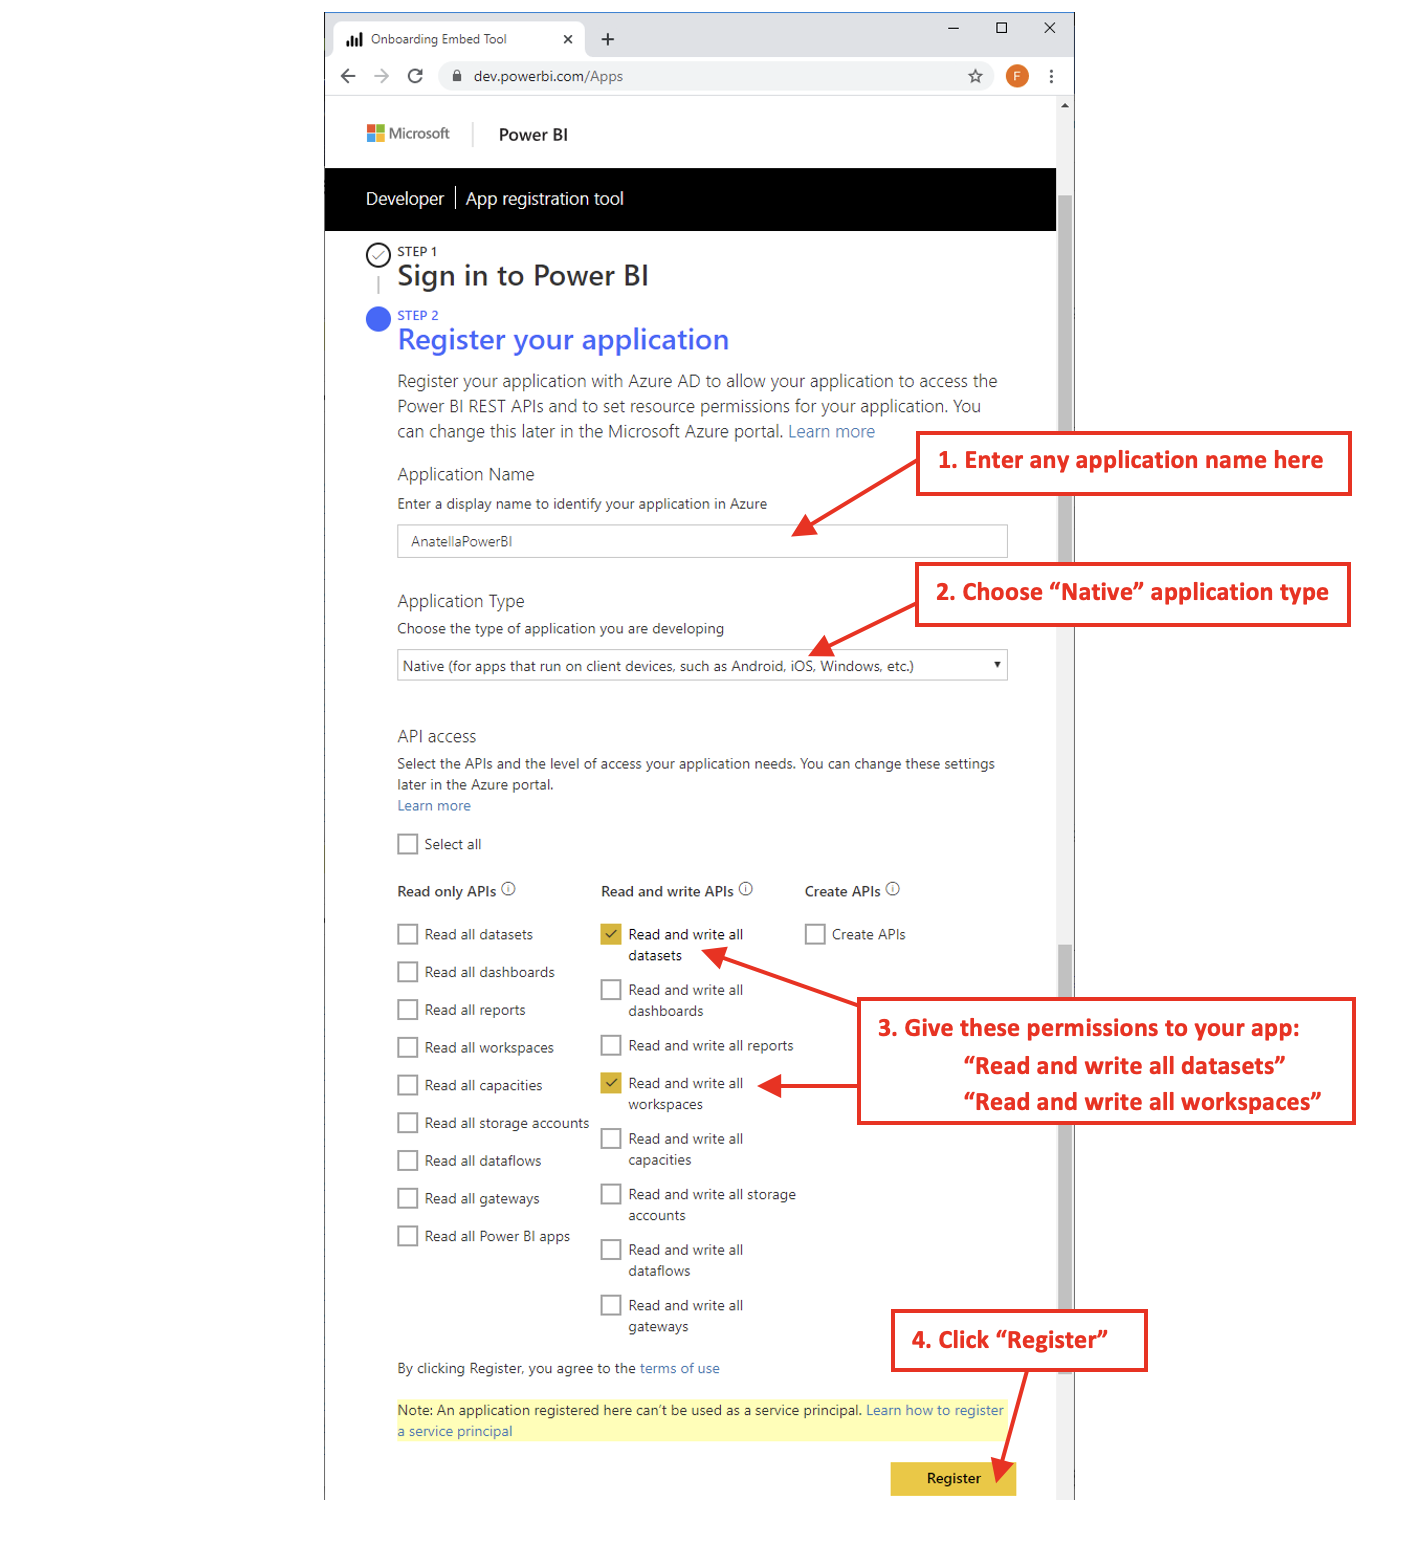
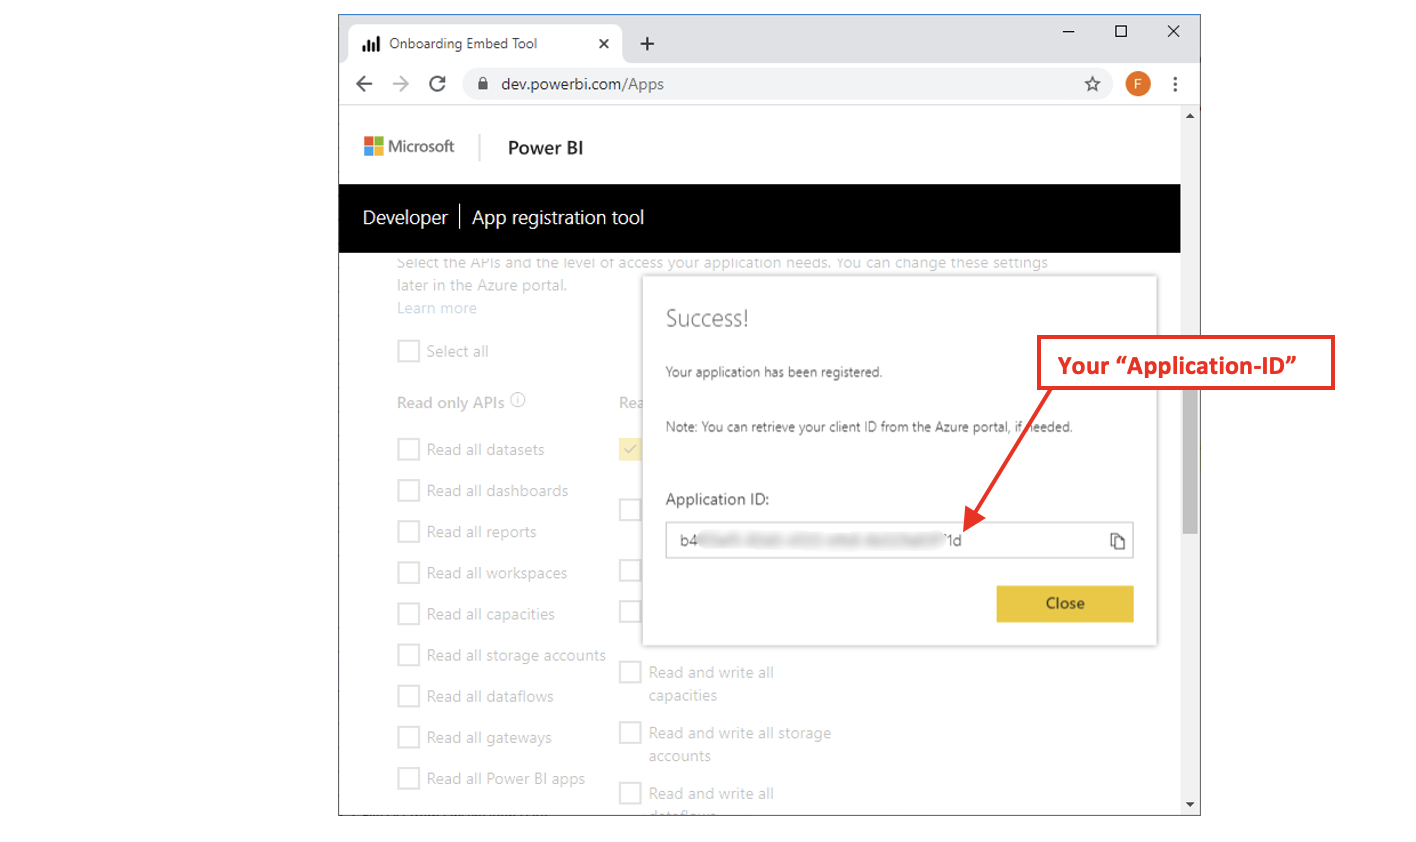
1.3. You receive your “Application-ID”.
Copy/paste your “Application-ID” inside the parameter P6 inside ETL:
- Grant “Admin consent” to your application.
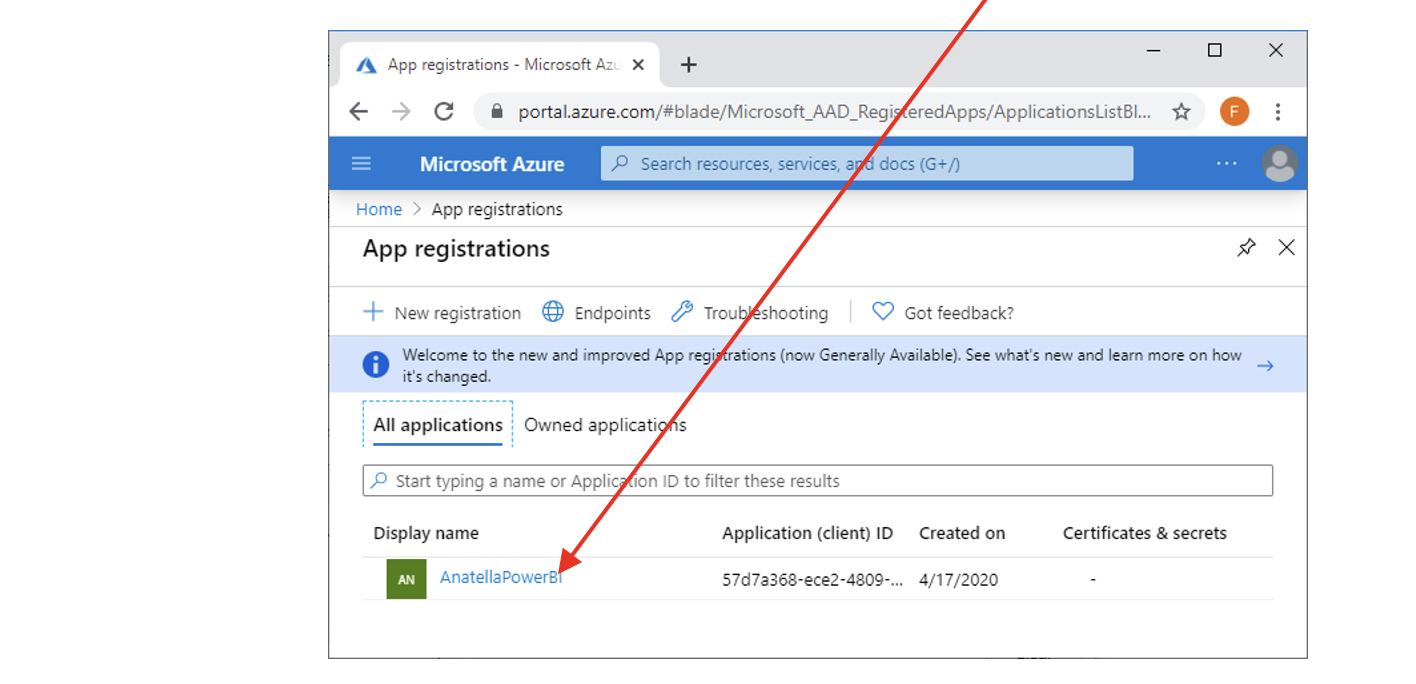
- Open the URL https://portal.azure.com , login and click on the “App Registration” icon:

- Click on your new application inside the list of applications here:
- Click on “API Permissions” in the left menu:

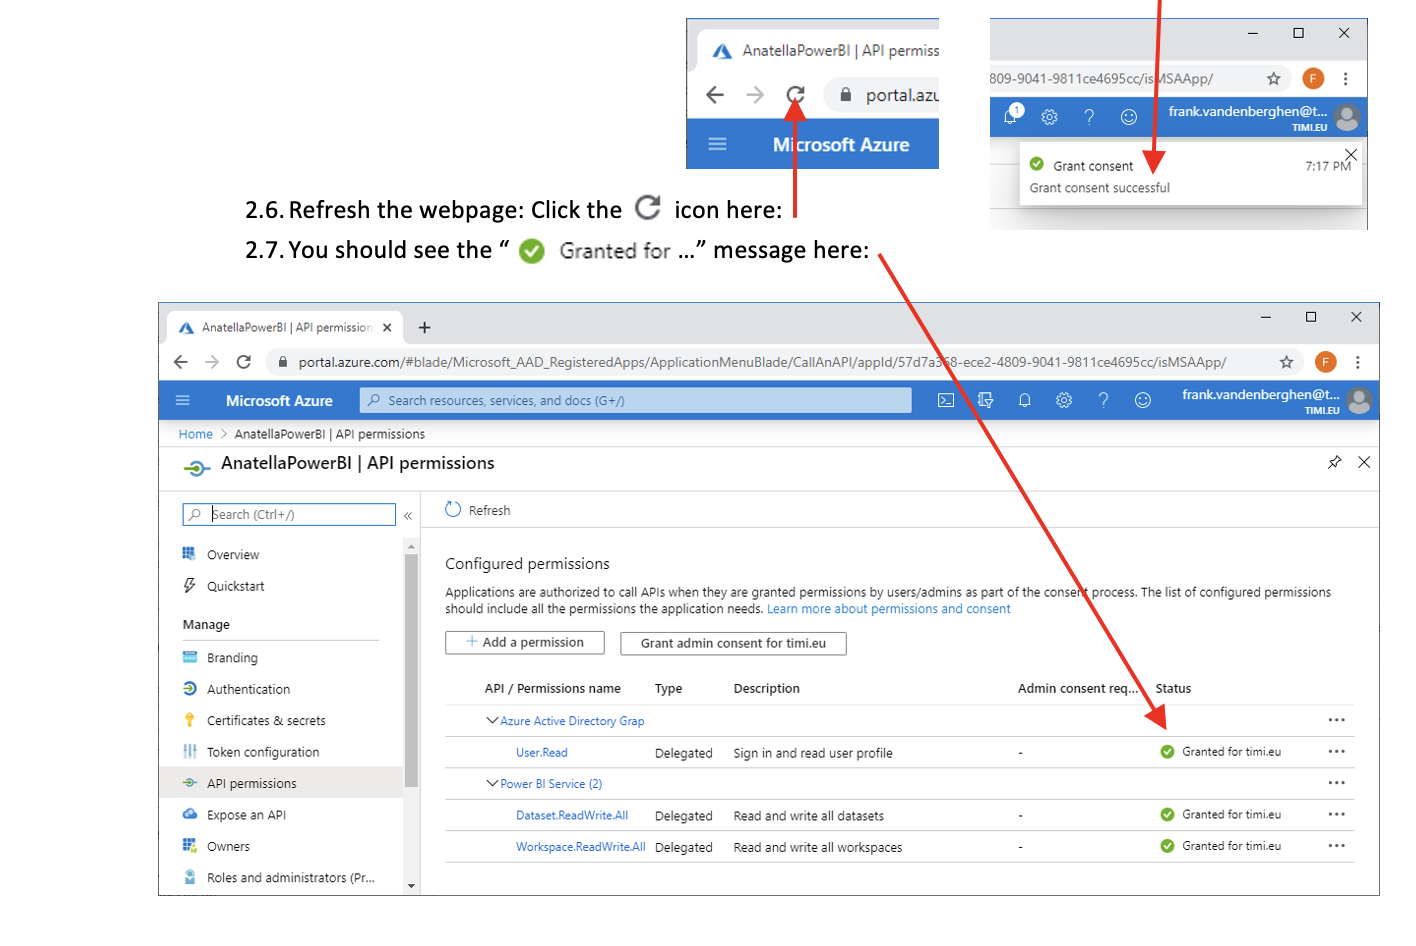
- Click on the “Grant admin consent for …” button:

- You should see “Grant consent succesful” in the top left corner of your browser: